Advanced Copy
approvedby leschuster
Copy Markdown and transform it into HTML, Anki, or any custom format. Create custom profiles with versatile templates tailored to your workflow.
Obsidian Advanced Copy


An Obsidian plugin to copy Markdown and transform it into HTML, Anki, or any custom format. Create custom profiles with versatile templates tailored to your workflow.
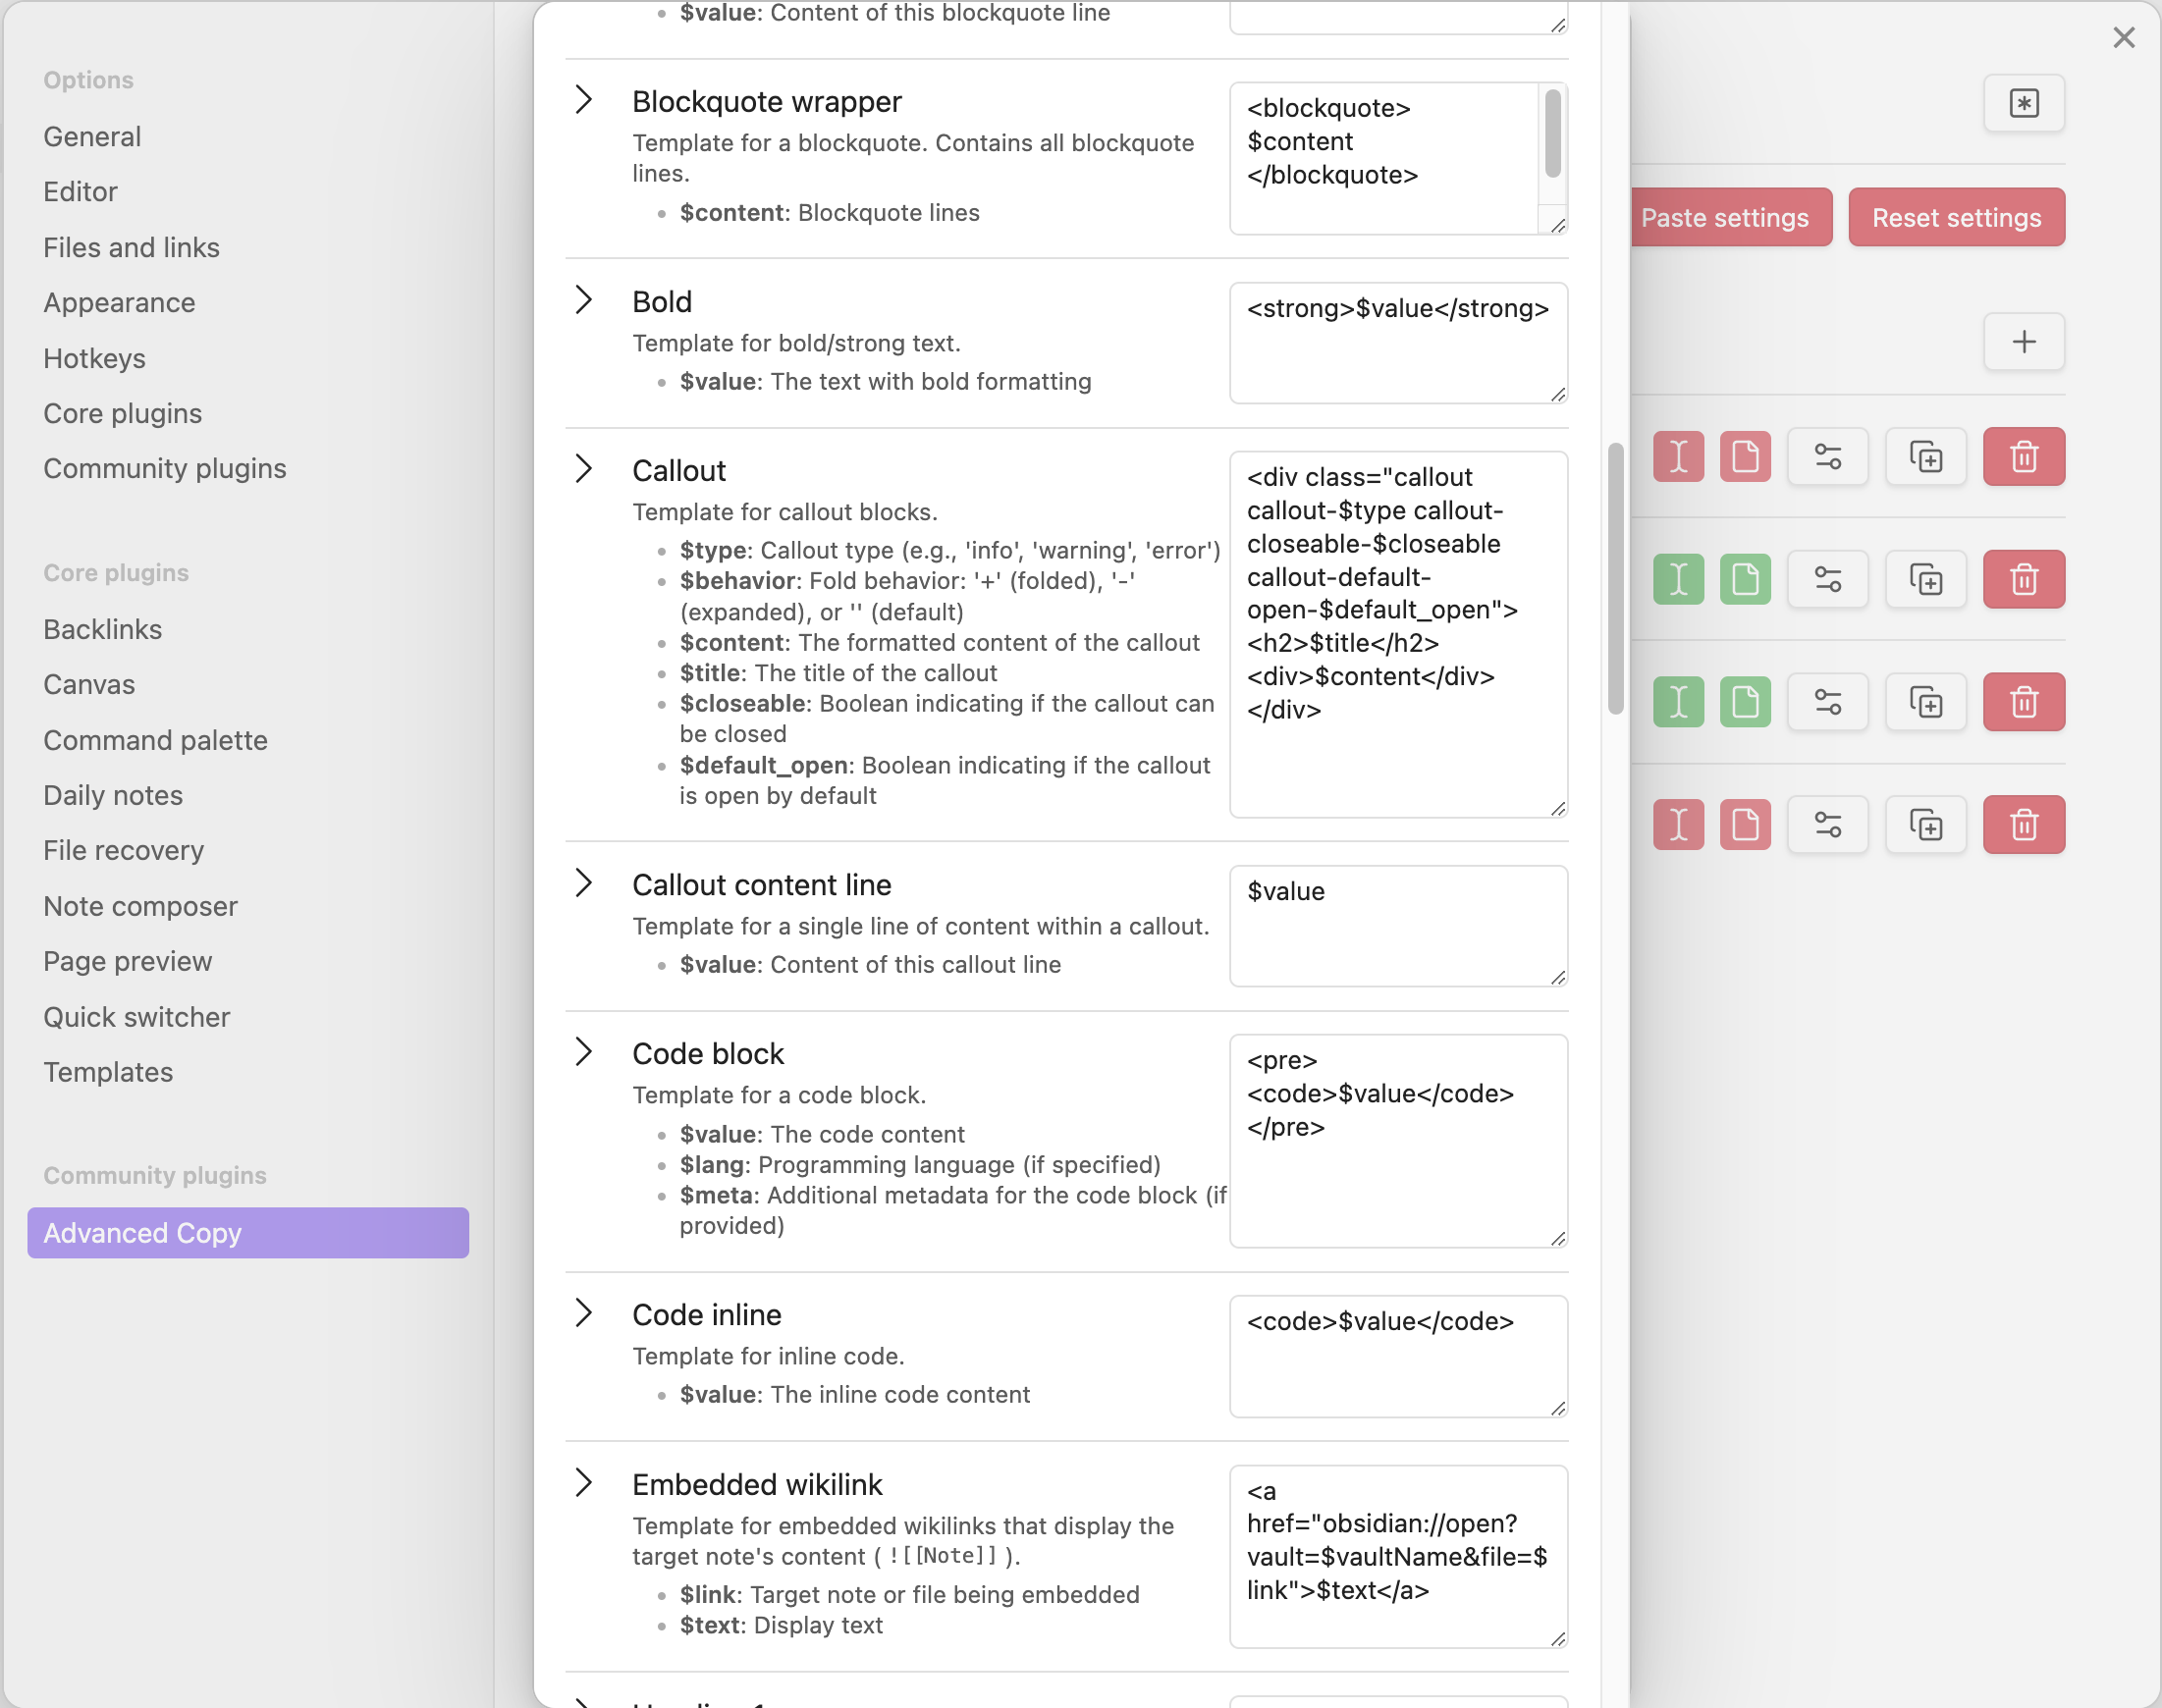
You can create templates for almost all Markdown elements supported by Obsidian, organized under a "Profile". Templates can include variables such as the heading level, element content, current filename, and date.
When running the plugin's commands, you need to select a profile. Default profiles are available and can be customized to your preferences.
💡 Example Use Cases
- Copy notes as HTML with functioning links
- Export selected Markdown as Anki-compatible HTML
- Copy content along with a source reference to the original note
- Quickly share text snippets by pasting them into platforms like Slack
🎬 Demo
https://github.com/user-attachments/assets/af4e9f83-d324-42f4-95fc-bda558bcee2c
🚀 Quickstart
You can download this plugin in the Obsidian Community plugins tab.
Here is how to do it manually:
- From the latest release, download
main.js,manifest.jsonandstyles.css. - Open your vaults plugin directory:
<vault>/.obsidian/plugins/ - Create a new directory called
advanced-copyand place the downloaded files there. - Restart Obsidian or reload the community plugins list.
- Enable
Advanced Copyin the community plugins list.
▶️ Usage
This plugin adds the commands Advanced Copy: Copy Page and Advanced Copy: Copy Selection. You need to choose which profile to use. After that, the plugin will copy the Markdown text, perform transformations according to the profile and place the result in the clipboard.
To speed things up, you can add separate commands for each profile. You may also add hotkeys for these commands in Obsidians Hotkeys-Tab. Beware that you might need to restart Obsidian for the changes to take effect.
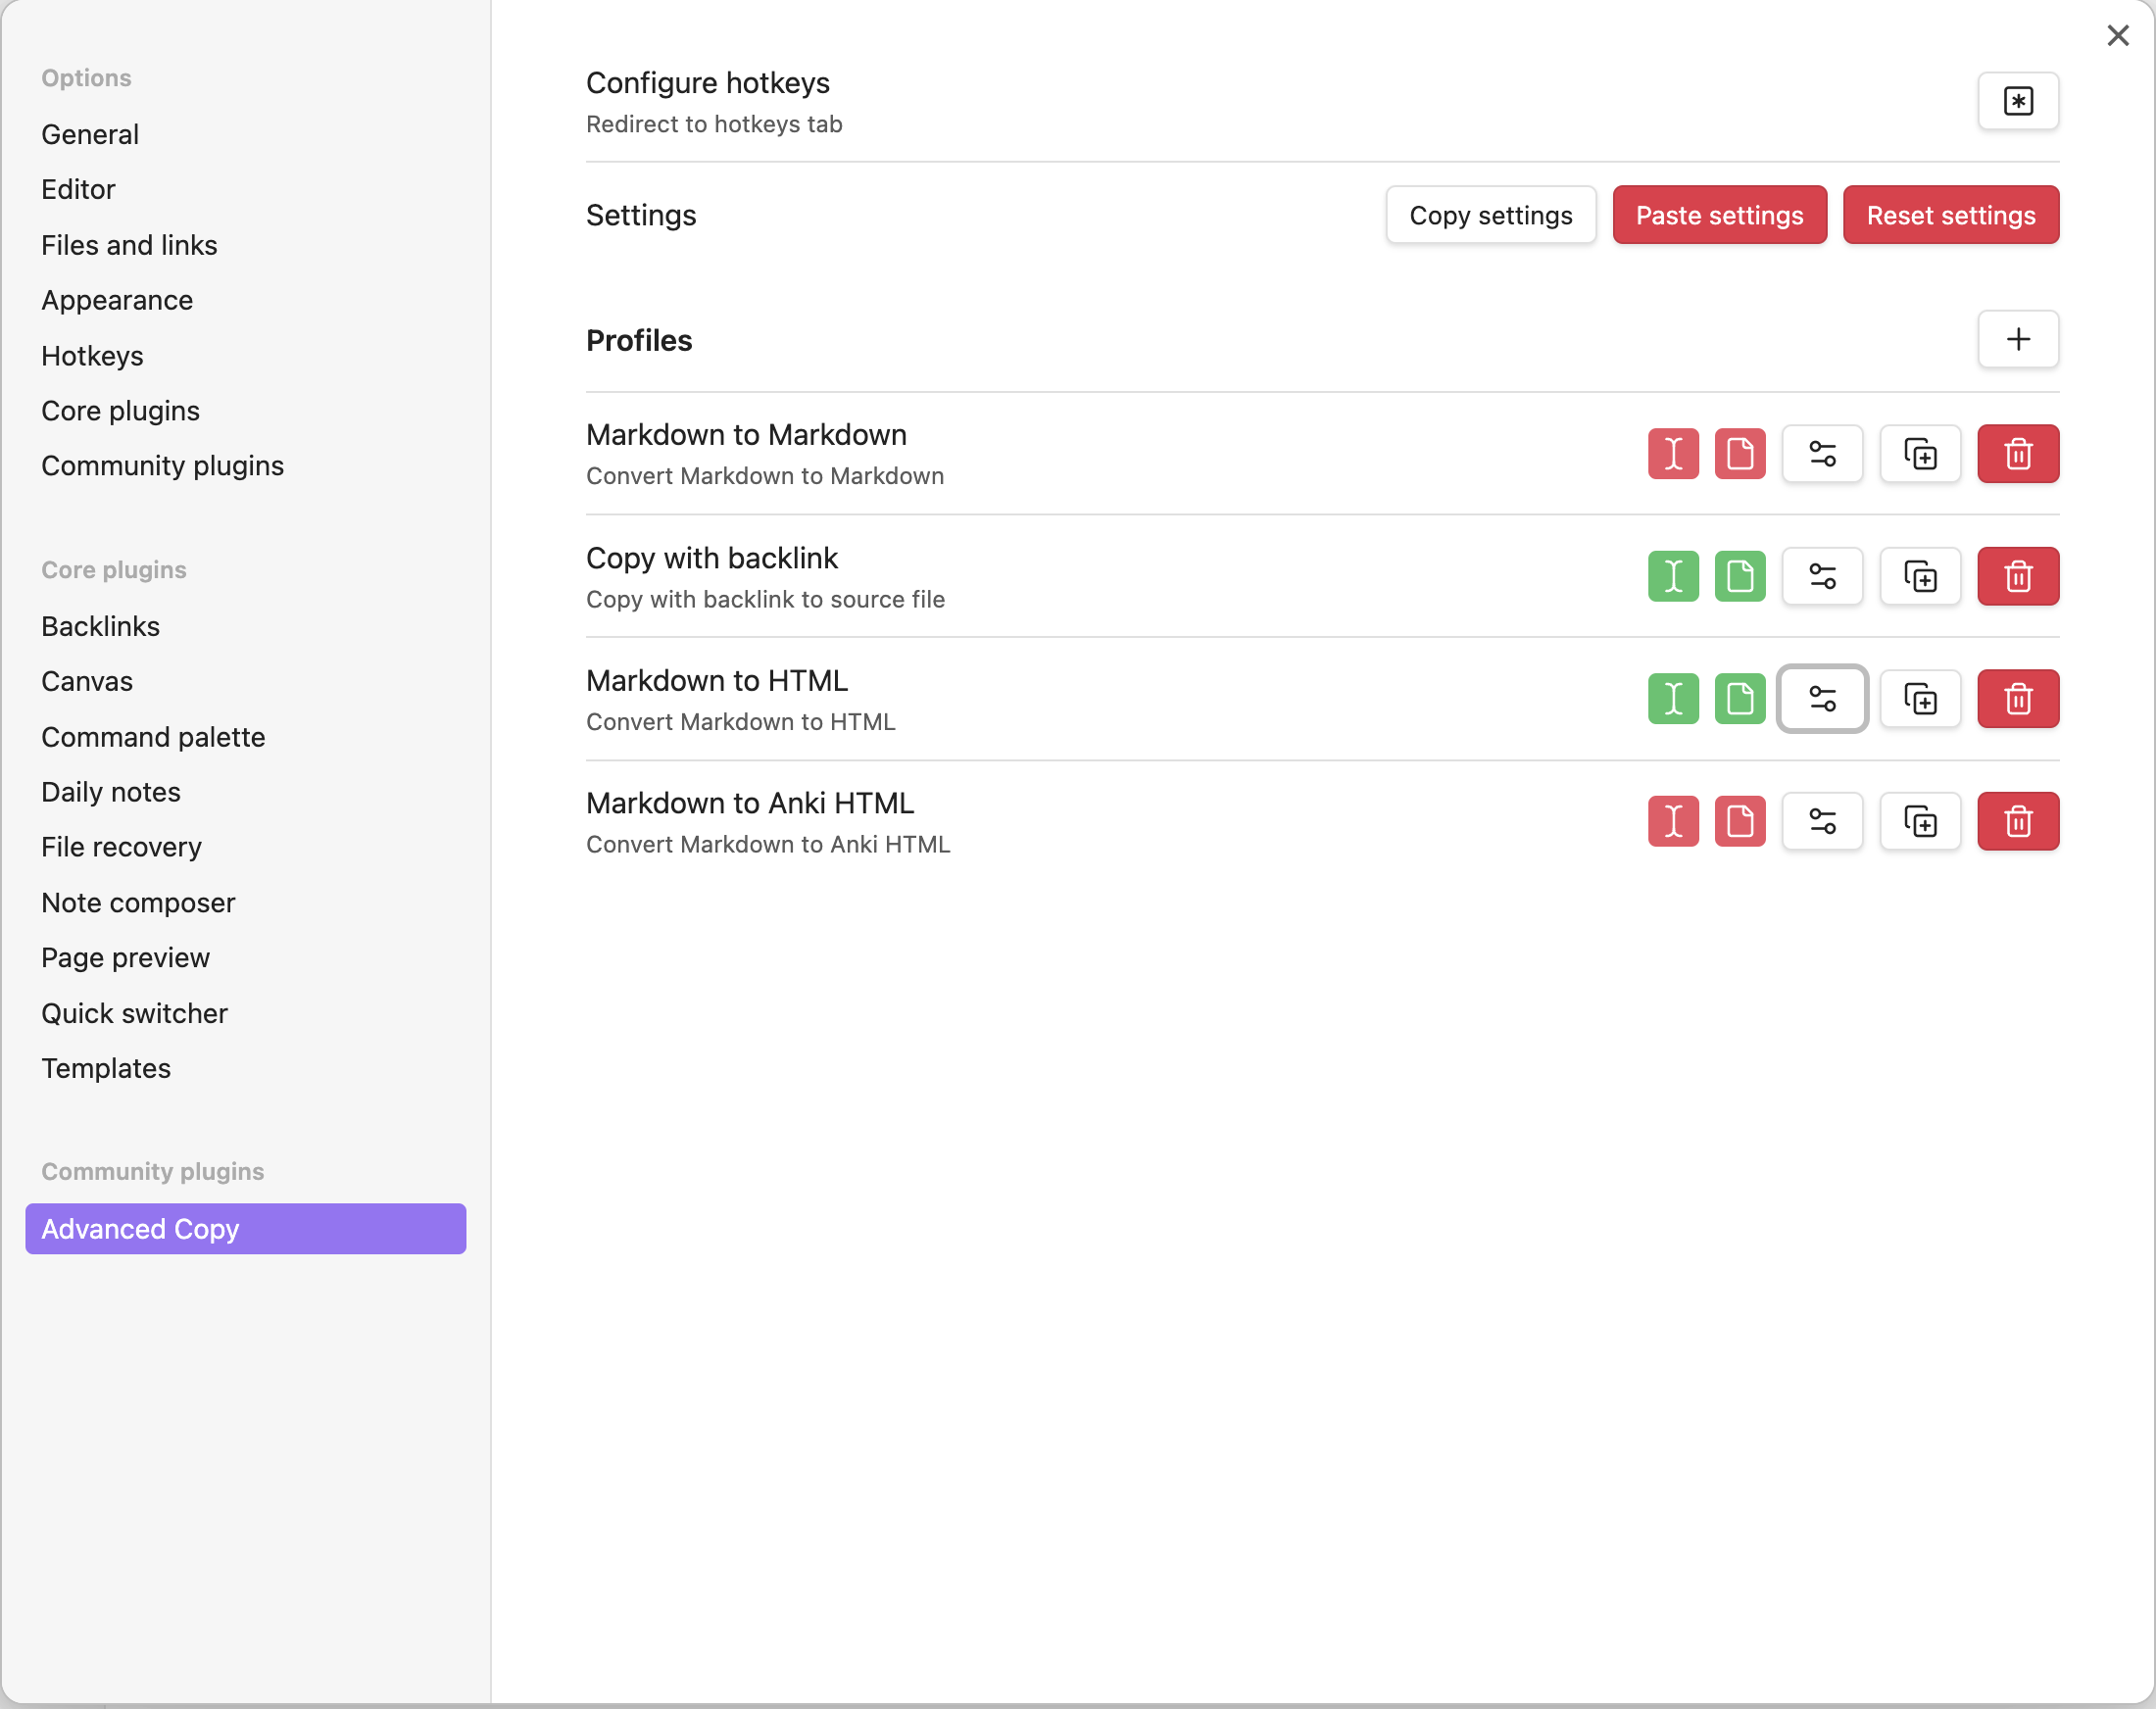
⚙️ Configuration
In the plugins setting tab, you can configure pre-existing profiles, delete or duplicate them. You can also enable/disable commands for specifc profiles (you need to restart Obsidian after that).
Global variables are listed at the beginning of the Templates section in the Edit dialog. Local variables are listed in the description of the template.
🤝 Contributing
Please create a dedicated Dev vault in Obsidian. Do not use your main vault!
- Go to your vaults plugin folder:
<vault>/.obsidian/plugins/ - Clone this repository:
git clone https://github.com/leschuster/obsidian-advanced-copy.git - Rename the downloaded directory to
advanced-copyand open it in your editor. - Install dependencies:
npm i - Run the project:
npm run dev - Make your changes
- Run tests:
npm run testornpm run test:watch
If you'd like to contribute, please fork the repository and open a pull request to the main branch.
Note: After you've made code changes, you need to either restart Obsidian or disable & enable the plugin. Alternatively, you can use the Obsidian Hot-Reload Plugin.
🚢 How to Release
- Update the version in the following files:
manifest.jsonversion-bump.mjspackage.json
- Run
npm ito update the version inpackage-lock.json. - Commit your changes.
- Tag the commit with the new release version:
git tag -s 0.x.y -m "Release 0.x.y" - Push the changes and open Pull Request.
🙏 Acknowledgements
The core functionality of this project, converting Markdown to a custom format, relies heavily on the incredible work done by the unified and remark projects. I am deeply grateful for their contributions.
For plugin developers
Search results and similarity scores are powered by semantic analysis of your plugin's README. If your plugin isn't appearing for searches you'd expect, try updating your README to clearly describe your plugin's purpose, features, and use cases.