Article Navigator
approvedby IvanHanloth
Adds Previous / Next / SeeAlso navigation to notes via frontmatter properties. Supports floating buttons or VitePress-style inline navigation. - This plugin has not been manually reviewed by Obsidian staff.
Article Navigator
Adds Previous / Next / See Also navigation to your notes through standard frontmatter properties. Supports a VitePress-style inline nav bar, floating side buttons, and automatic reverse linking — all without any external dependencies.
Features
| Feature | Description |
|---|---|
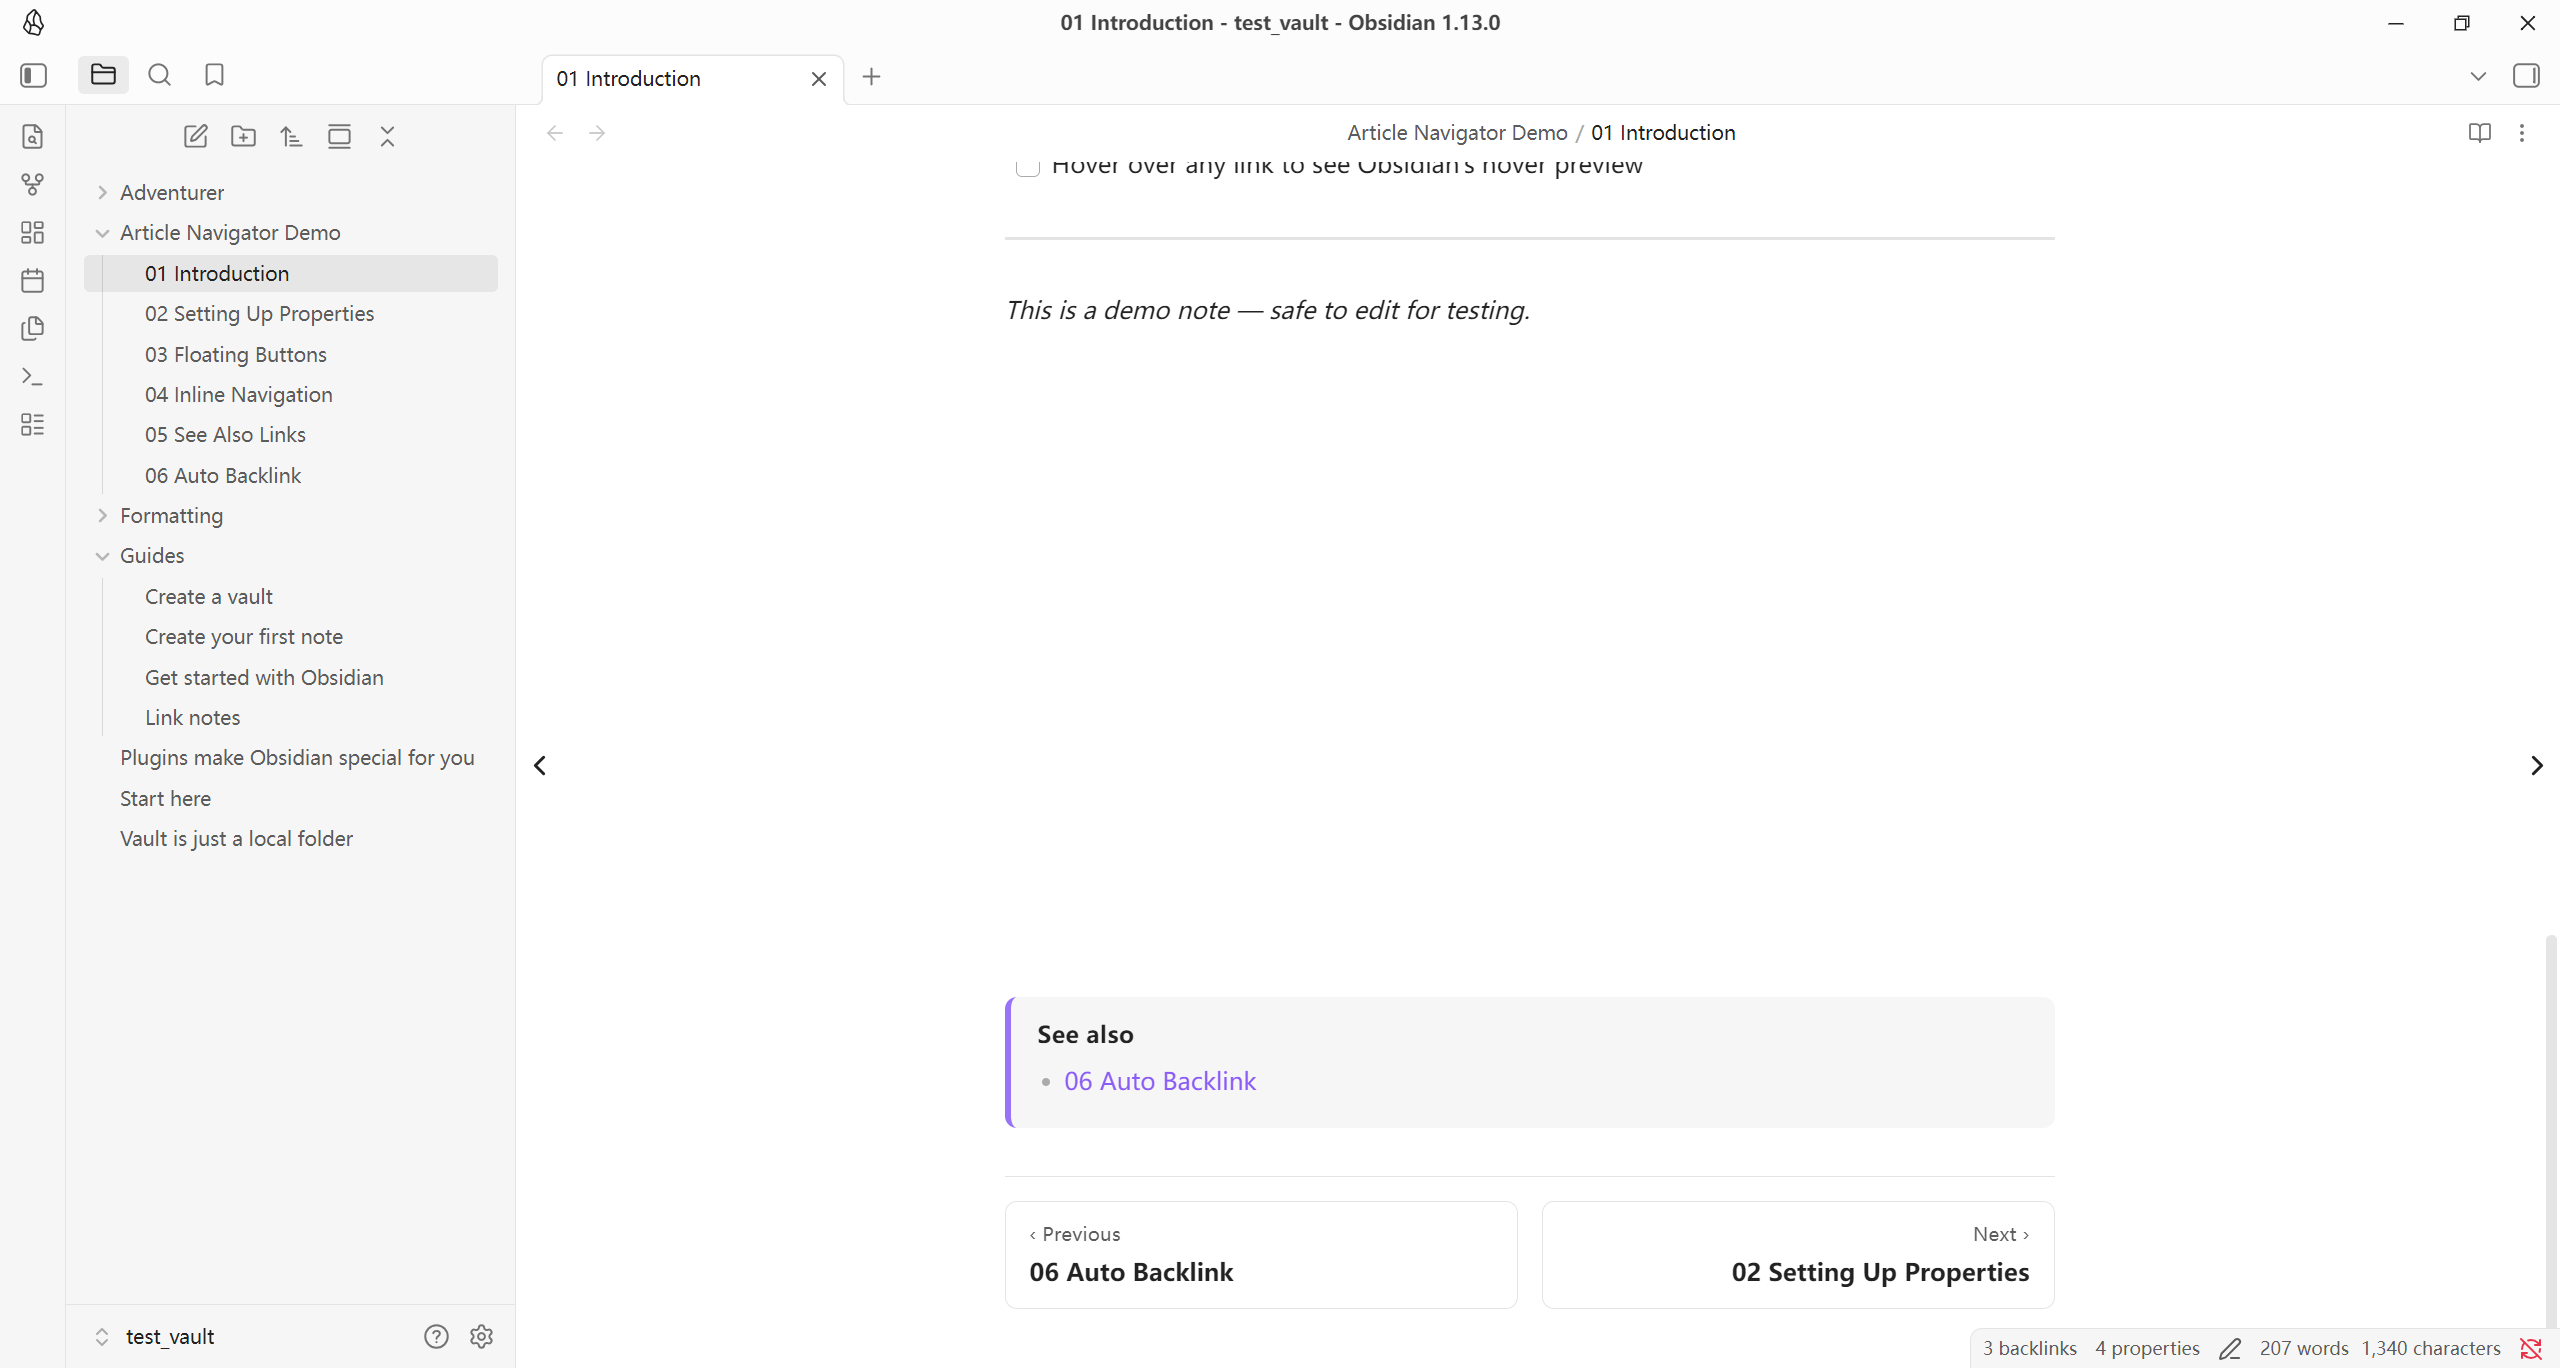
| Inline navigation | Previous / Next cards rendered at the bottom of each note (Reading & Source view) |
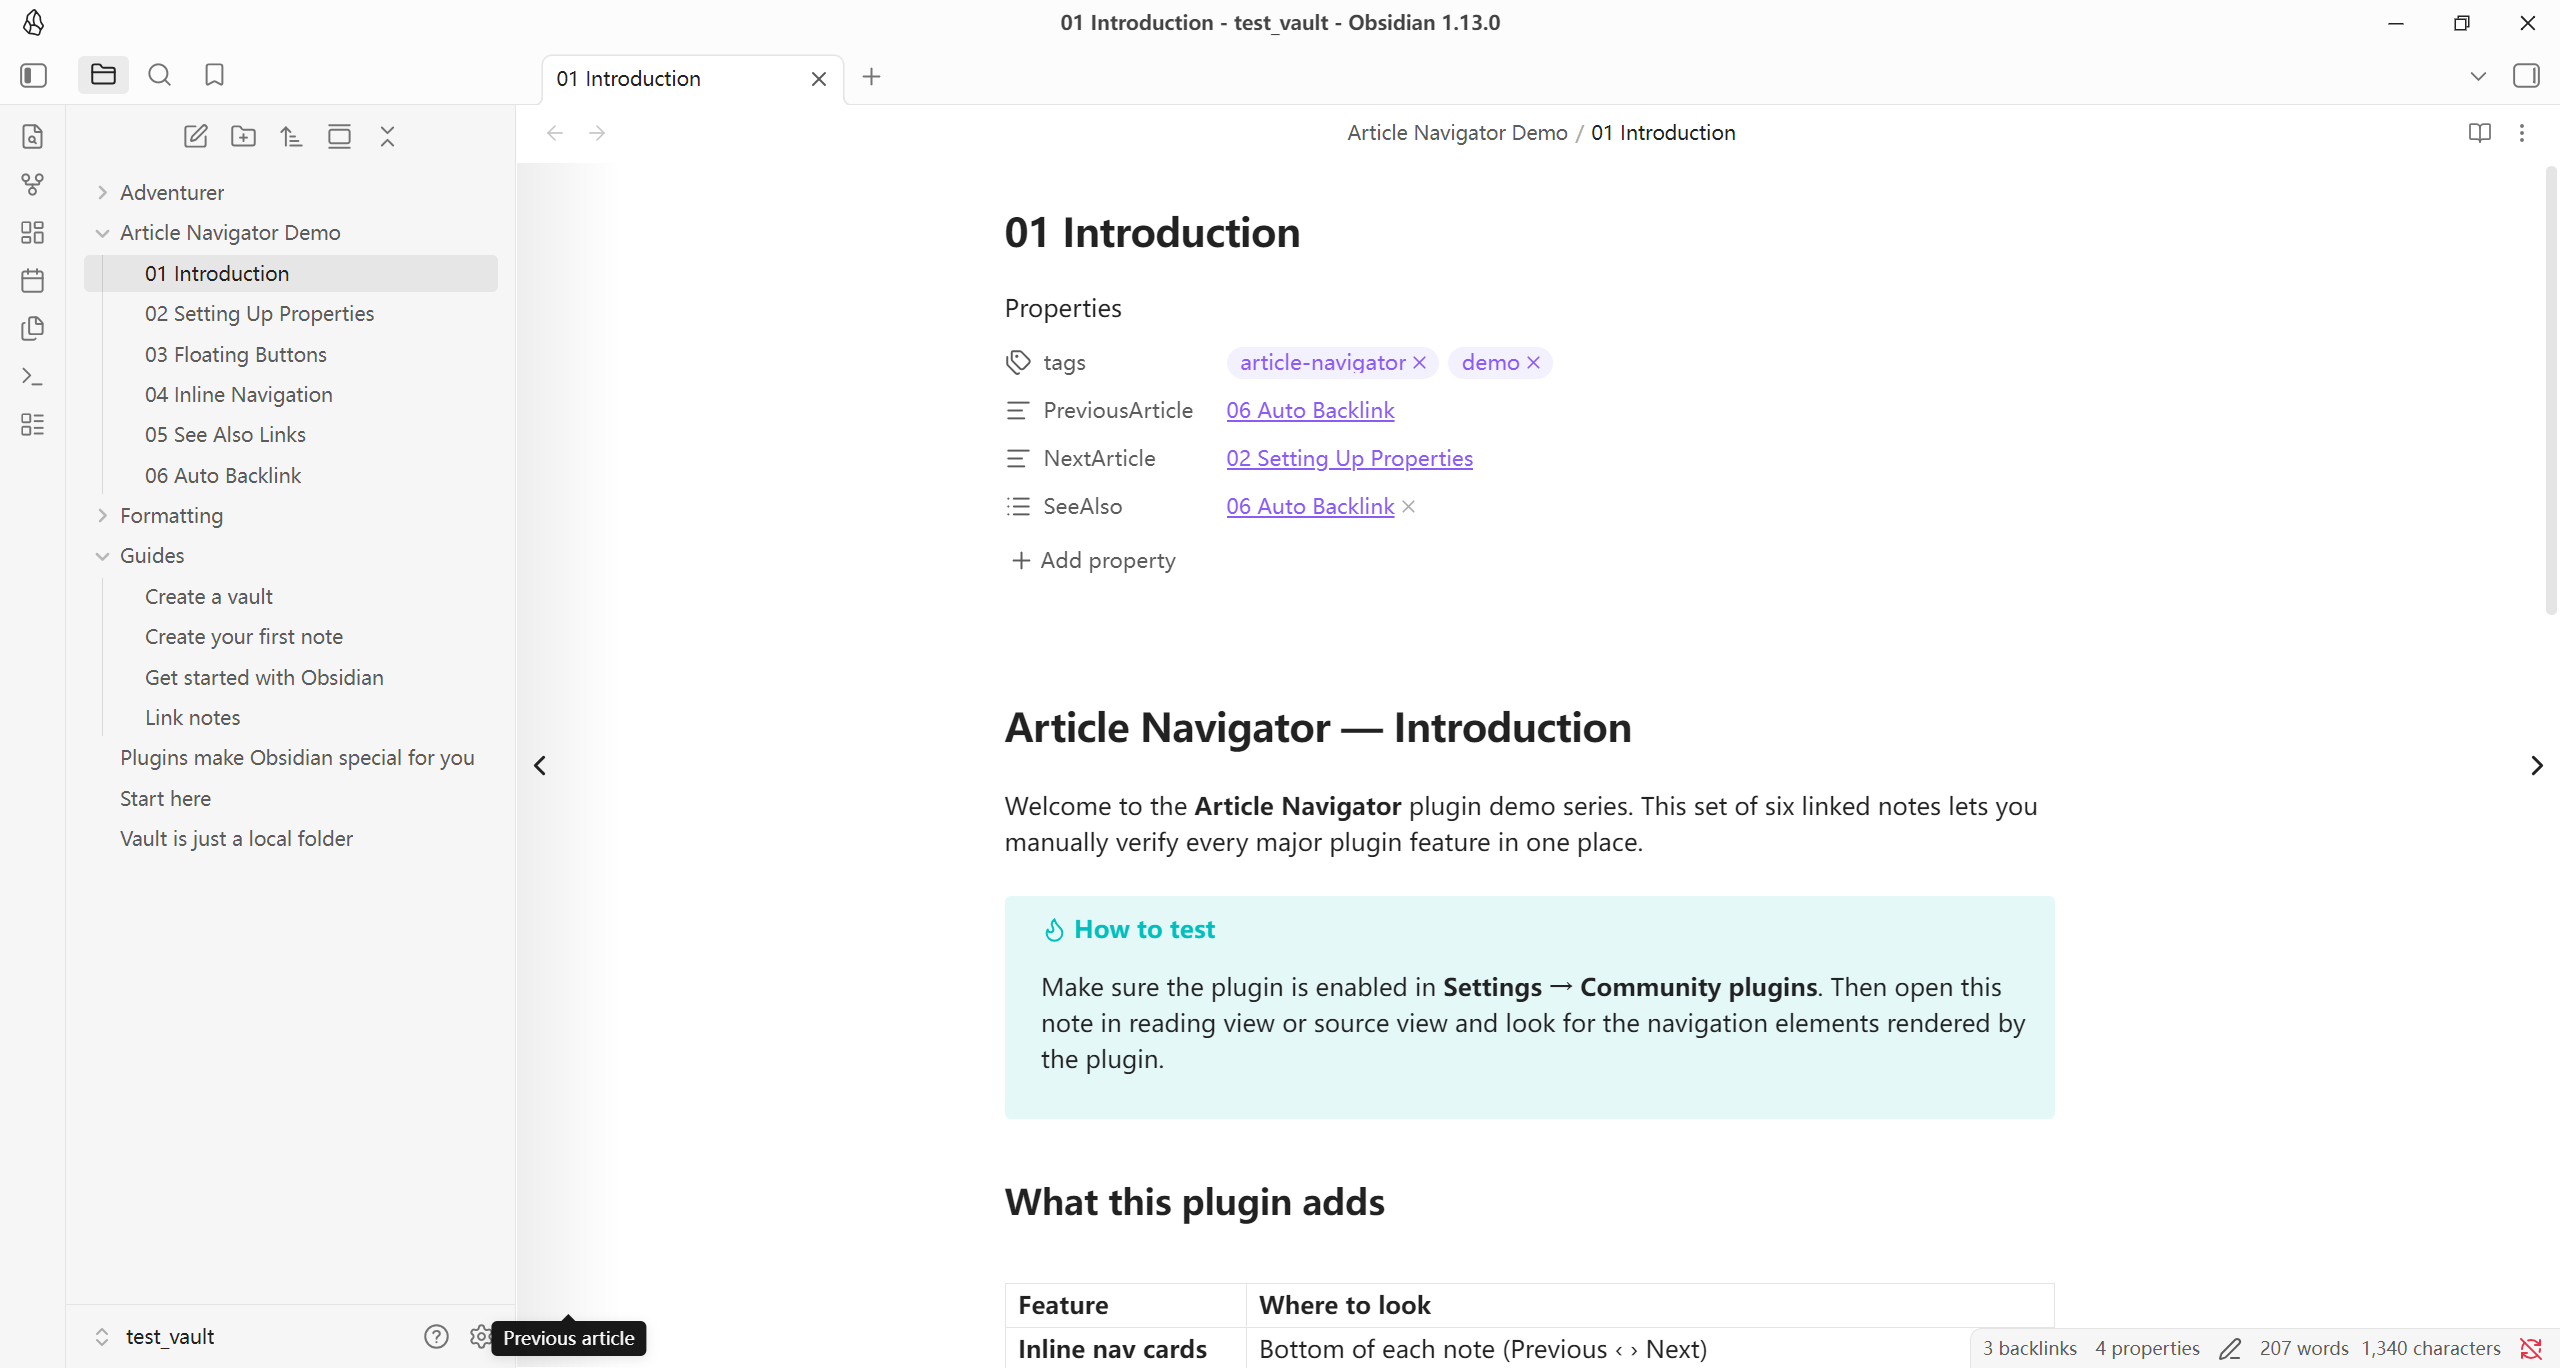
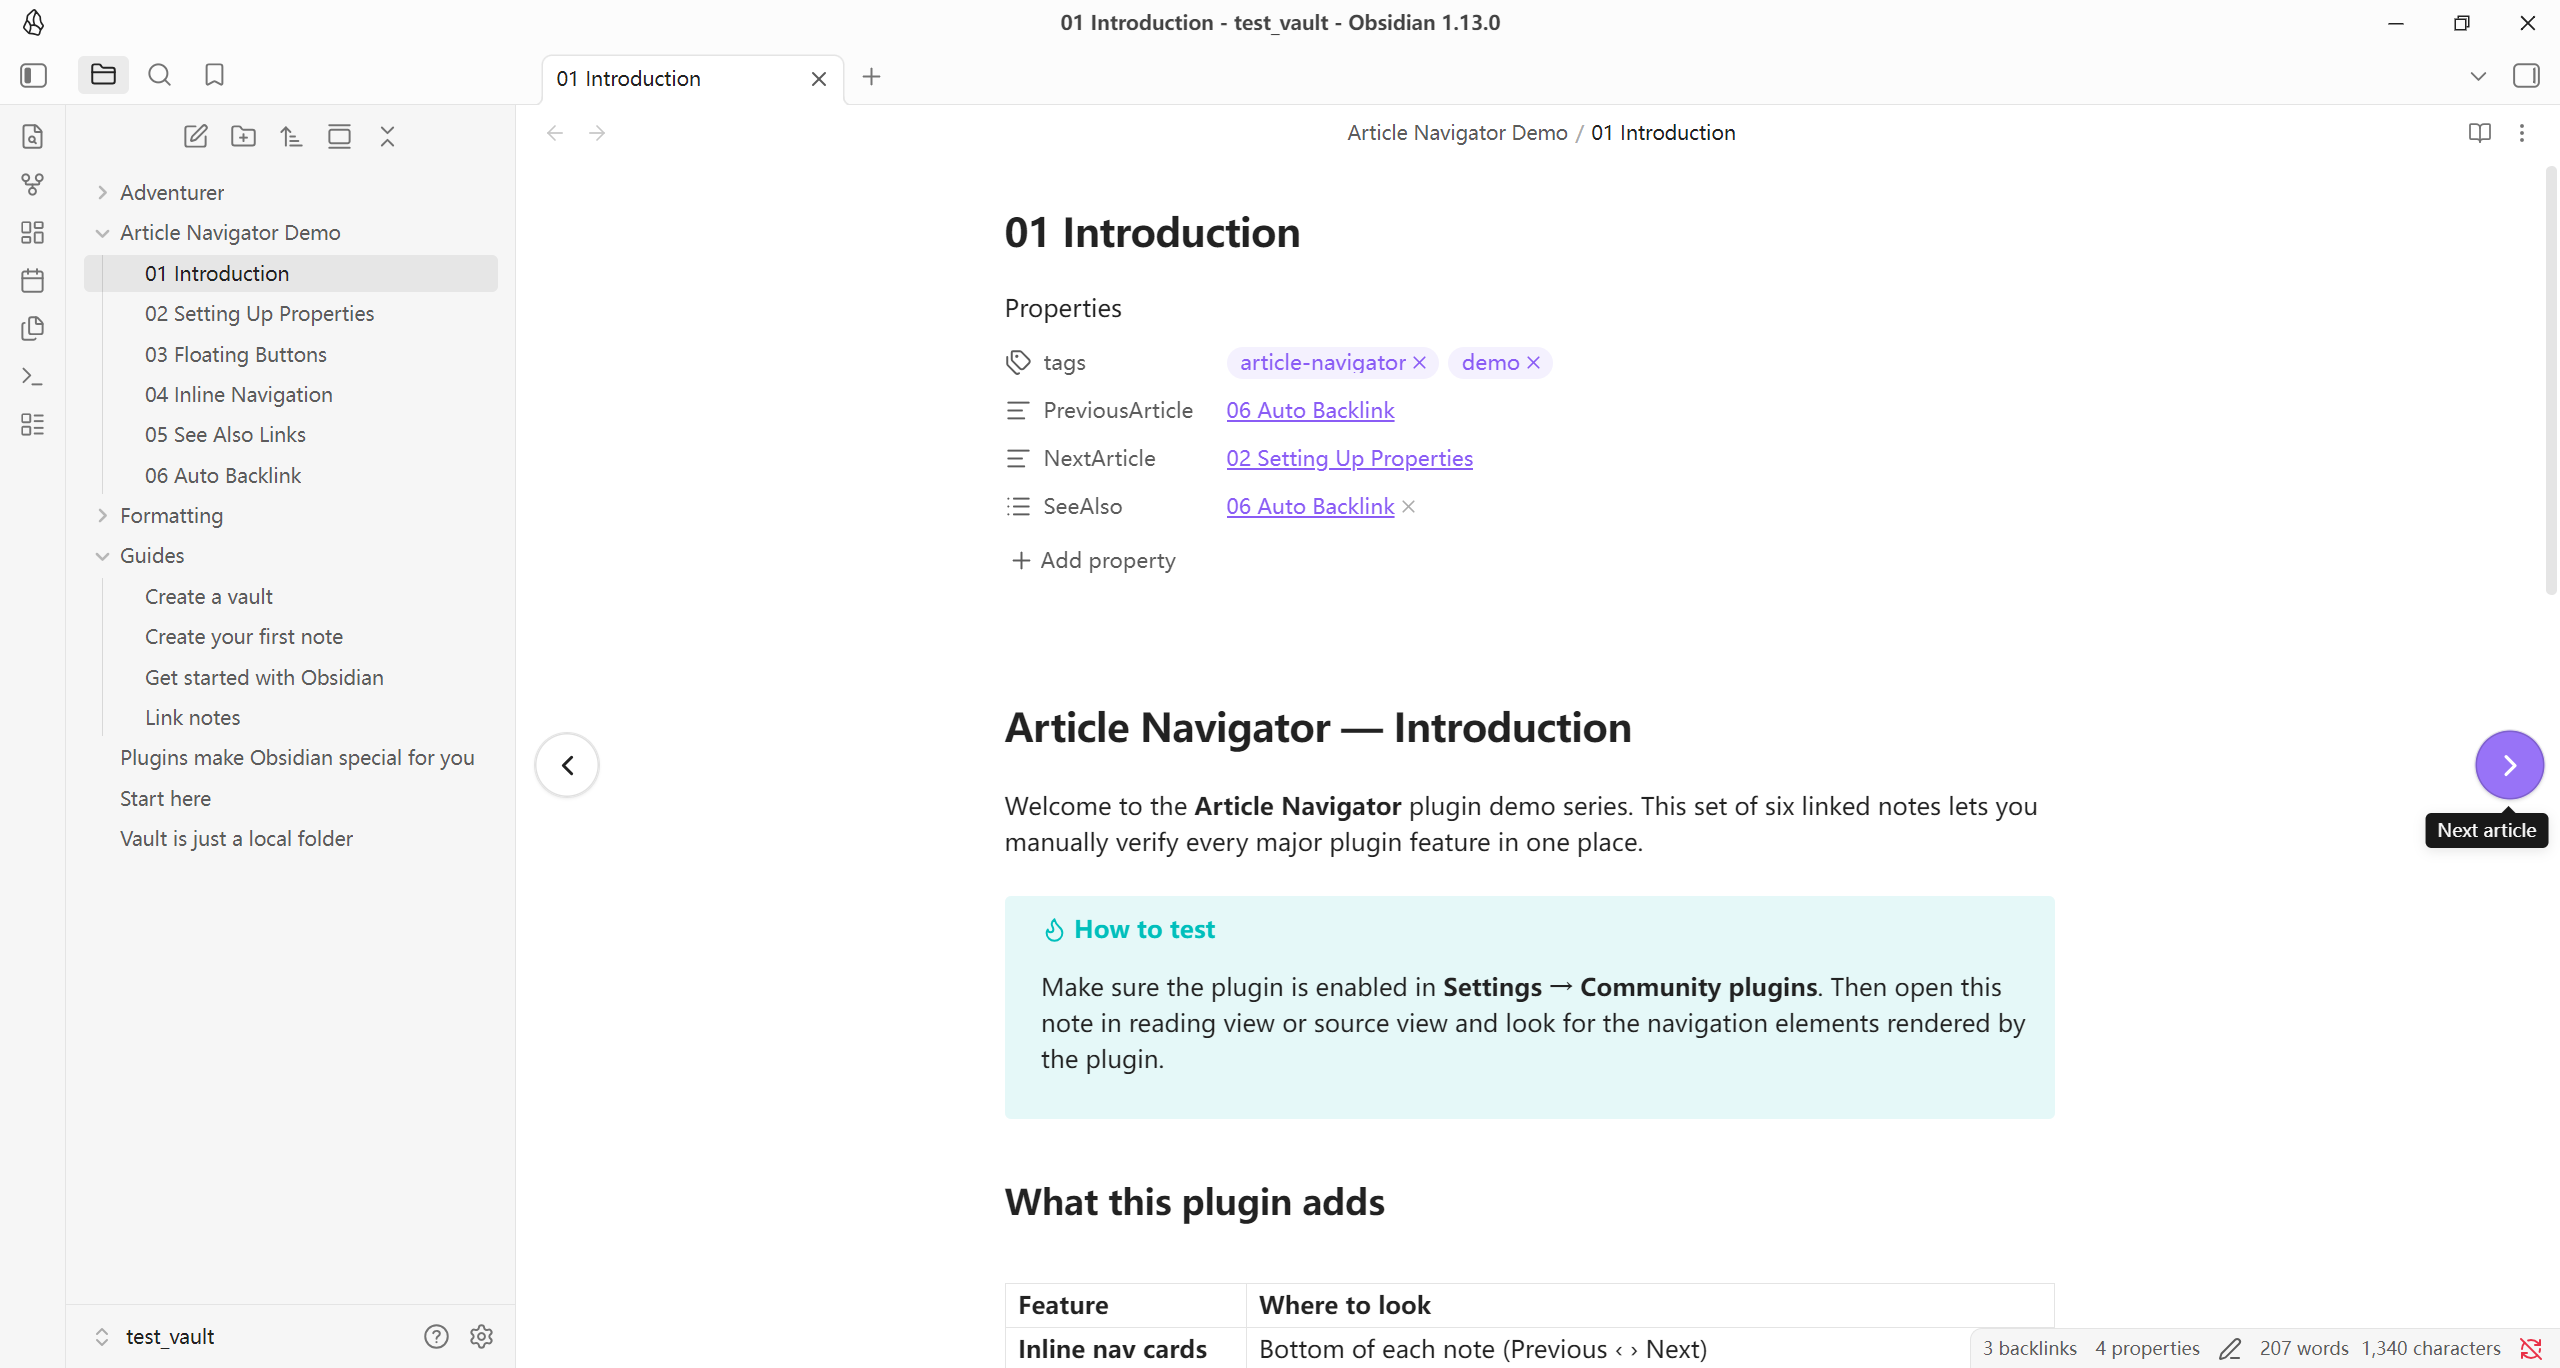
| Floating side buttons | Circular or full-height strip buttons inside the document area |
| See Also list | Related-link list rendered at the top or bottom of a note — vault notes and external URLs |
| Auto backlink | When you set Prev/Next, the plugin keeps the reciprocal link on the target note in sync |
| New-note seeding | Newly created empty notes get the three navigation properties automatically |
| Edge / tap navigation | Optional: double-click page margins or tap half the screen on mobile to navigate |
| i18n | UI language follows Obsidian's language setting automatically |
Demo
Installation
Make sure you have turned off Restricted mode in Settings → Community plugins to allow using plugins.
Via Obsidian URI
- click this link: obsidian://show-plugin?id=article-navigator to open the plugin page in Obsidian's Community plugin browser.
- Click Install, then Enable.
Community plugin browser
- Open Settings → Community plugins → Browse.
- Search for Article Navigator.
- Click Install, then Enable.
Manual installation
- Download
main.js,manifest.json, andstyles.cssfrom the latest release. - Copy the three files to
<vault>/.obsidian/plugins/article-navigator/. - Reload Obsidian and enable the plugin in Settings → Community plugins.
Getting started
1 · Add navigation properties to a note
Open any note and run the command:
Article Navigator: Insert navigation properties into current note
This inserts three empty frontmatter keys if they are not already present:
---
PreviousArticle: ""
NextArticle: ""
SeeAlso: []
---
2 · Link to adjacent notes
Fill in the keys with wikilinks:
PreviousArticle: "[[My Previous Note]]"
NextArticle: "[[My Next Note]]"
SeeAlso:
  - "[[Related Topic A]]"
  - "[[Related Topic B]]"
3 · Navigate
- Click the inline nav cards at the bottom of the note.
- Click the floating side buttons at the document edges.
- Use the commands Go to previous article / Go to next article (assignable to hotkeys).
Settings reference
Display
| Setting | Default | Description |
|---|---|---|
| Add properties to new notes | On | Seed empty new notes with the three navigation keys |
| Inline navigation at bottom | On | Show the VitePress-style Previous / Next bar |
| Floating side buttons | Tall | Style of the floating buttons: Off, Circular, Tall strip |
| See Also position | Bottom | Where to render the See Also block: Top, Bottom, Hidden |
Floating button behaviour
| Setting | Default | Description |
|---|---|---|
| Fade buttons when idle | On | Fade to 12 % opacity after the delay |
| Idle fade delay | 3 s | Seconds of inactivity before fading (1–15) |
Tap navigation
| Setting | Default | Description |
|---|---|---|
| Double-click margins to navigate | Off | Double-click the empty area beside the content |
| Tap half-screen on mobile | Off | Single tap on the left / right half navigates |
Auto reverse linking
| Setting | Default | Description |
|---|---|---|
| Enable auto reverse linking | On | Keep reciprocal Prev/Next links in sync automatically |
| Conflict mode | Prompt | What to do when the target already has a different link: Prompt, Auto-update, Skip |
Property keys
Override the frontmatter key names used by the plugin.
Edits to these three fields are not saved on the fly — the inputs hold a draft until you click one of the two shared buttons at the bottom of the section. Both buttons are always visible but only become clickable once at least one key actually differs from the saved value.
| Button | What it does |
|---|---|
| Save | Persist the new key names. Existing notes keep their old keys; the plugin will simply look for the new keys from now on. |
| Save & rename existing notes | Persist the new key names and rewrite every note in the vault so the old keys are migrated to the new ones. |
The rename pass is safe to use when you reshuffle multiple keys at once (for example swapping A → B and B → A). Internally each affected file is processed in two phases: every source key is first moved to a unique temporary placeholder, then the placeholder is moved onto the final destination. This avoids any intermediate collision. If a target key is already present on a note from an unrelated source, the rename for that particular key on that note is skipped so unrelated data is never clobbered — the final notice tells you how many keys were skipped, if any.
Renaming uses Obsidian's processFrontMatter API, which means the YAML is normalised the same way Obsidian itself writes properties; cached navigation snapshots are also reset afterwards so the auto-backlink controller doesn't mistake the rename for a real user edit.
| Setting | Default |
|---|---|
| Previous article key | PreviousArticle |
| Next article key | NextArticle |
| See Also key | SeeAlso |
Display labels
Leave blank to use the default label for Obsidian's current language.
| Setting | Default (English) | Default (Chinese) |
|---|---|---|
| Previous label | Previous | 上一篇 |
| Next label | Next | 下一篇 |
| See Also label | See also | 相关阅读 |
Commands
| Command | Description |
|---|---|
| Go to previous article | Navigate to the note in PreviousArticle |
| Go to next article | Navigate to the note in NextArticle |
| Insert navigation properties | Add empty Prev / Next / SeeAlso keys to the active note |
All three commands can be assigned to custom hotkeys in Settings → Hotkeys.
Development
Requirements
- Node.js ≥ 18 (LTS recommended)
- npm
Setup
git clone https://github.com/IvanHanloth/obsidian-article-navigator
cd obsidian-article-navigator
npm install
Scripts
| Command | Description |
|---|---|
npm run dev | Watch mode — rebuilds main.js on every change |
npm run build | Type-check + production bundle |
npm run deploy | Build and copy artifacts into test_vault |
npm run deploy -- /path/to/vault | Build and deploy to a custom vault |
npm run lint | ESLint (includes Obsidian-specific rules) |
npm run version | Bump version in manifest.json and versions.json |
Tip: You can also set the target vault via an environment variable:
VAULT_PATH=/path/to/my-vault npm run deploy
Project layout
src/
├── main.ts                 Plugin lifecycle — event wiring, onload / onunload
├── types.ts                Shared TypeScript types
├── constants.ts            CSS class names, timer durations
├── settings.ts             Settings interface, defaults, migration
├── settings-tab.ts         Settings UI
├── commands.ts             Command registration
├── i18n/
│   ├── index.ts            I18n class, locale detection
│   └── locales/
│       ├── en.ts           English
│       └── zh.ts           Chinese
├── nav/
│   ├── link-resolver.ts    Frontmatter link parsing and resolution
│   ├── frontmatter.ts      Frontmatter read / write helpers
│   └── auto-backlink.ts    Reciprocal link automation
└── ui/
    ├── view-manager.ts     Per-view refresh orchestration
    ├── floating-buttons.ts Floating prev / next buttons
    ├── inline-injections.ts Inline nav bar + See Also block
    ├── edge-handlers.ts    Edge / mobile tap handlers
    └── confirm-modal.ts    Confirmation dialog
Adding a locale
- Create
src/i18n/locales/<code>.tsimplementing theTranslationinterface fromsrc/i18n/index.ts. - Import and register it in the
BUNDLESmap insrc/i18n/index.ts. - Add the locale code to the
LocaleCodeunion type.
Releasing
- Update
minAppVersioninmanifest.jsonif needed (see the Obsidian version reference). - Run
npm version patch|minor|major— this bumpsmanifest.json,package.json, andversions.json. - Push the tag and create a GitHub release with
main.js,manifest.json, andstyles.cssas release assets.
Compatibility
- Minimum Obsidian version: 1.4.0
- Mobile: ✓ fully supported (
isDesktopOnly: false) - No external network requests, no telemetry.
License
MIT License
For plugin developers
Search results and similarity scores are powered by semantic analysis of your plugin's README. If your plugin isn't appearing for searches you'd expect, try updating your README to clearly describe your plugin's purpose, features, and use cases.