Toggl Import
approvedby theaspect
This plugin has not been manually reviewed by Obsidian staff. Import Toggl Track time entries into daily notes with a single command.
Toggl Import
Import Toggl Track time entries into your Obsidian daily notes with a single command.
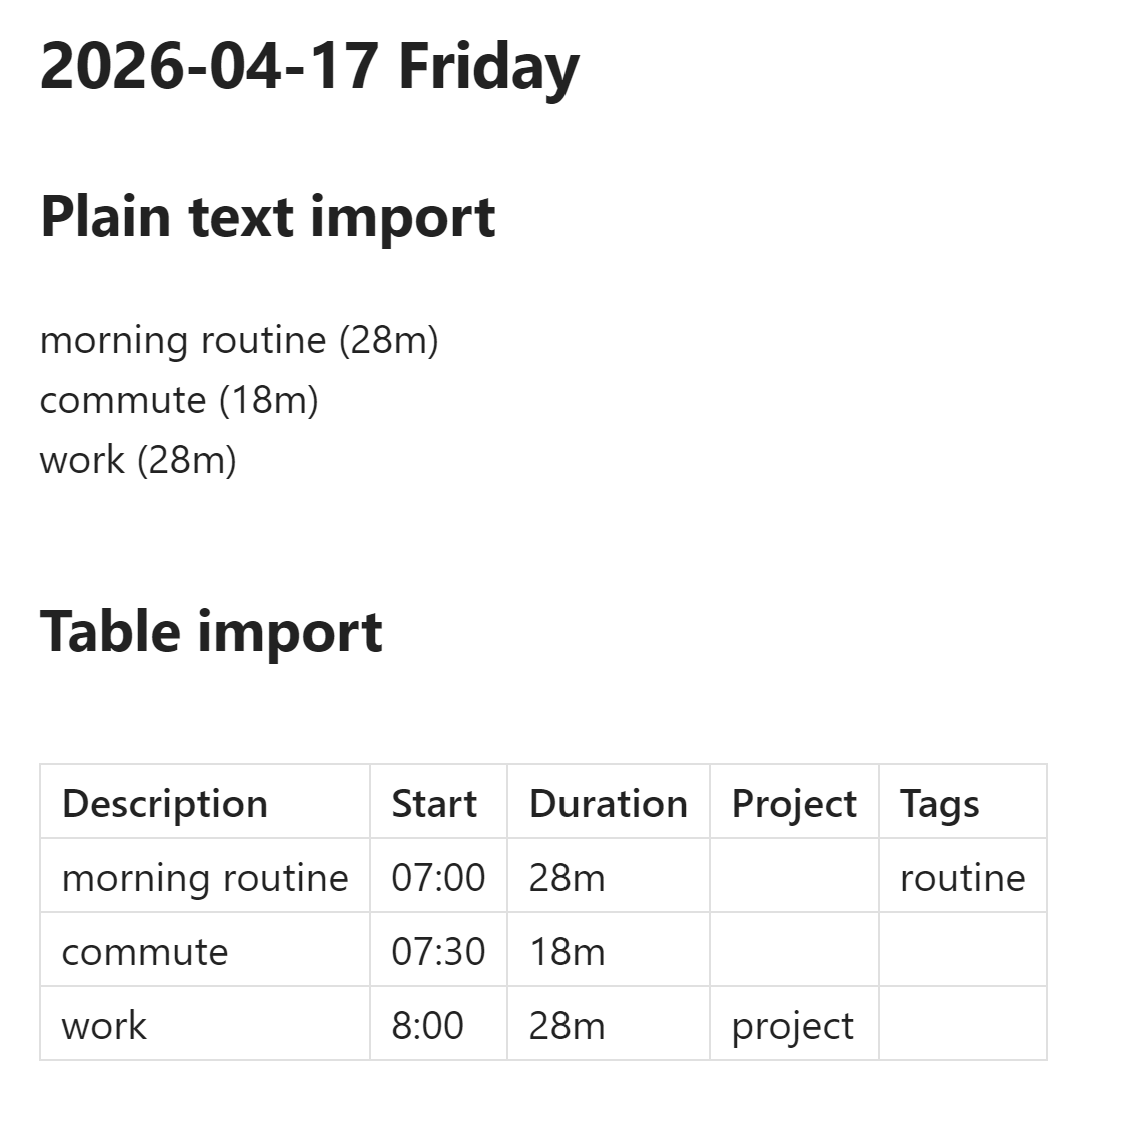
The active note's filename (yyyy-mm-dd) determines the date, entries are fetched from Toggl's API, and the formatted output is inserted at the cursor — no manual copying.
Features:
- Three output formats: Markdown table, plain text (configurable delimiter), or custom
template (
$description,$start,$duration,$tags,$projectplaceholders) - Configurable columns: Description, Start time, Duration, Tags, Project
- Sort entries by start time (ascending or descending)
- Secure API token storage — device-local, not synced via Obsidian Sync
- Test connection button to verify your API token before importing
Manual Installation
- Download
main.jsandmanifest.jsonfrom the latest release on GitHub. - Create the folder
<vault>/.obsidian/plugins/obsidian-toggl-import/if it does not already exist. - Copy
main.jsandmanifest.jsoninto that folder. - Open Obsidian Settings > Community plugins, scroll to the plugin list, and enable Toggl Import.
Install via BRAT
BRAT lets you install pre-release plugins directly from a GitHub repository.
- Install the BRAT plugin from the Obsidian Community plugins list.
- In BRAT settings, click Add Beta Plugin.
- Paste
theaspect/obsidian-toggl-importand confirm. - Open Settings > Community plugins and enable Toggl Import.
Usage
- Open Settings > Toggl Import, paste your Toggl API token (found at track.toggl.com/profile under "API Token"), then click Test to verify the connection.
- Open (or create) a daily note whose filename starts with a date in
yyyy-mm-ddformat — e.g.2026-04-16.mdor2026-04-16 Wednesday.md. - Place your cursor where you want the entries inserted.
- Open the command palette (Ctrl/Cmd+P) and run Toggl Import: Import Toggl Entries.
- Time entries for that date appear at the cursor position, formatted according to your settings.
Running the command again appends new entries rather than replacing existing ones.
Settings
| Setting | Description | Default |
|---|---|---|
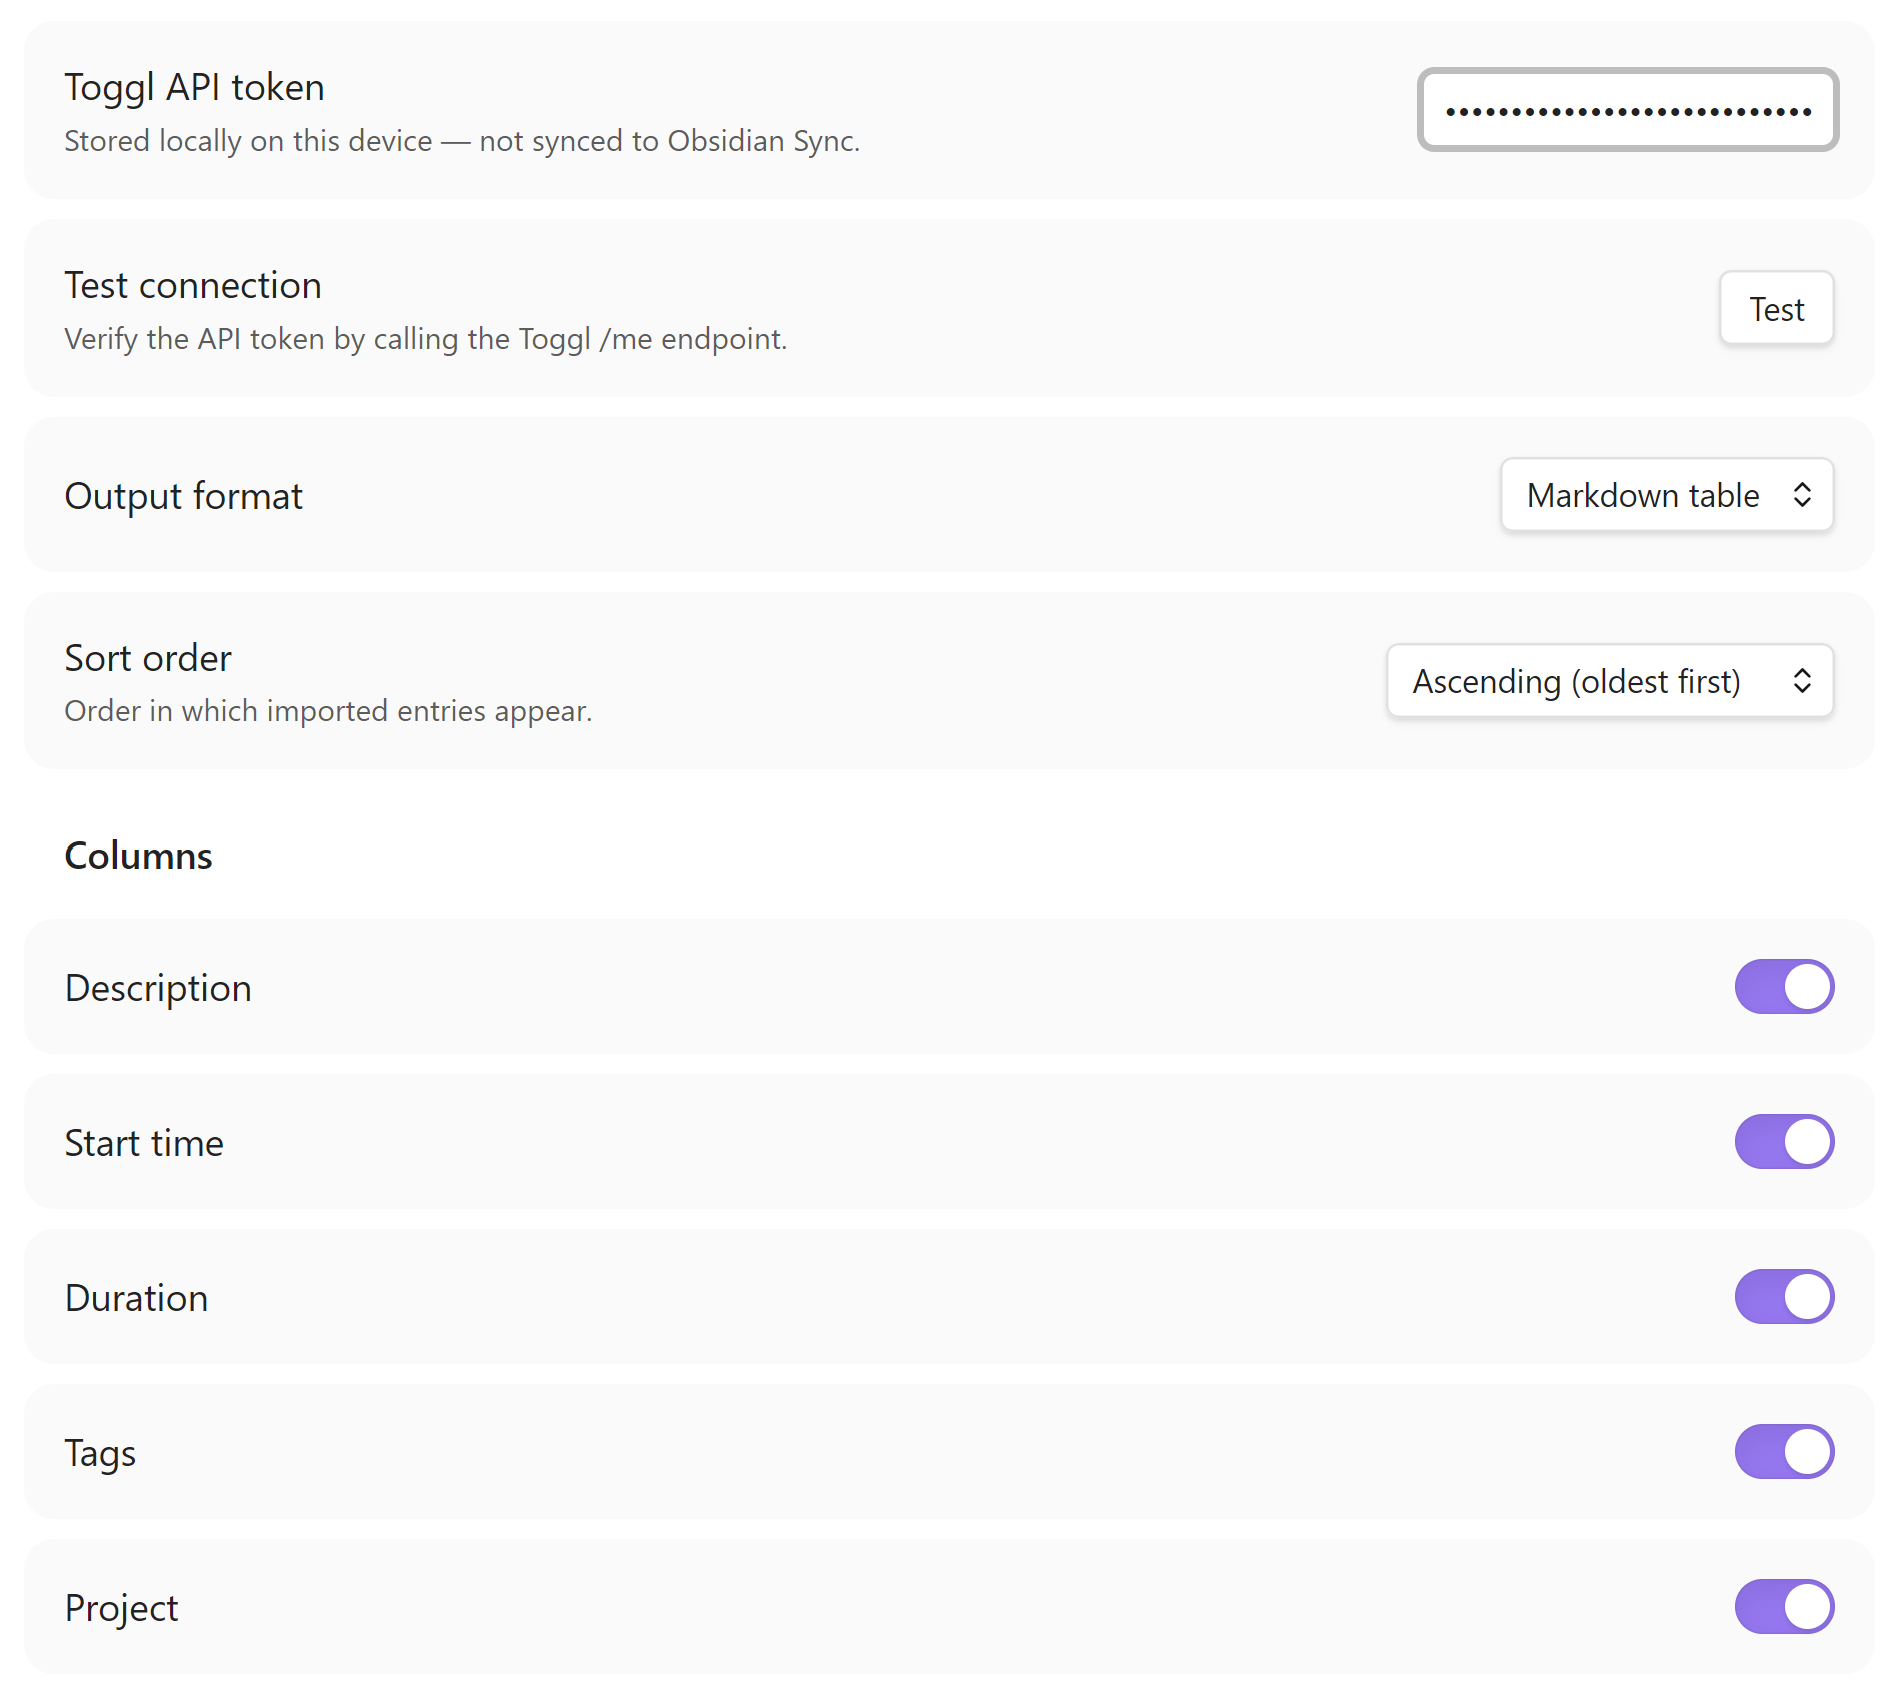
| Toggl API token | Your Toggl Track API token, stored locally on this device | (empty) |
| Test connection | Verify the token by calling the Toggl /me endpoint | — |
| Output format | Markdown table, Plain text, or Custom template | Markdown table |
| Delimiter | Column separator used in plain text mode | | |
| Template | Template string for custom template mode. Available variables: $description, $start, $duration, $tags, $project | $description ($duration) |
| Sort order | Ascending (oldest first) or Descending (newest first) | Ascending |
| Columns | Toggle individual columns: Description, Start time, Duration, Tags, Project. Disabled in template mode (template controls output). | Description, Start time, Duration enabled |
Third-Party Service
- Account requirement — Using this plugin requires a Toggl Track account and API token. Sign up at track.toggl.com.
- Network communication — The plugin communicates with the Toggl Track API (
https://api.track.toggl.com) to fetch your time entries. No data is sent to any other server. Refer to Toggl's privacy policy at toggl.com/legal/privacy for details on how Toggl handles your data. - No affiliation — This plugin is an independent open-source project and is not affiliated with, endorsed by, or associated with Toggl OÜ or the Toggl Track product.
Development
git clone https://github.com/theaspect/obsidian-toggl-import.git
cd obsidian-toggl-import
npm install
npm run dev      # watch mode — rebuilds on every file save
npm run build    # type-check + production bundle
npm test         # run tests
Copy main.js and manifest.json to your vault's plugin folder
(<vault>/.obsidian/plugins/obsidian-toggl-import/) for manual testing. The
Hot-Reload community plugin auto-reloads the
plugin whenever main.js changes — no Obsidian restart needed.
Releasing a new version
- Bump the version number (must be bare semver — e.g.
1.1.0, notv1.1.0) in three files:manifest.json—"version"fieldpackage.json—"version"fieldversions.json— add a new entry mapping the new version to itsminAppVersion, e.g."1.1.0": "1.8.7"
- Commit the version bump:
git commit -am "chore: bump version to 1.1.0" - Push a bare semver tag:
git tag 1.1.0 && git push origin 1.1.0
GitHub Actions picks up the tag and publishes the release automatically — no manual draft or upload needed.
License
For plugin developers
Search results and similarity scores are powered by semantic analysis of your plugin's README. If your plugin isn't appearing for searches you'd expect, try updating your README to clearly describe your plugin's purpose, features, and use cases.