Vault LLM Assistant
approvedby brianstm
Uses AI to answer questions and create notes about your vault with proper citations
Vault LLM Assistant for Obsidian

Features
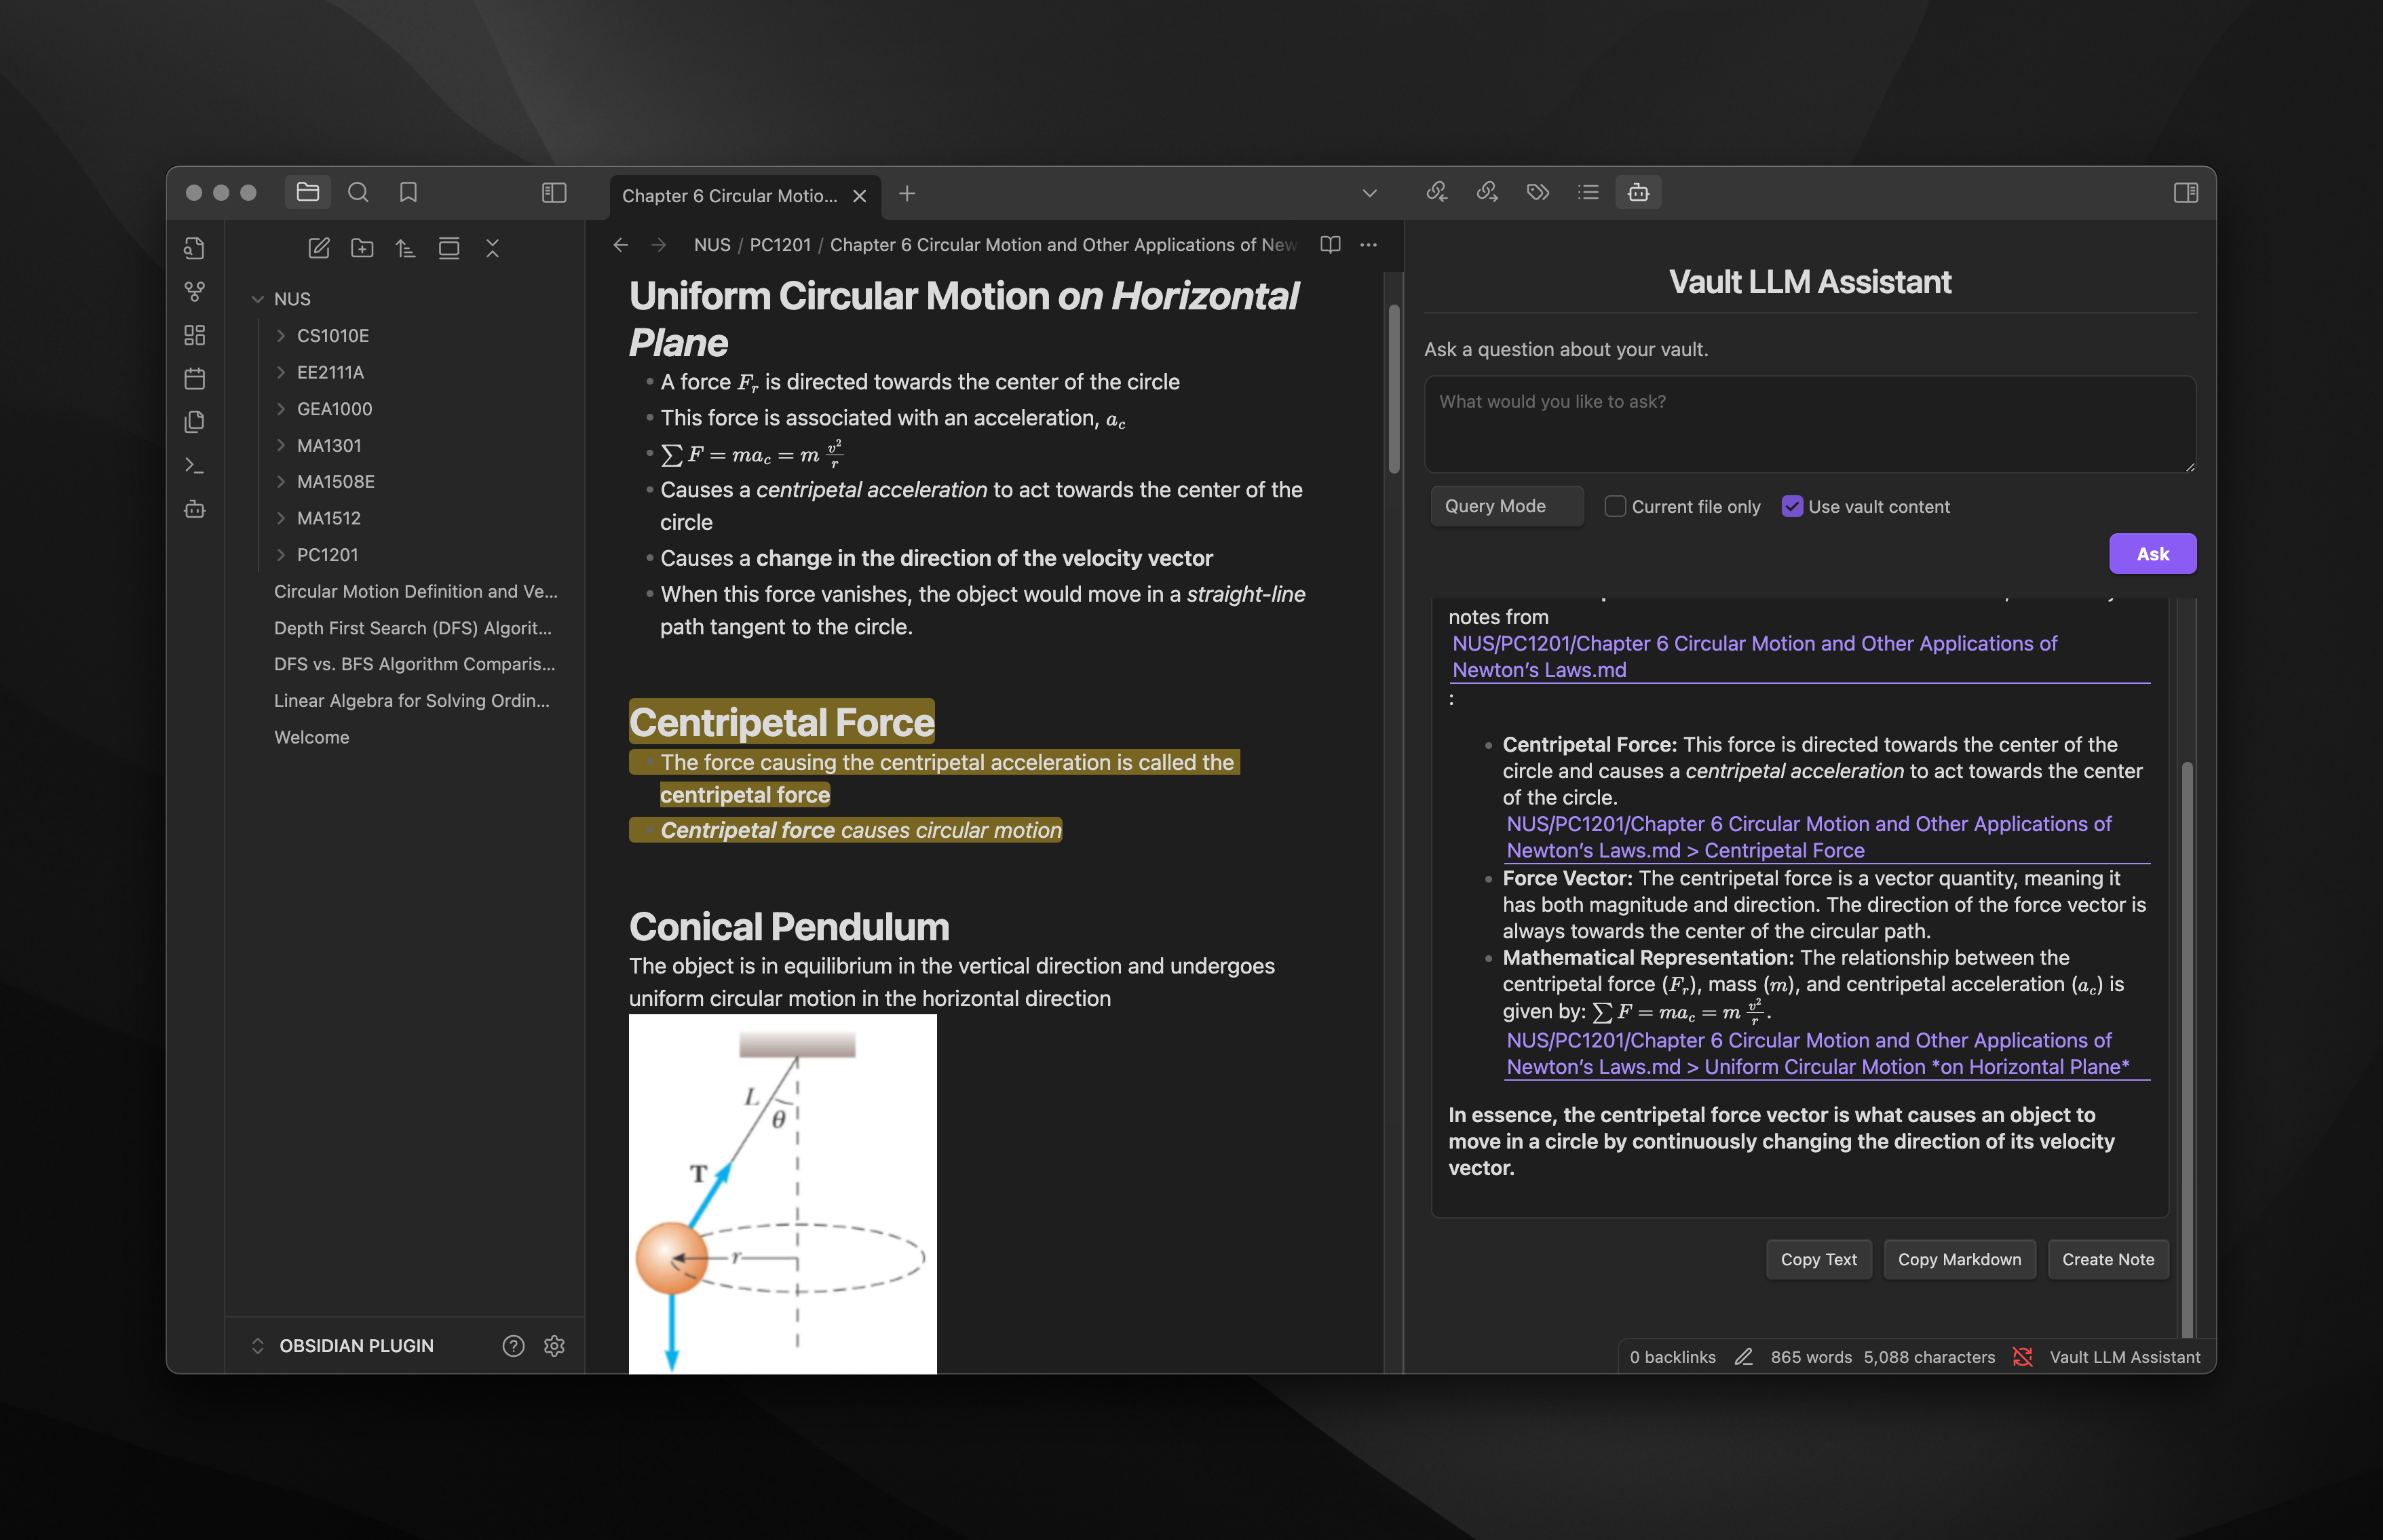
- Ask questions about your vault's content and get AI-generated answers
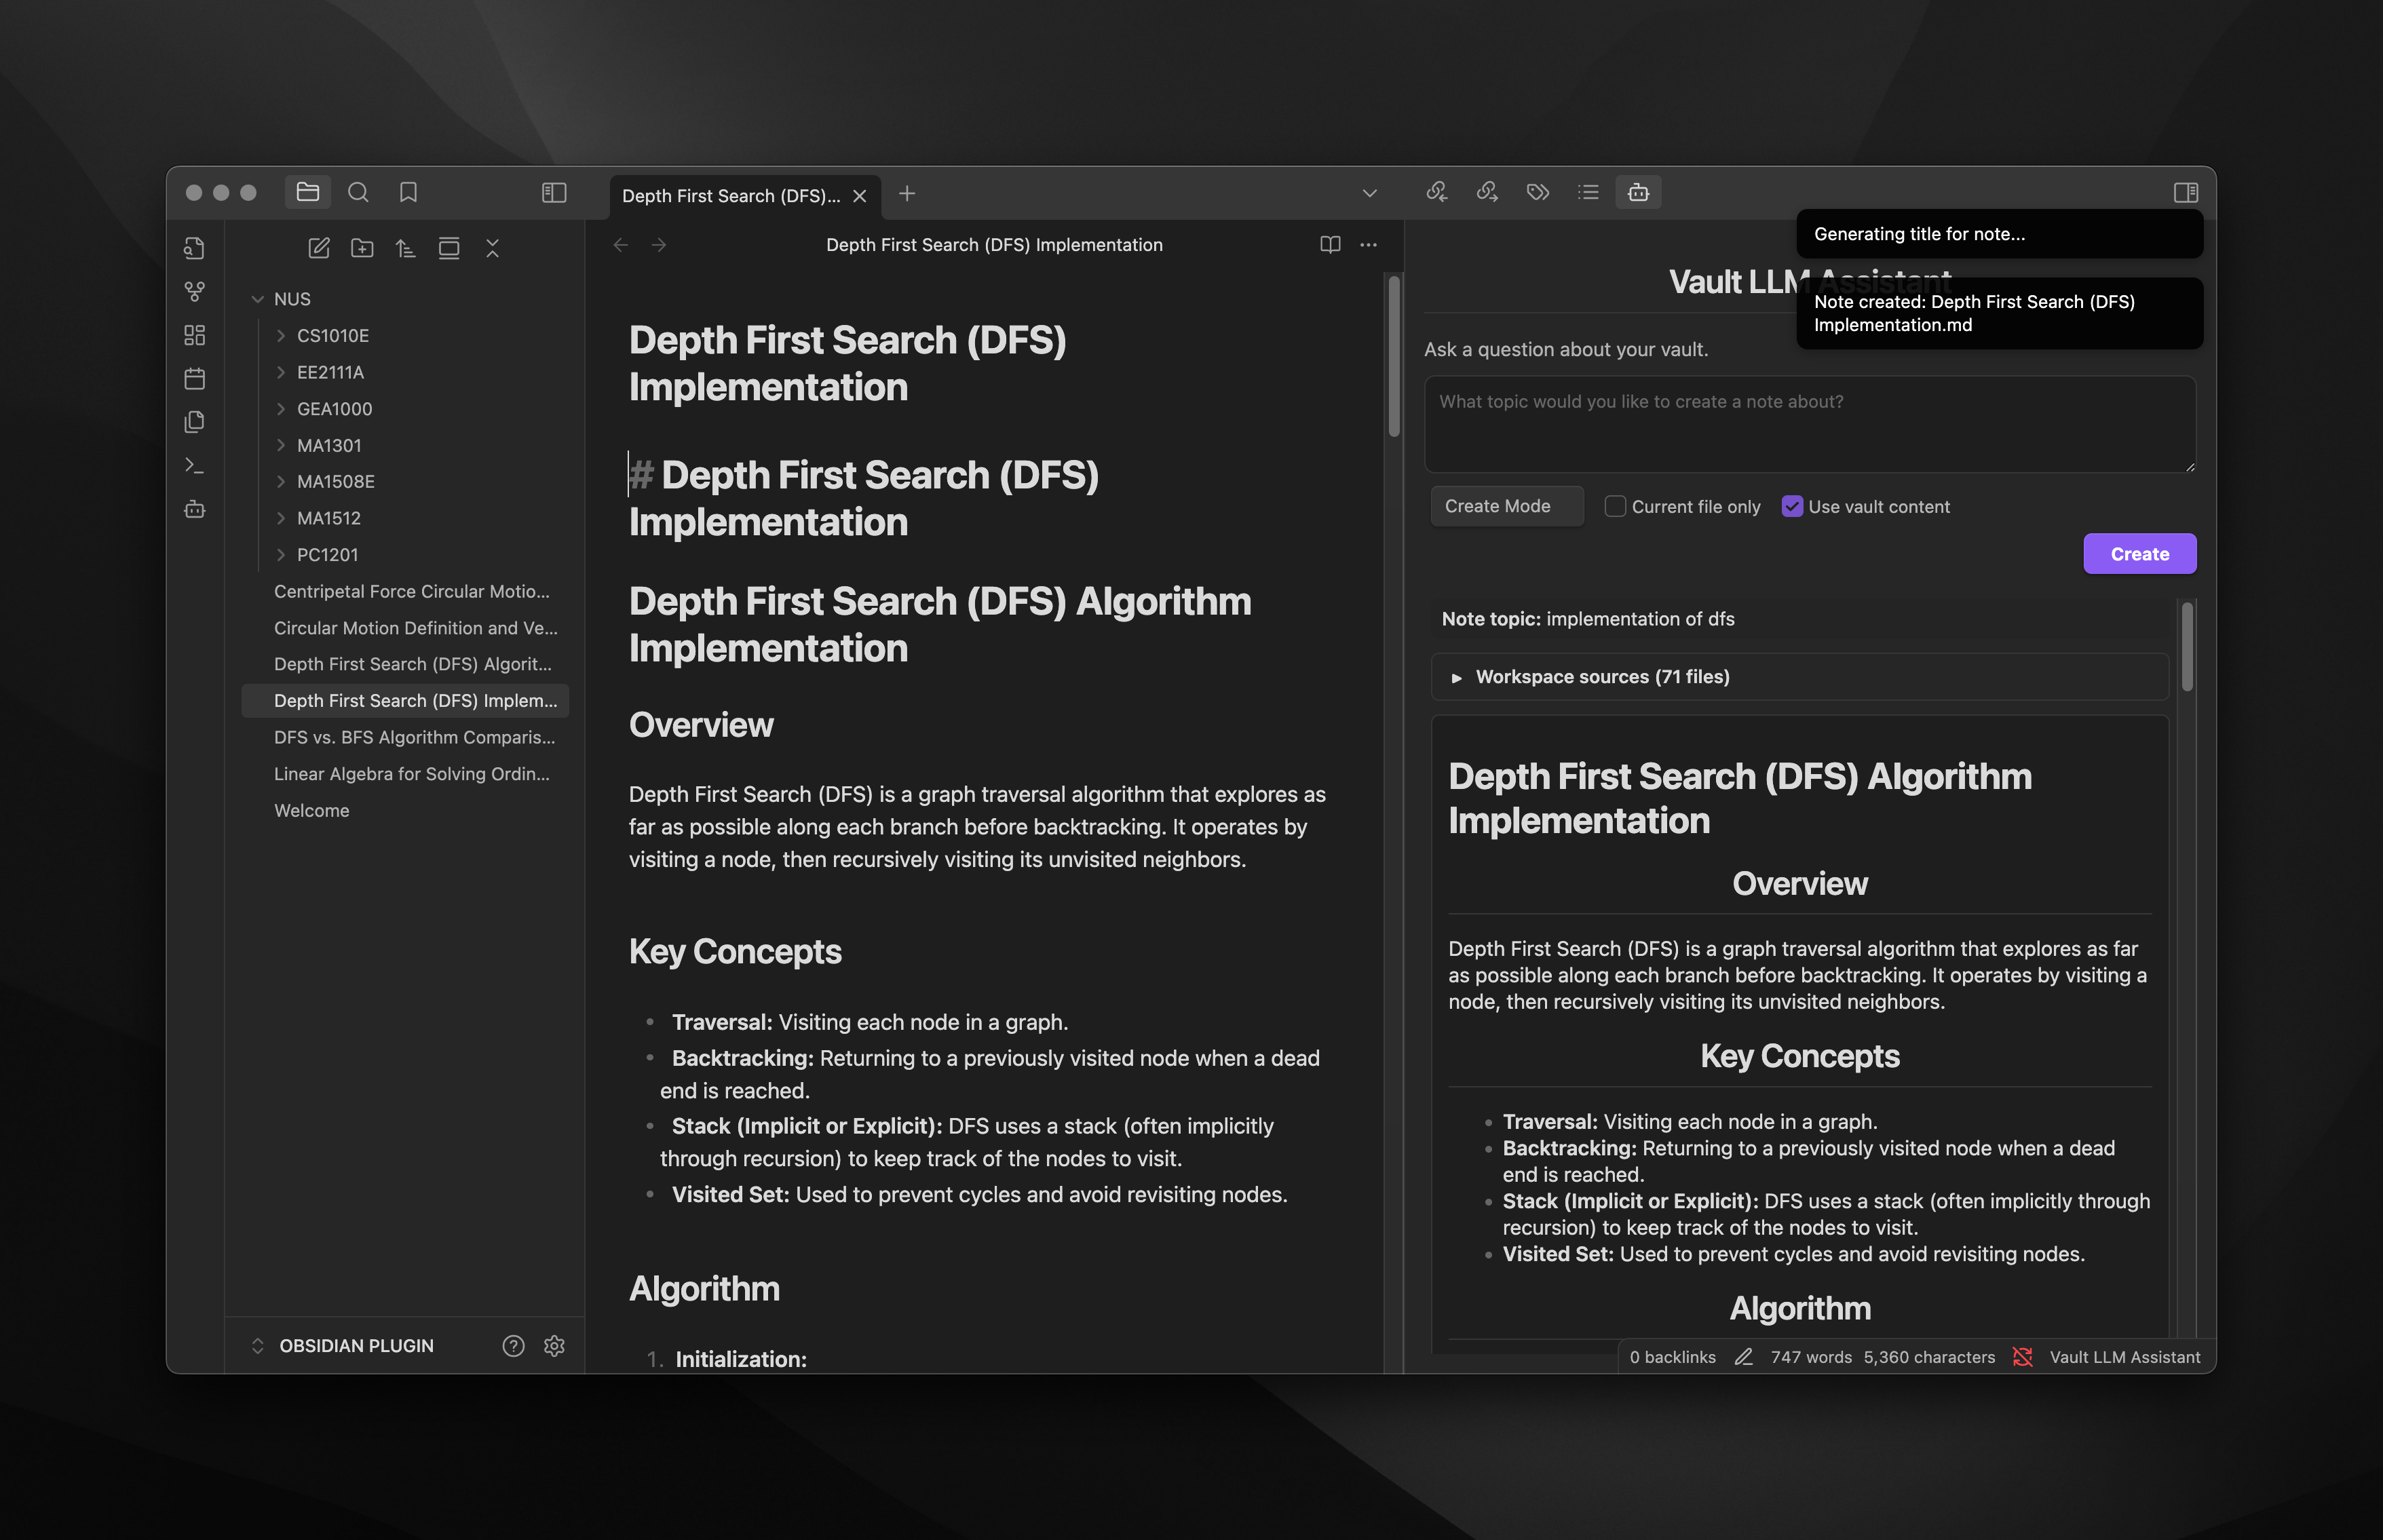
- Create comprehensive notes on any topic with optional vault context integration
- Toggle between Query mode and Create mode with a simple dropdown
- Choose whether to include vault content in your prompts
- Results include citations and links back to your original notes
- Copy results as text or markdown with one click
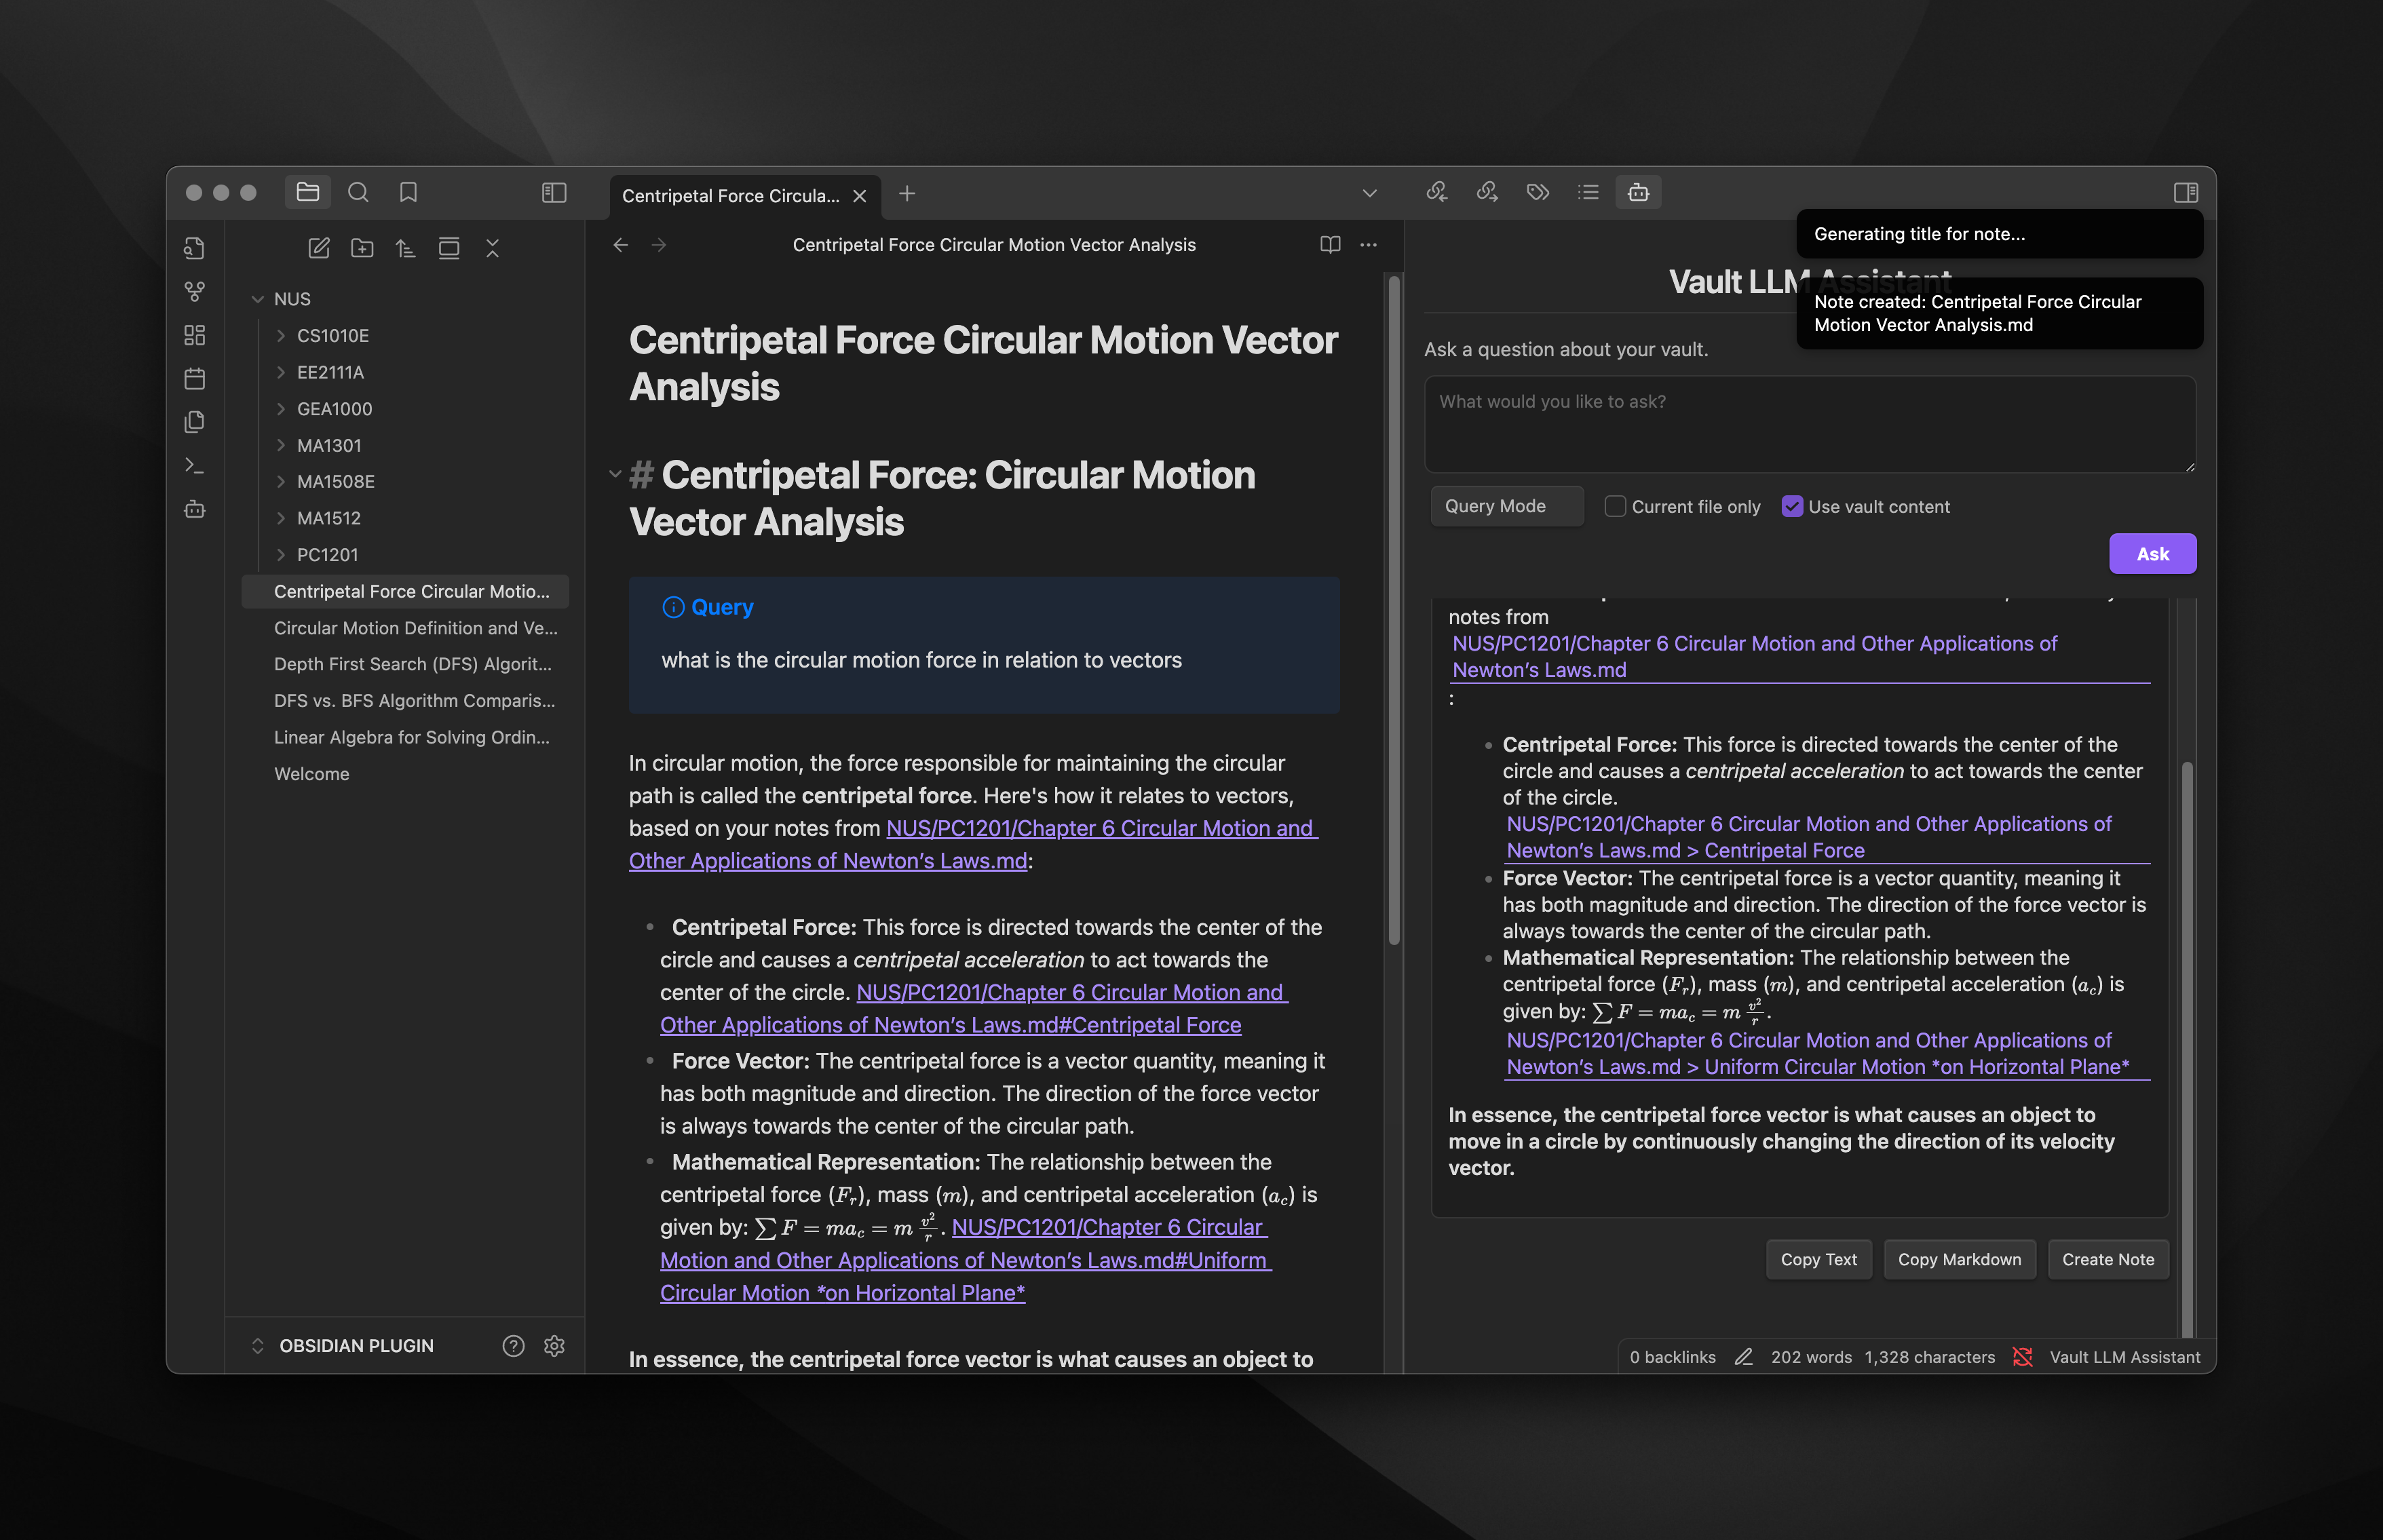
- Create new notes from responses with AI-generated titles
- Support for OpenAI GPT, Google Gemini, and Anthropic Claude models
- Support for local LLM (LM Studio and Ollama)
- Configure which files and folders to include or exclude from scanning
- Highlight and copy results easily
For a detailed list of changes between versions, see the Changelog.
Screenshots
Installation
From Obsidian Community Plugins
- Open Obsidian Settings → Community Plugins or use this link https://obsidian.md/plugins?id=vault-llm-assistant
- Disable Safe Mode if necessary
- Click "Browse" and search for "Vault LLM Assistant"
- Click Install and enable the plugin
Manual Installation
- Download the latest release from the GitHub releases page
- Extract the ZIP file to your vault's
.obsidian/plugins/directory - Restart Obsidian and enable the plugin in Settings → Community Plugins
Required Dependencies
After installation, install the required dependencies:
cd [your-vault]/.obsidian/plugins/obsidian-vault-llm-assistant
npm install
Usage
Basic Usage
- Click the Vault LLM Assistant icon in the left sidebar ribbon
- Select your desired mode from the dropdown (Query or Create)
- Optionally toggle "Use vault content" to include or exclude your vault's content in prompts
- Type your question or topic
- Click "Ask" (in Query mode) or "Create" (in Create mode) or press Ctrl+Enter (Cmd+Enter on Mac)
- View the AI-generated response with citations to your notes
Modes
- Query Mode: Ask questions about your vault's content and get AI-generated answers
- Create Mode: Generate comprehensive notes on any topic, with or without using your vault content as context
Response Actions
After receiving a response, you can:
- Highlight and copy text: Select text normally as the response is fully selectable
- Copy Text: Click the "Copy Text" button to copy the response as plain text
- Copy Markdown: Click the "Copy Markdown" button to copy the response with markdown formatting
- Create Note: Click the "Create Note" button to save the response as a new note in your vault
Configuration Options
Access plugin settings via Settings → Community Plugins → Vault LLM Assistant:
- LLM Provider: Choose between OpenAI GPT and Google Gemini
- API Key: Enter your API key for the selected provider
- Model: Select which AI model to use
- Max Tokens & Temperature: Control response length and creativity
- Use Vault Content in Prompts: Toggle whether to include vault content in AI prompts
- Mode: Select the current mode (Query or Create)
- Default Folder for New Notes: Set where new notes will be saved
- Generate Note Titles with LLM: Toggle whether to use AI for generating note titles
- Include/Exclude Folders: Specify which folders to include or exclude from scanning
API Keys
- OpenAI: Get your API key from OpenAI Platform
- Google Gemini: Get your API key from Google AI Studio
- Anthropic Claude: Get your API key from Anthropic Console
- Local LLM: Connects to your local instance of LM Studio or Ollama
Local Development
To set up for local development:
# Clone the repository
git clone https://github.com/brianstm/obsidian-vault-llm-assistant.git

# Enter the project directory
cd obsidian-vault-llm-assistant

# Install dependencies
npm install

# Start development server with hot-reload
npm run dev
Troubleshooting
If you encounter issues:
- Verify your API key is correct and active
- Check that you've installed all dependencies with
npm install - Ensure your API key has access to the models you've selected
- Check console logs for specific error messages (Ctrl+Shift+I in Obsidian)
License
This project is licensed under the MIT License.
Credits
- Developed by Brians Tjipto
- Website: brianstjipto.xyz
If you find this plugin helpful, please consider starring the GitHub repository!
For plugin developers
Search results and similarity scores are powered by semantic analysis of your plugin's README. If your plugin isn't appearing for searches you'd expect, try updating your README to clearly describe your plugin's purpose, features, and use cases.