Icon Fairy
approvedby t1seo
Use your own images as icons for files, folders, tabs, note titles, and inline text, with a local icon library and Markdown annotations. - This plugin has not been manually reviewed by Obsidian staff.
Icon Fairy

Your images. Your icons. Your vault.


Upload your own PNG, JPG, WebP, or SVG images and use them as Obsidian icons for folders, notes, tabs, note titles, and inline text. Everything stays inside your vault.
Screenshots show the included sample vault in Obsidian’s light appearance.
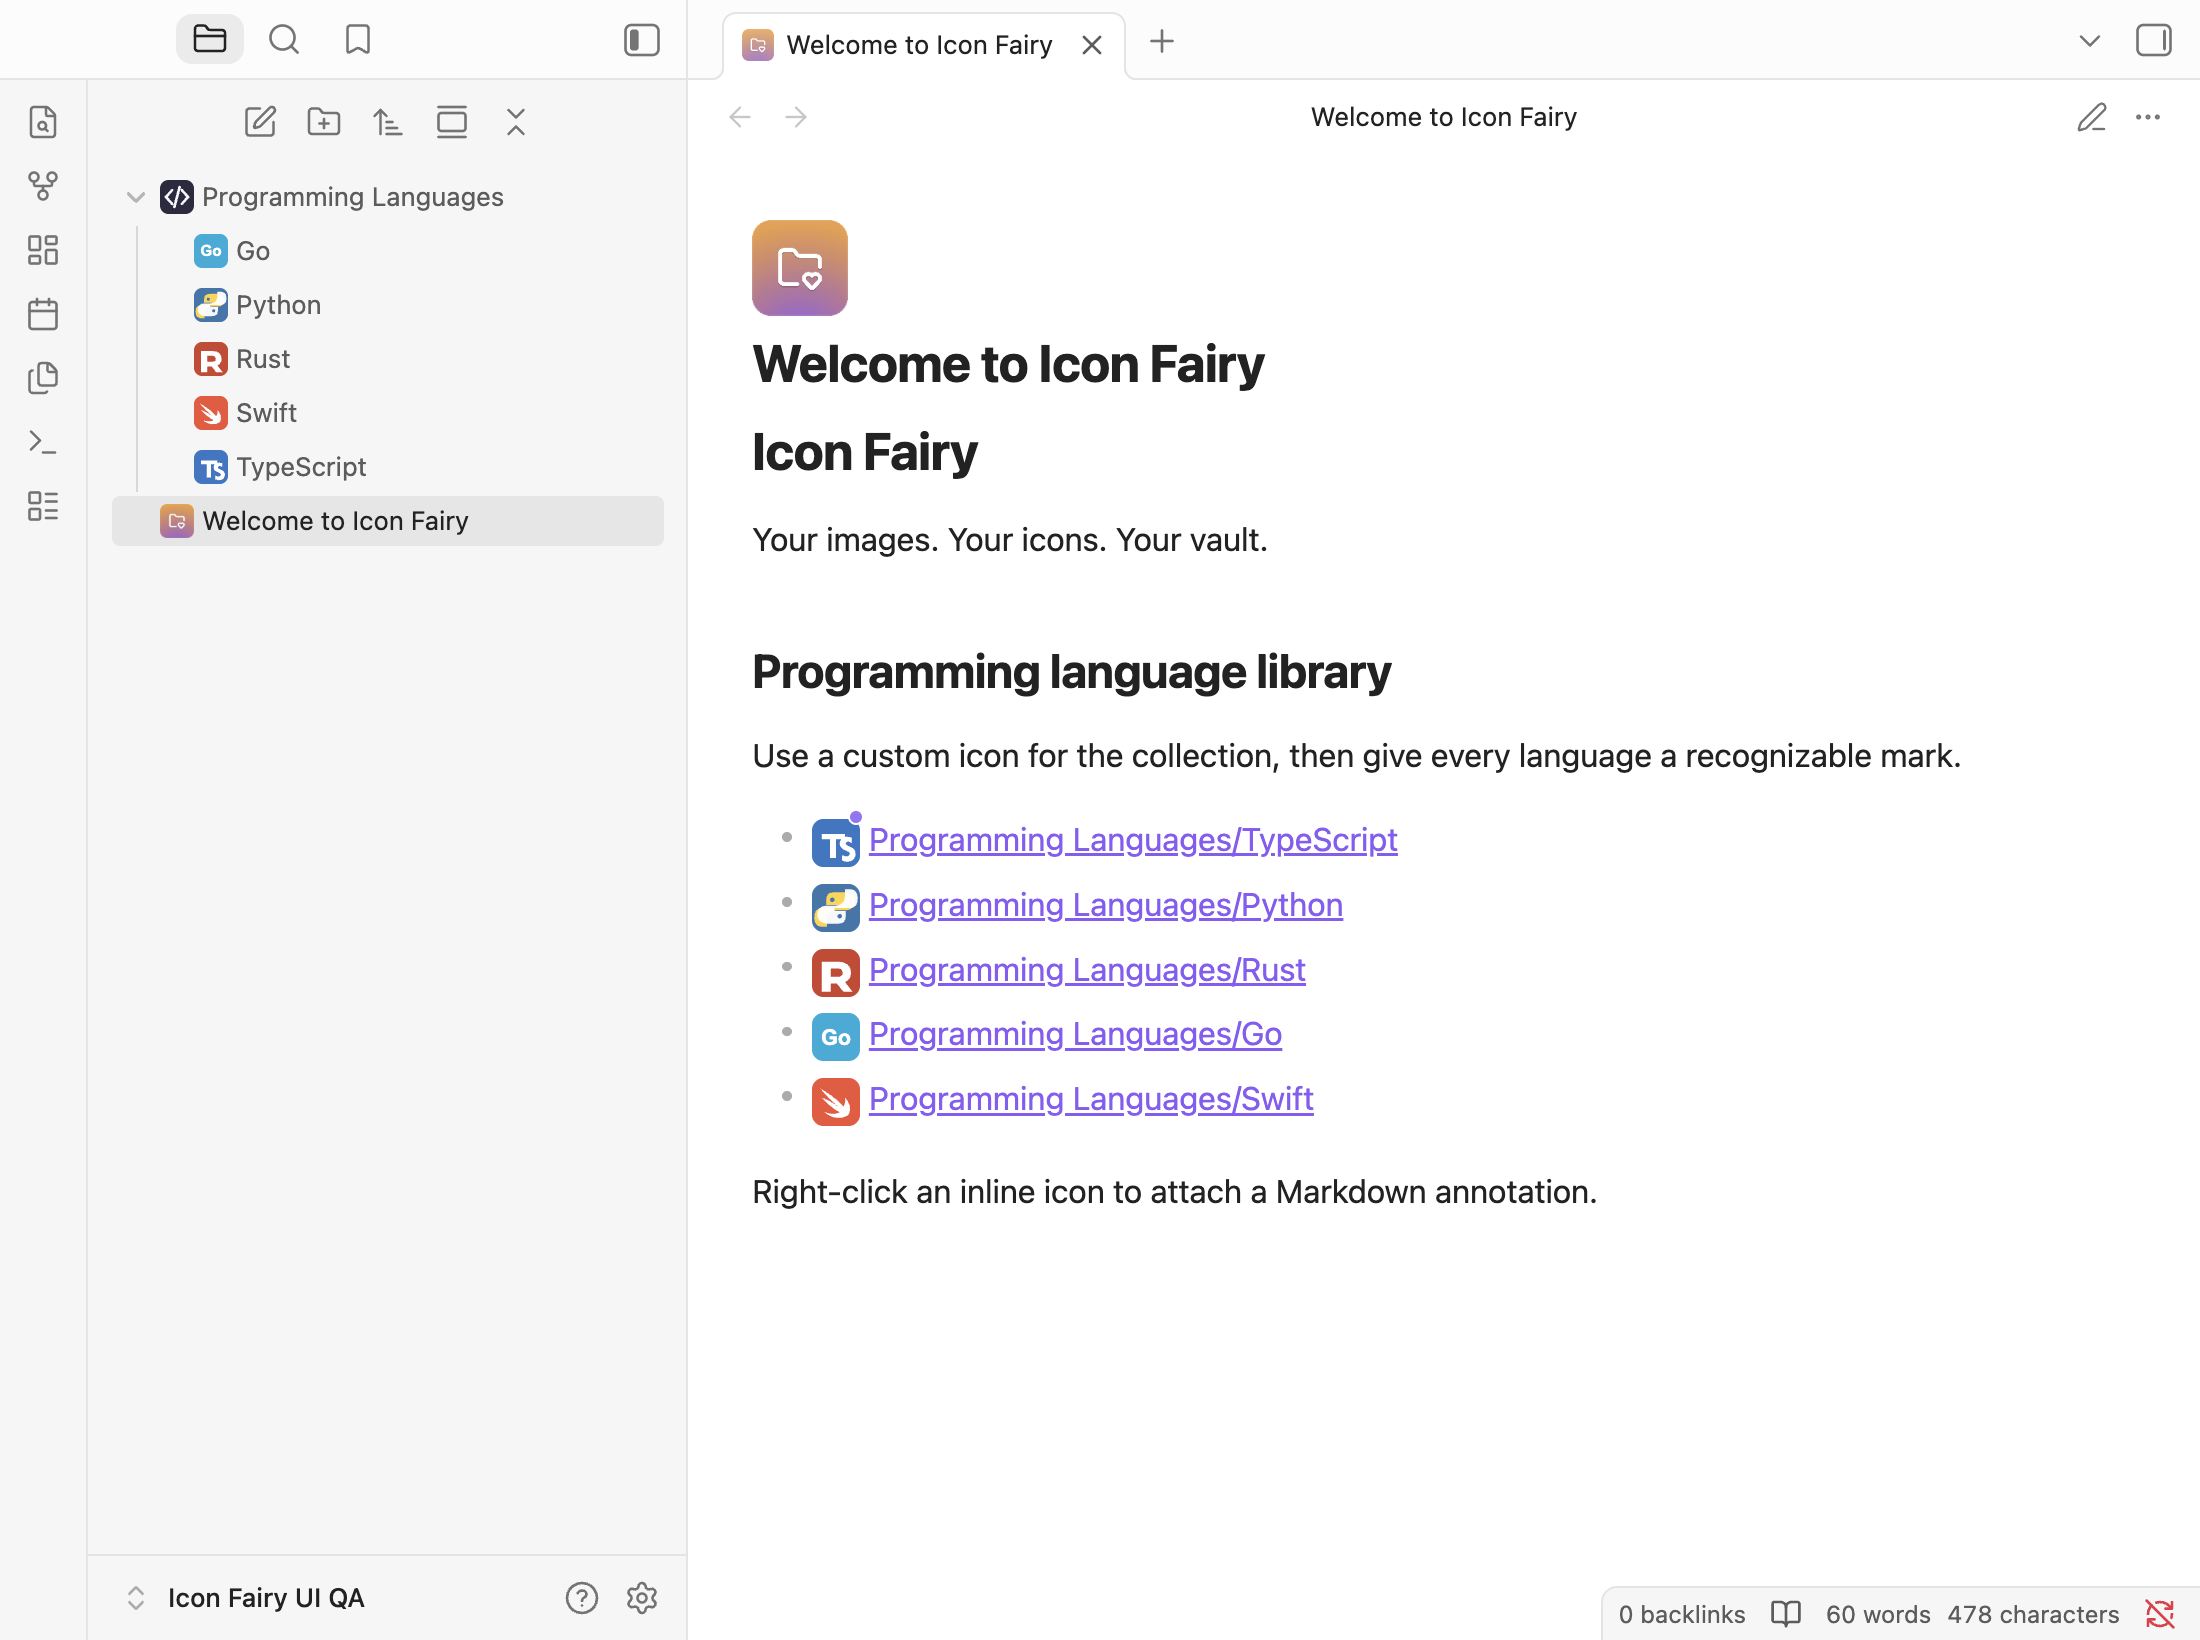
A two-minute tour
- Right-click a file or folder and choose Change icon….
- Pick an icon already in your library, or open Upload.
- The same assignment appears in the file explorer, tab, and note title.
- Enable inline icons and write a shortcode such as
:ci-typescript:inside a note.
| What you can do | Where it appears |
|---|---|
| Assign an icon to a folder | File explorer |
| Assign an icon to a note | File explorer, tab, and note title |
Insert :ci-NAME: | Live Preview and Reading view |
| Annotate one inline icon | Accent dot and Markdown hover card |
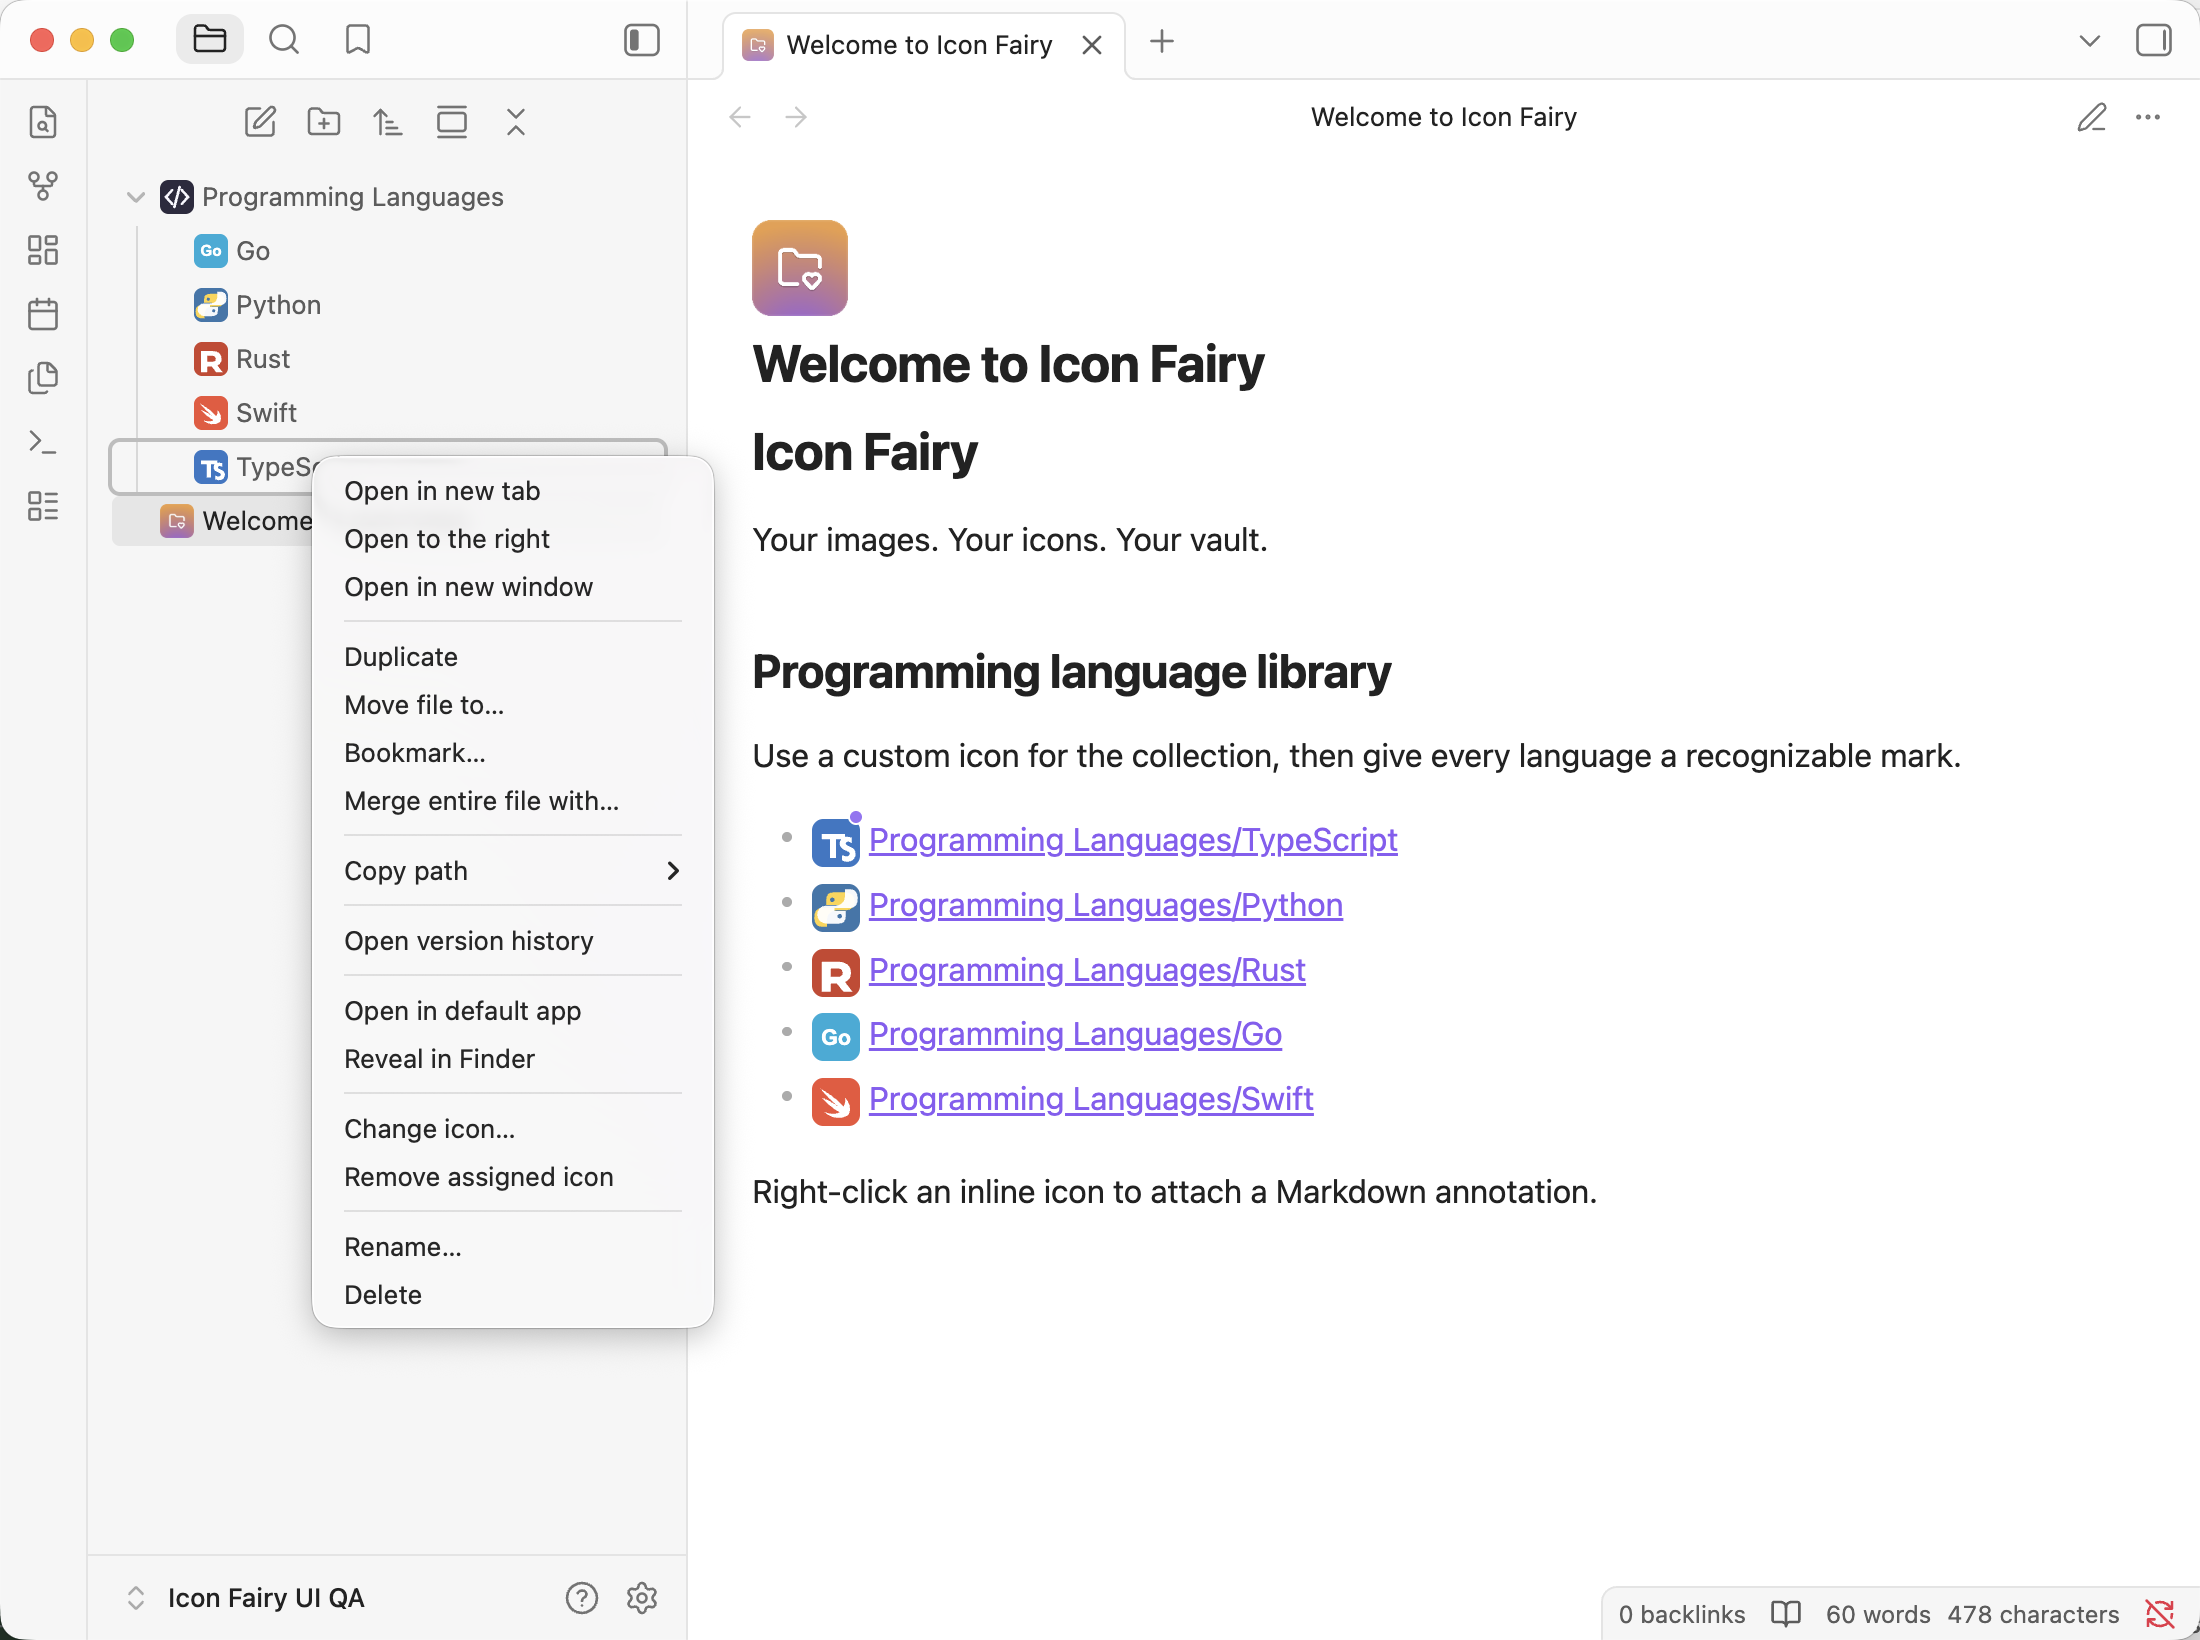
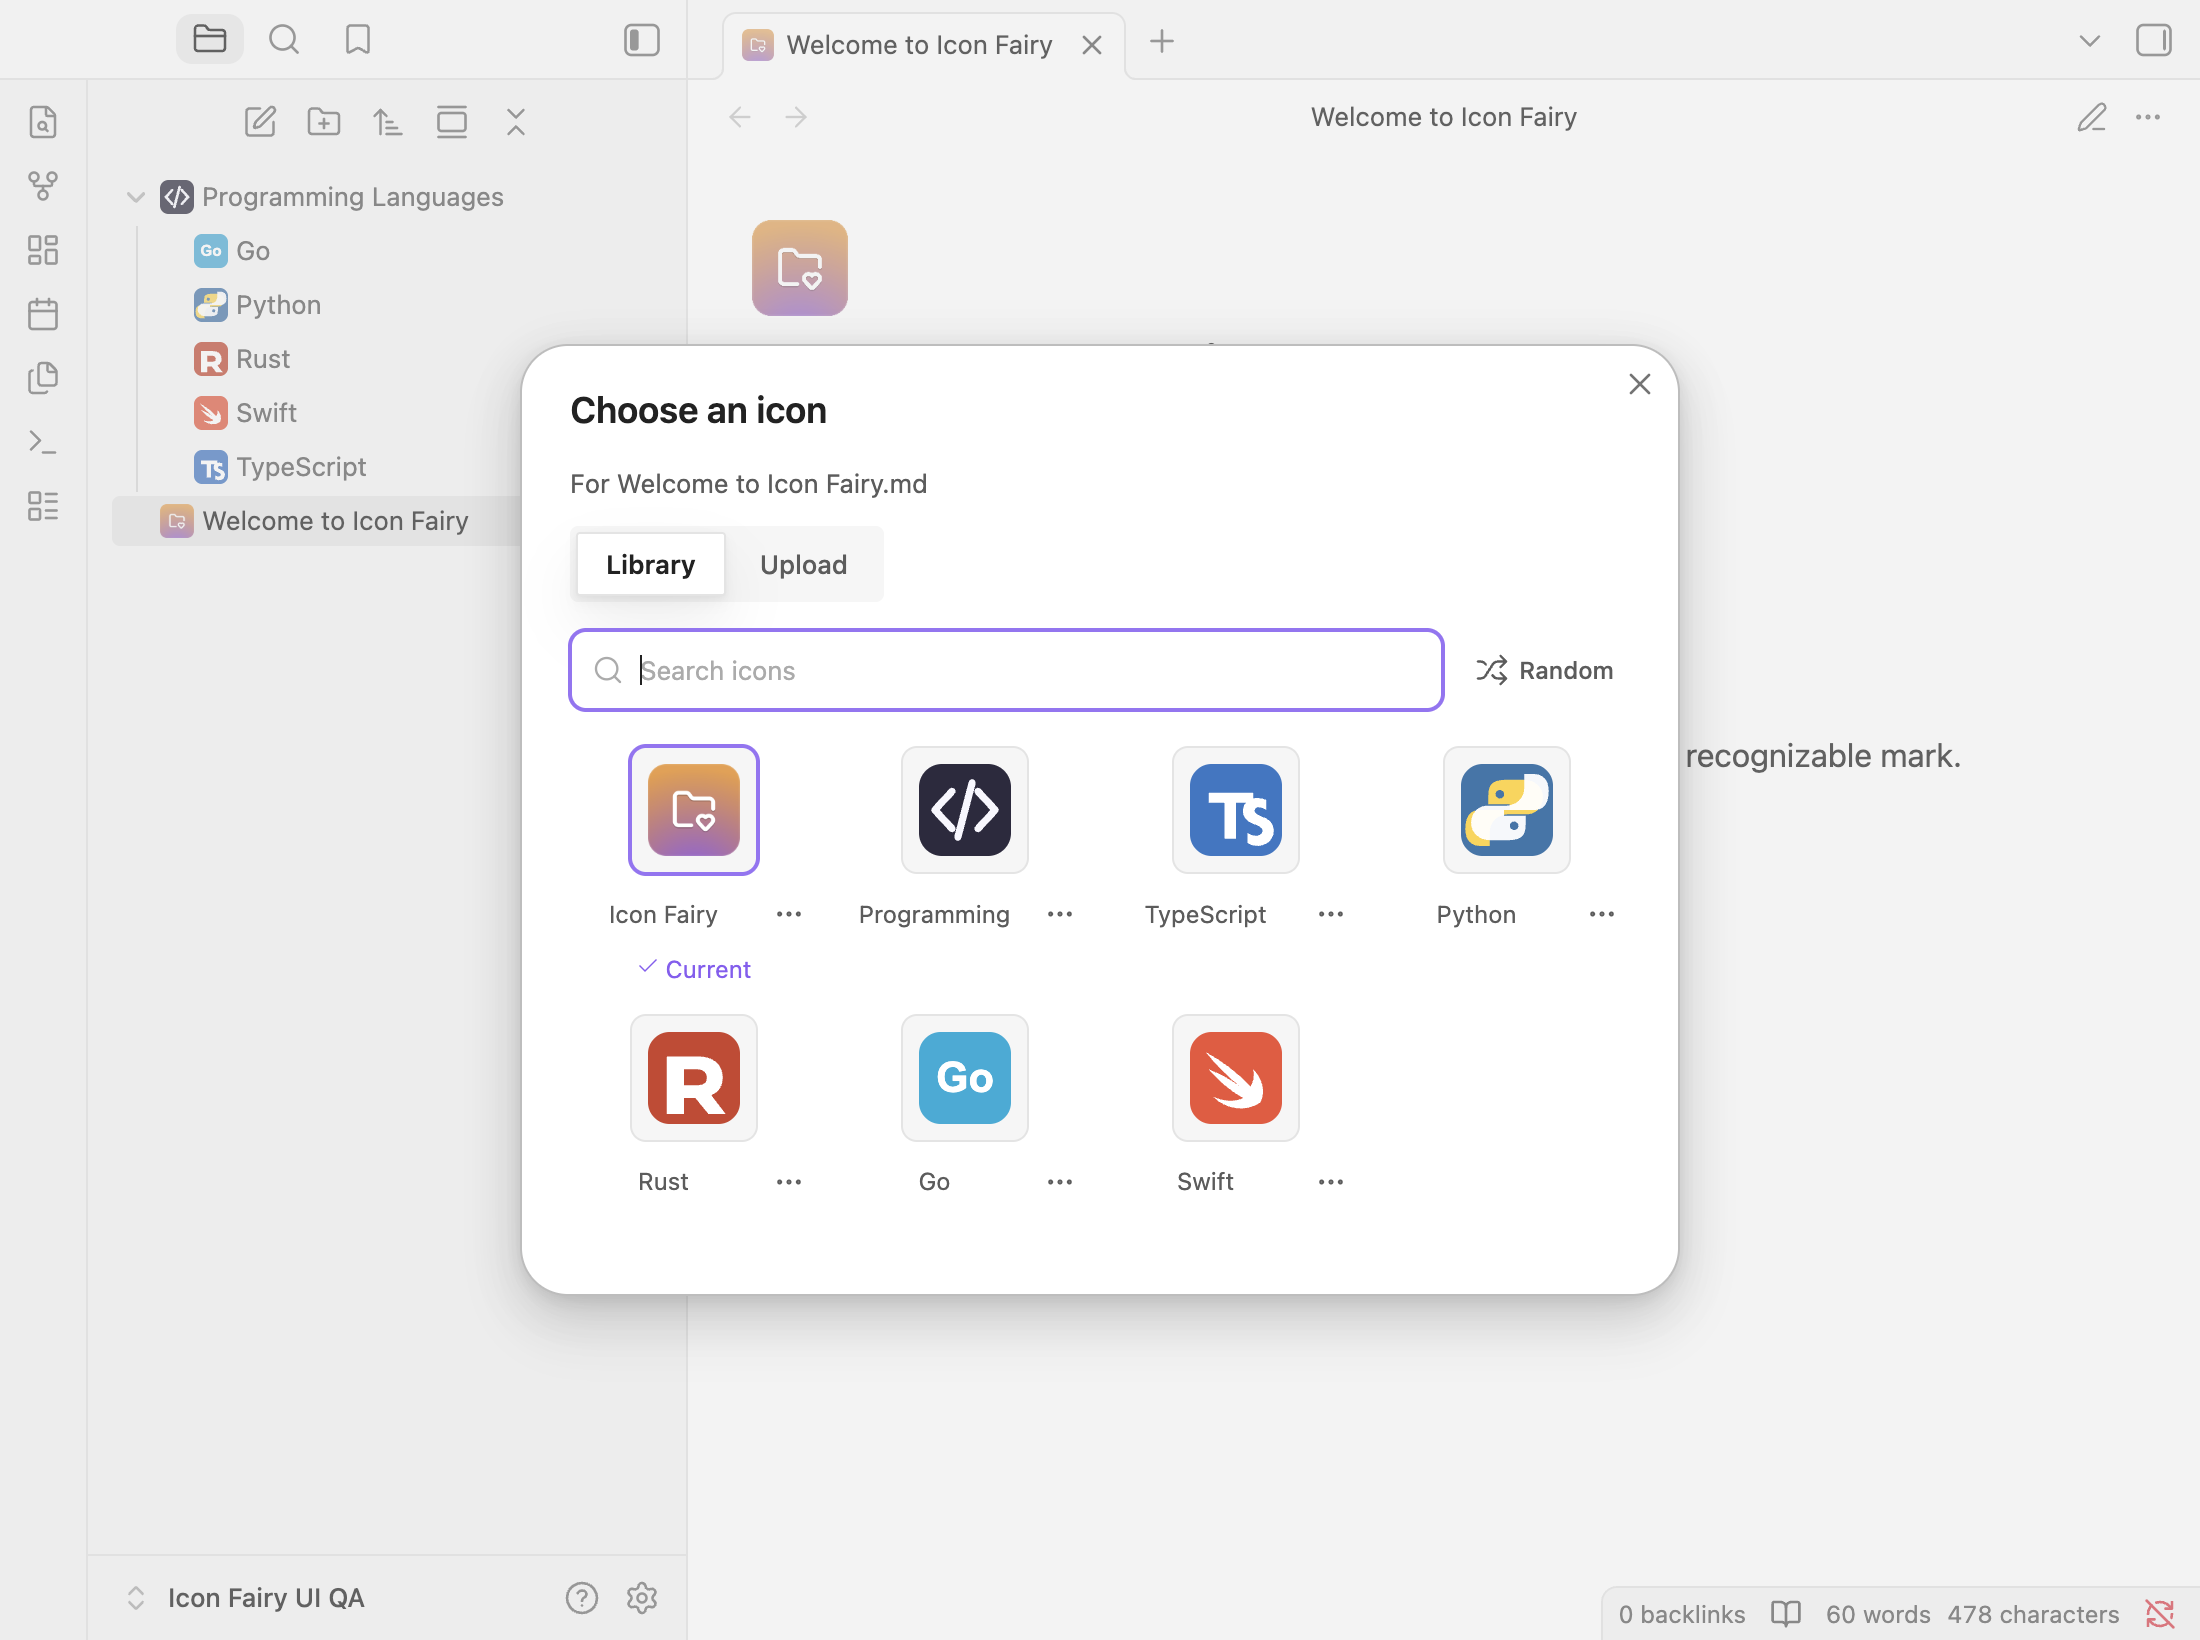
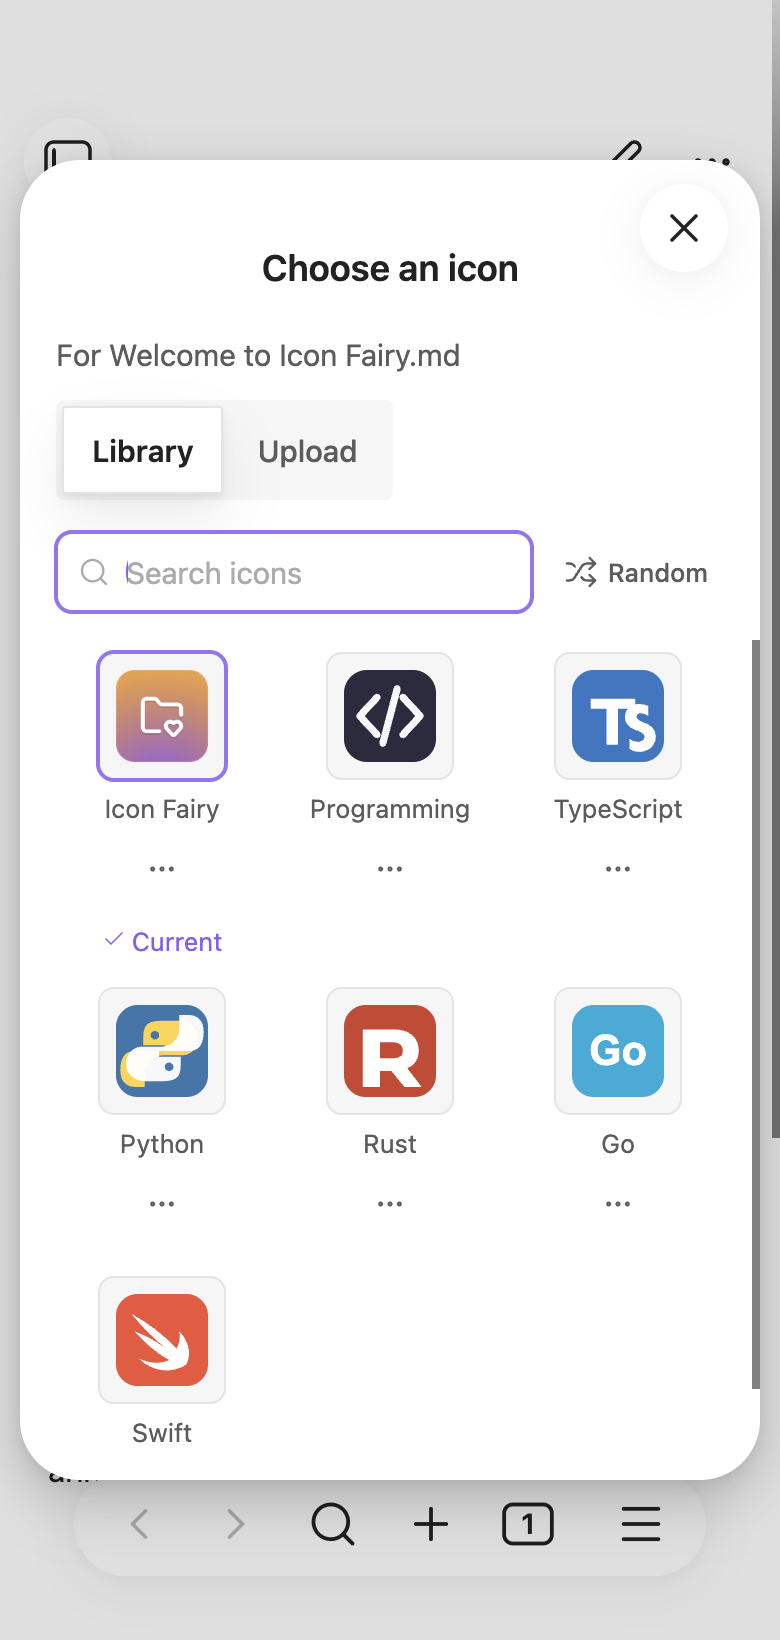
The picker names the current task and target, so it is always clear where the next icon will go. Search by name, choose Random for a quick pick, or use the keyboard: Left/Right changes the source tab, and arrow keys plus Enter select a focused icon. Icon Fairy keeps only one picker open at a time.
Example: a programming language library
The included sample vault uses one icon for the collection and a familiar mark for every language:
Programming Languages/       </> folder icon
├── TypeScript.md             TS icon
├── Python.md                 Python icon
├── Rust.md                   R icon
├── Go.md                     Go icon
└── Swift.md                  Swift icon
Each language note also uses its icon inline:
# TypeScript

:ci-typescript: Type-safe JavaScript for large applications.
This makes a large vault easier to scan without changing file names or frontmatter.
Upload and manage icons
Open the picker from a file menu or command, then choose Upload. Drop files into the upload area, choose Browse files, or paste an image from the clipboard. The drop zone is also available by keyboard with Tab, then Enter or Space.
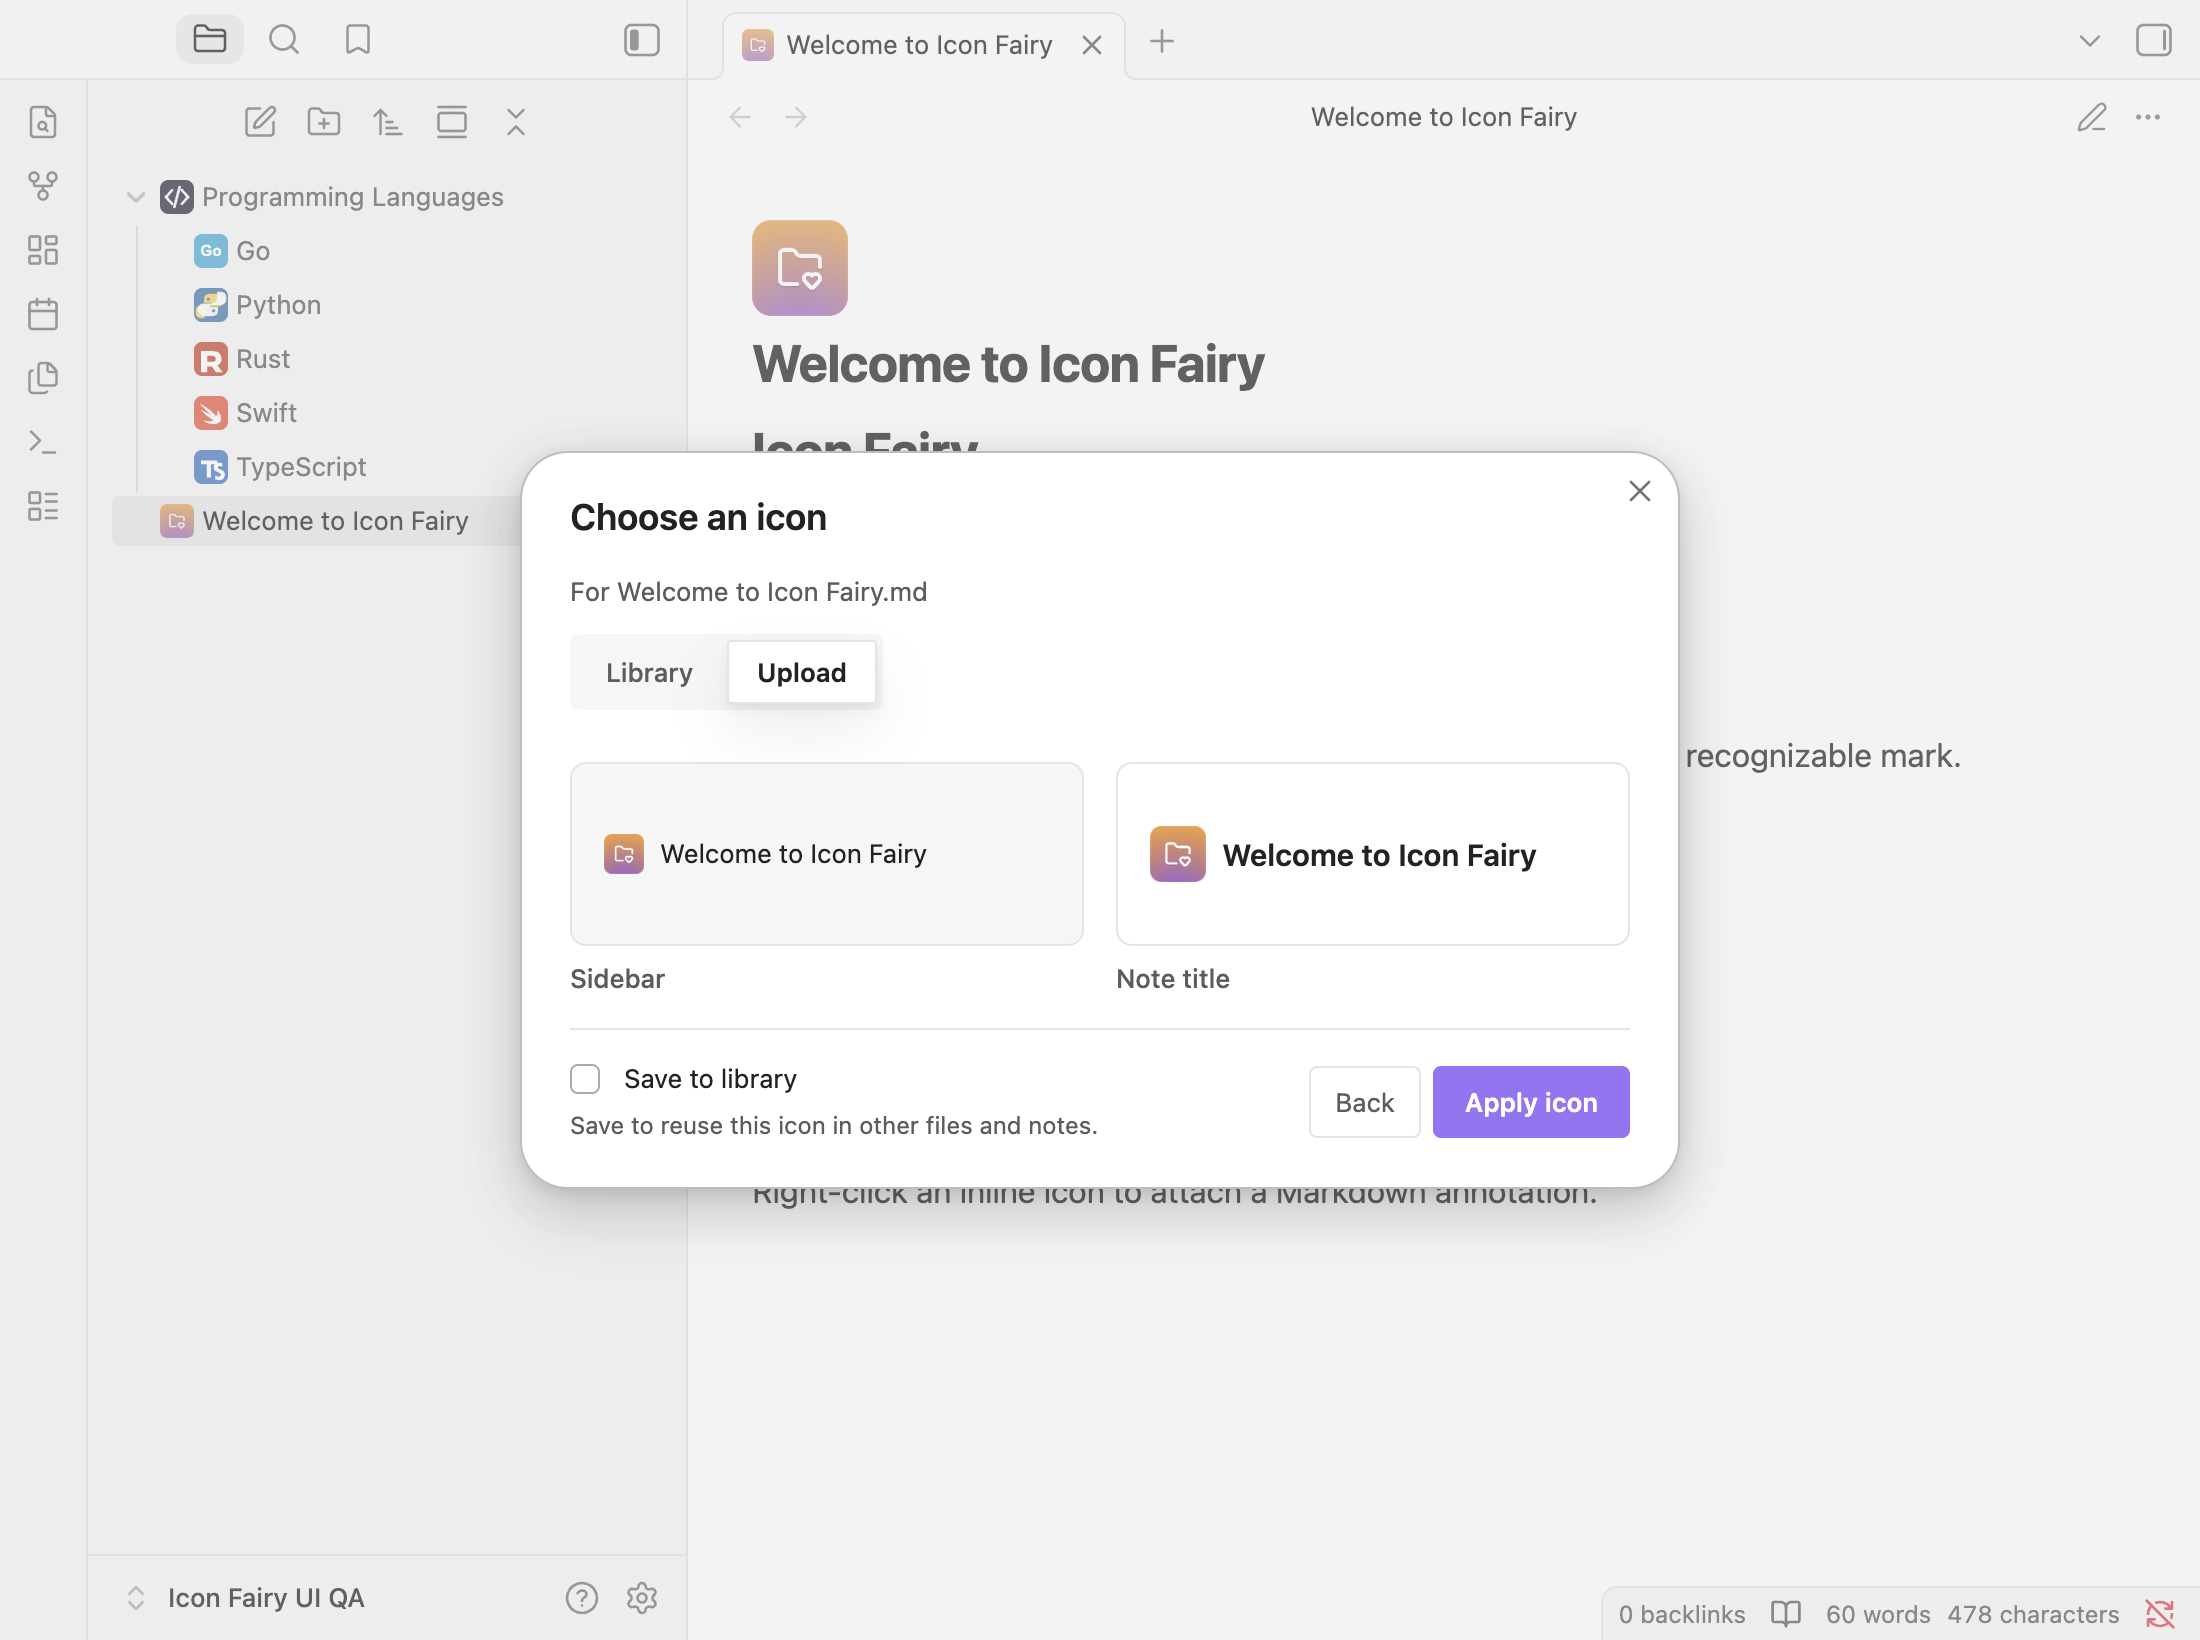
Select multiple files to review, rename, or remove individual items before one batch import. SVG files remain vector files instead of being rasterized.
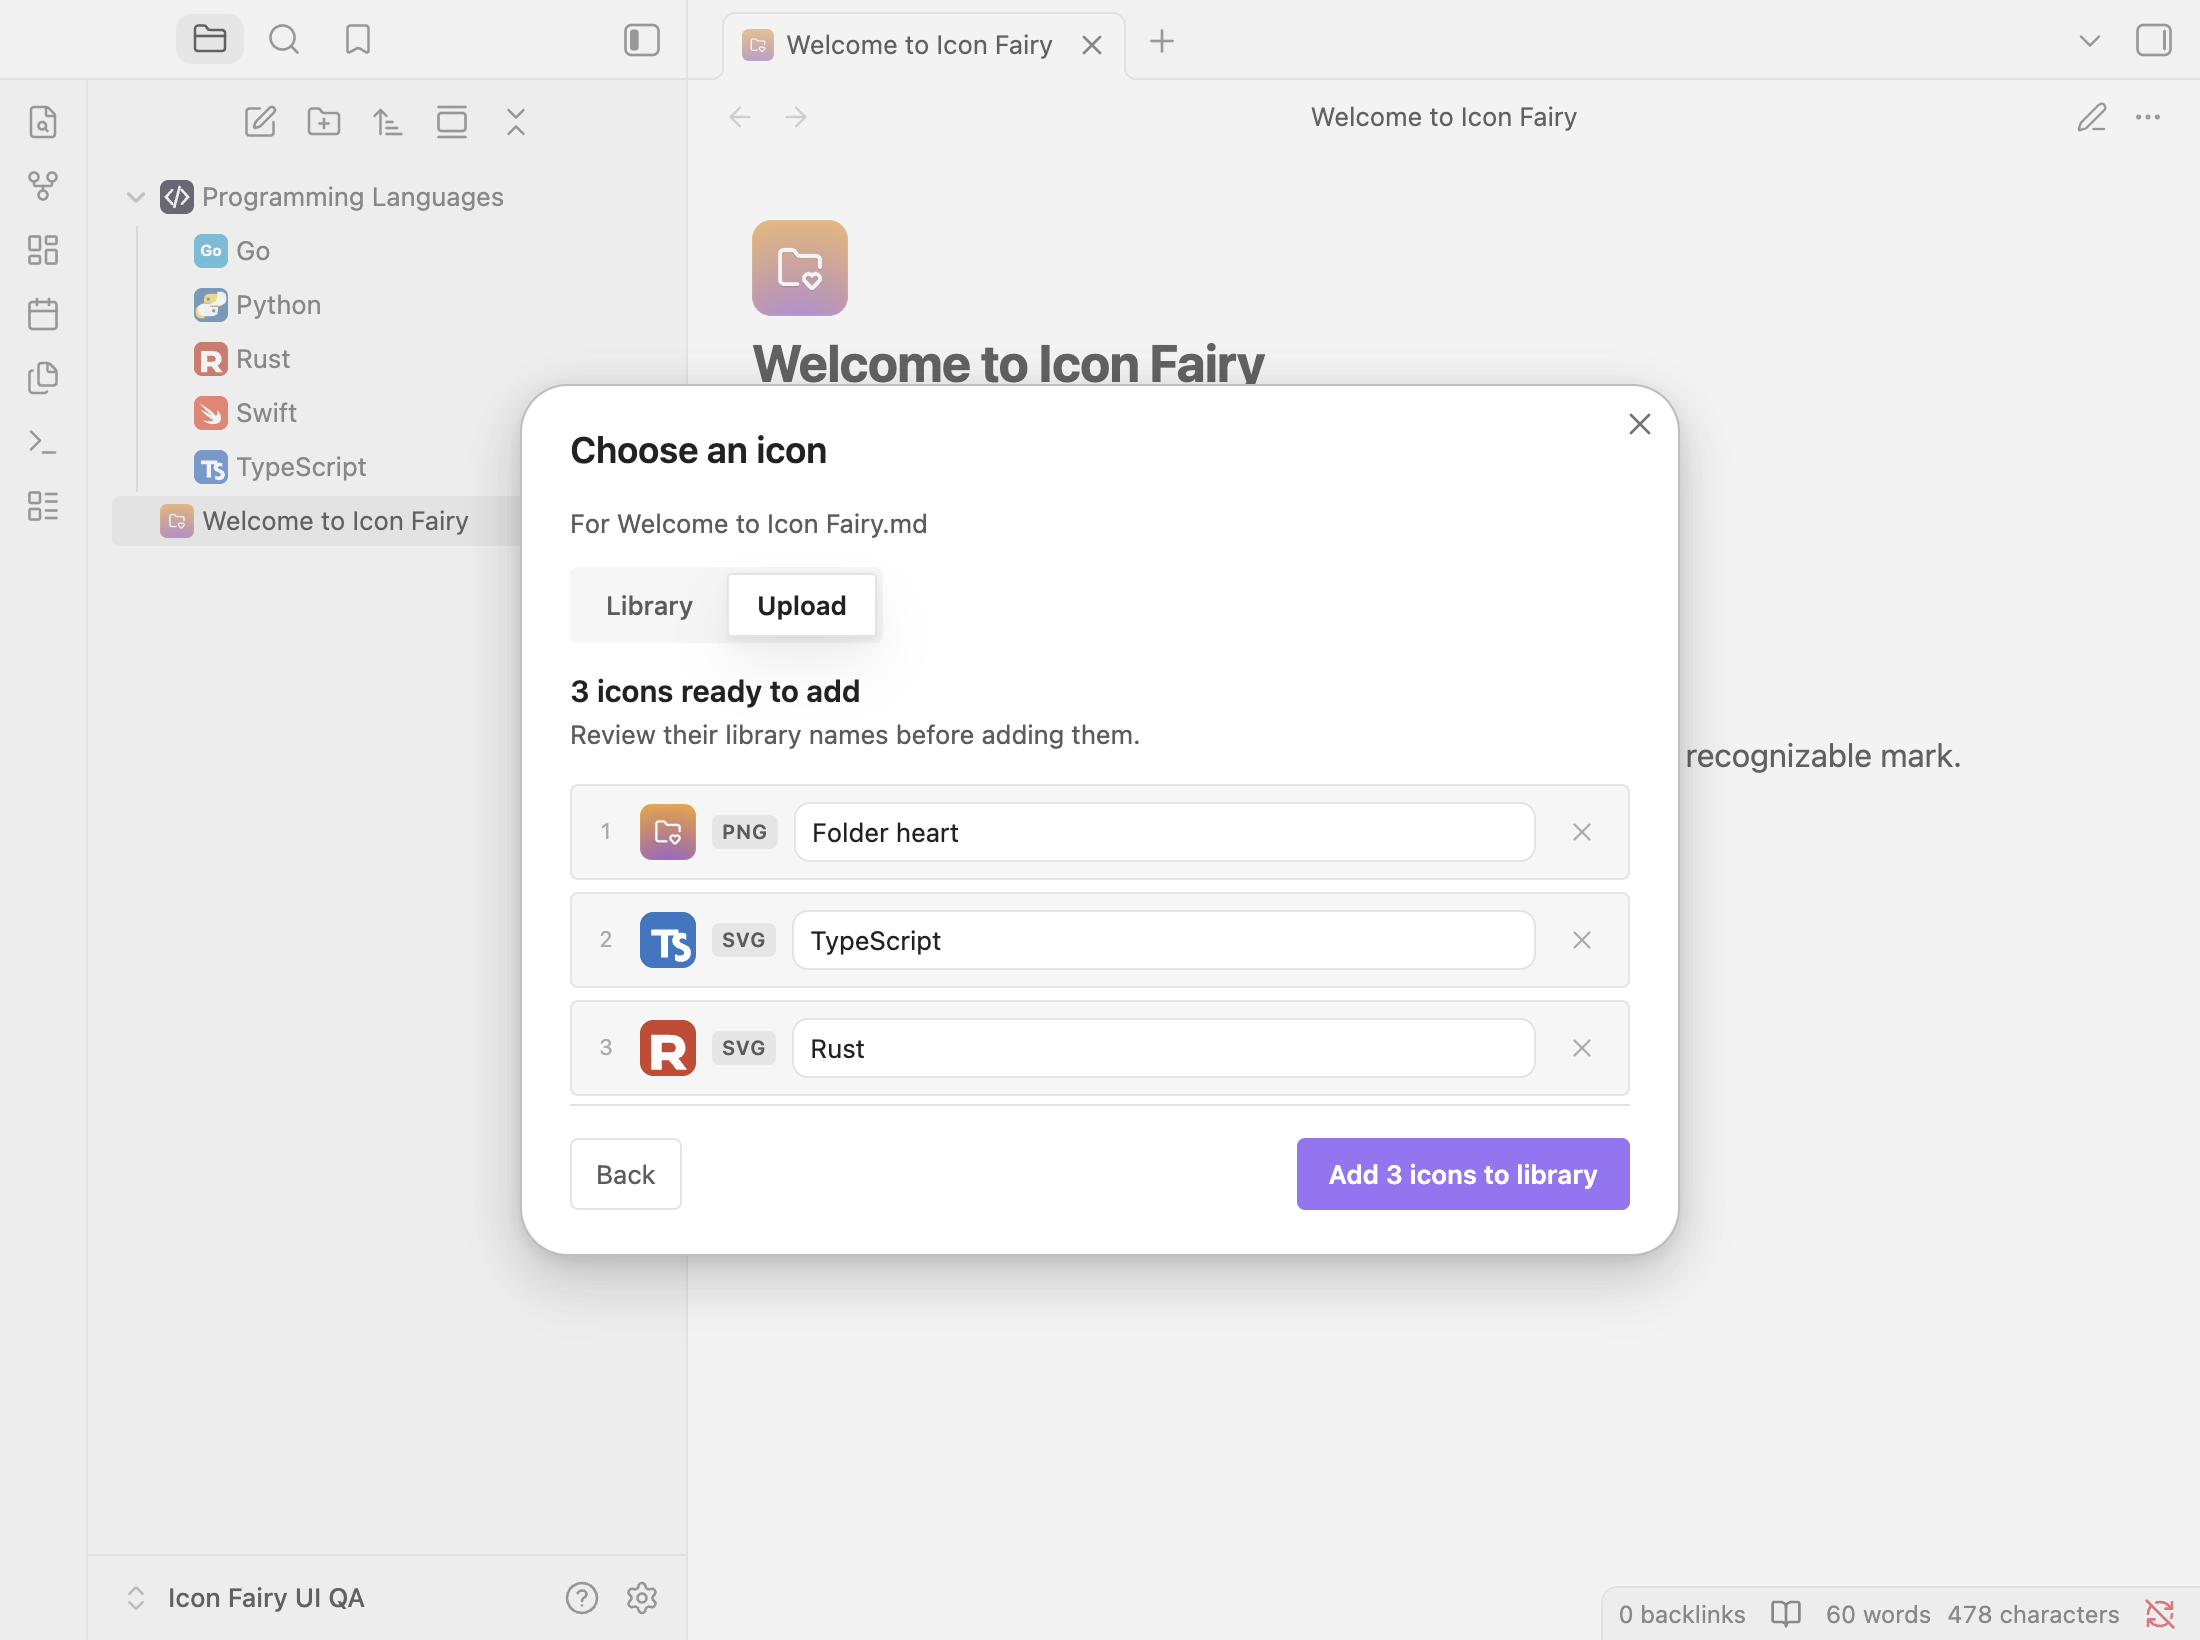
In Library, the assigned icon is marked Current. Open an icon’s More actions menu to Rename or Delete from library; double-clicking its name also starts renaming. Deleting a library item clears assignments using that item. To remove only a file’s assignment, use Remove assigned icon in its file menu.
For a single upload, Apply icon assigns it to the selected file or folder. Save to library makes it reusable; SVGs and inline insertion require this. Batch upload uses Add N icons to library and does not change the current assignment.
Inline icons and annotations
Enable inline icons in the plugin settings, then type :ci- to open autocomplete or use the command palette. The default format is:
:ci-ICON-ID:
Right-click a rendered inline icon and choose Add icon annotation or Edit icon annotation. The focused editor supports Markdown, [[wiki links]], and ![[embeds]], with a live preview and Cmd/Ctrl+Enter to save. Annotated icons show a small accent dot.
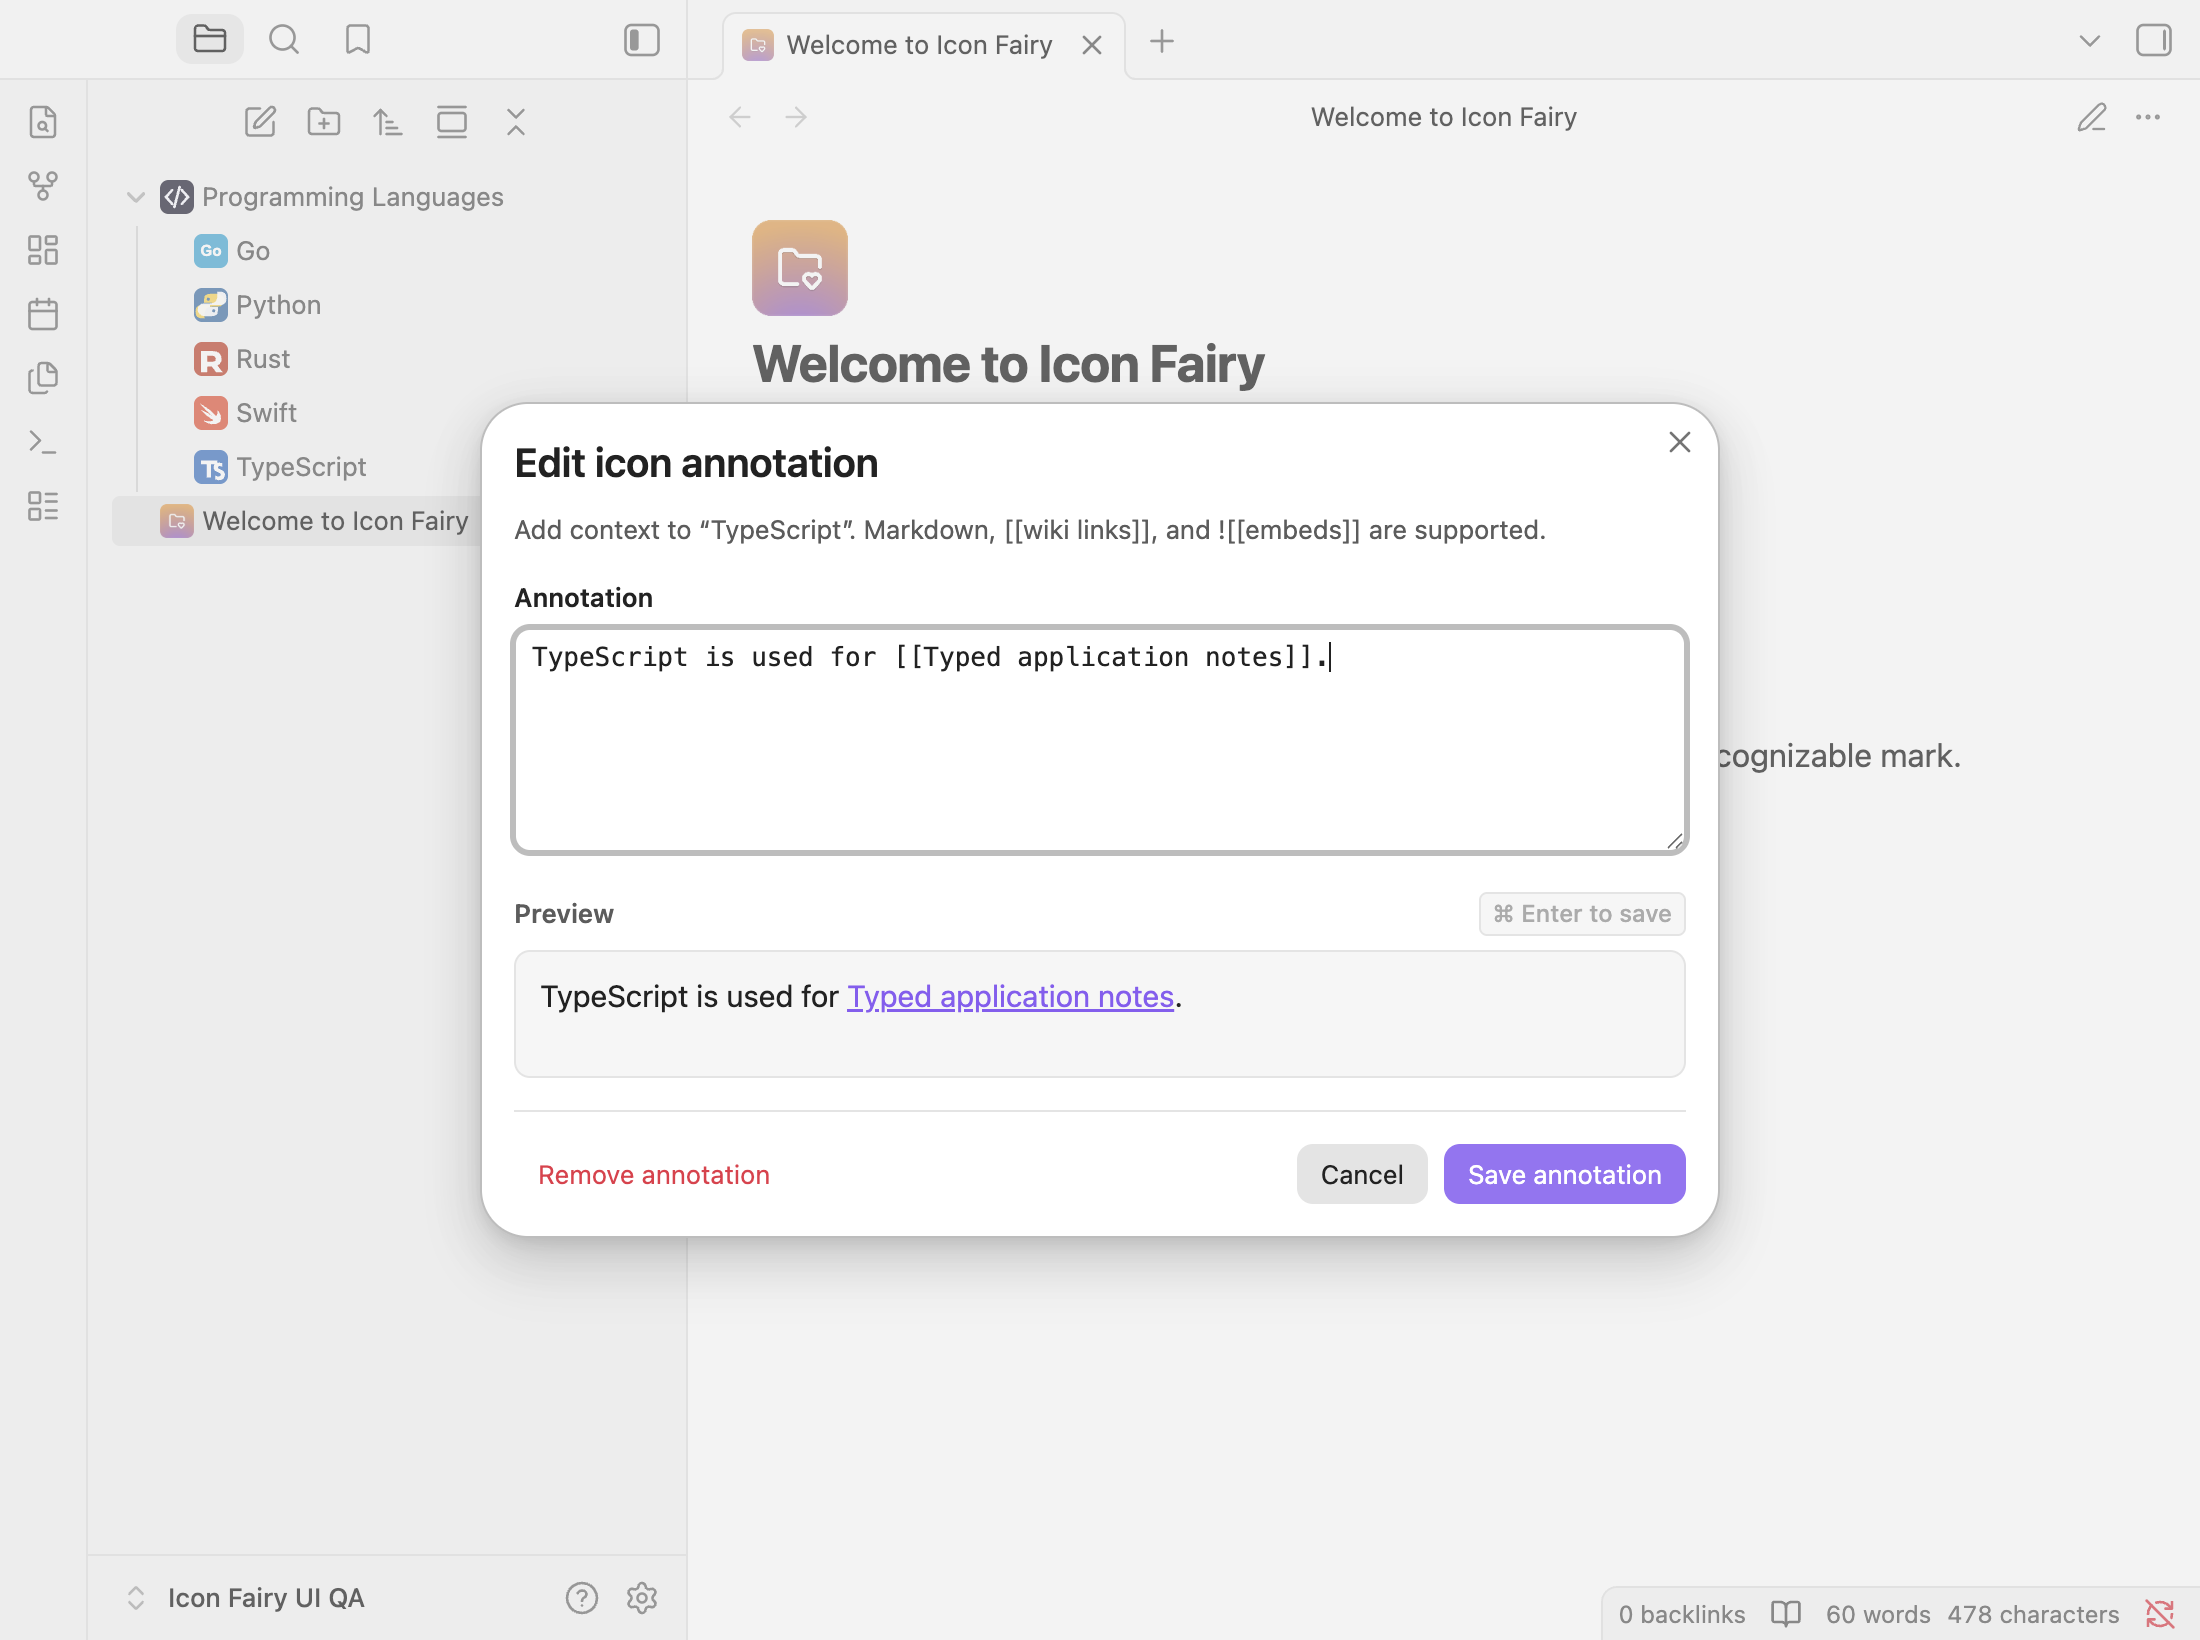
Annotations are per occurrence. Icon Fairy adds an instance suffix such as :ci-typescript~note-a1b2c3d4: so two uses of the same icon can carry different notes.
Commands
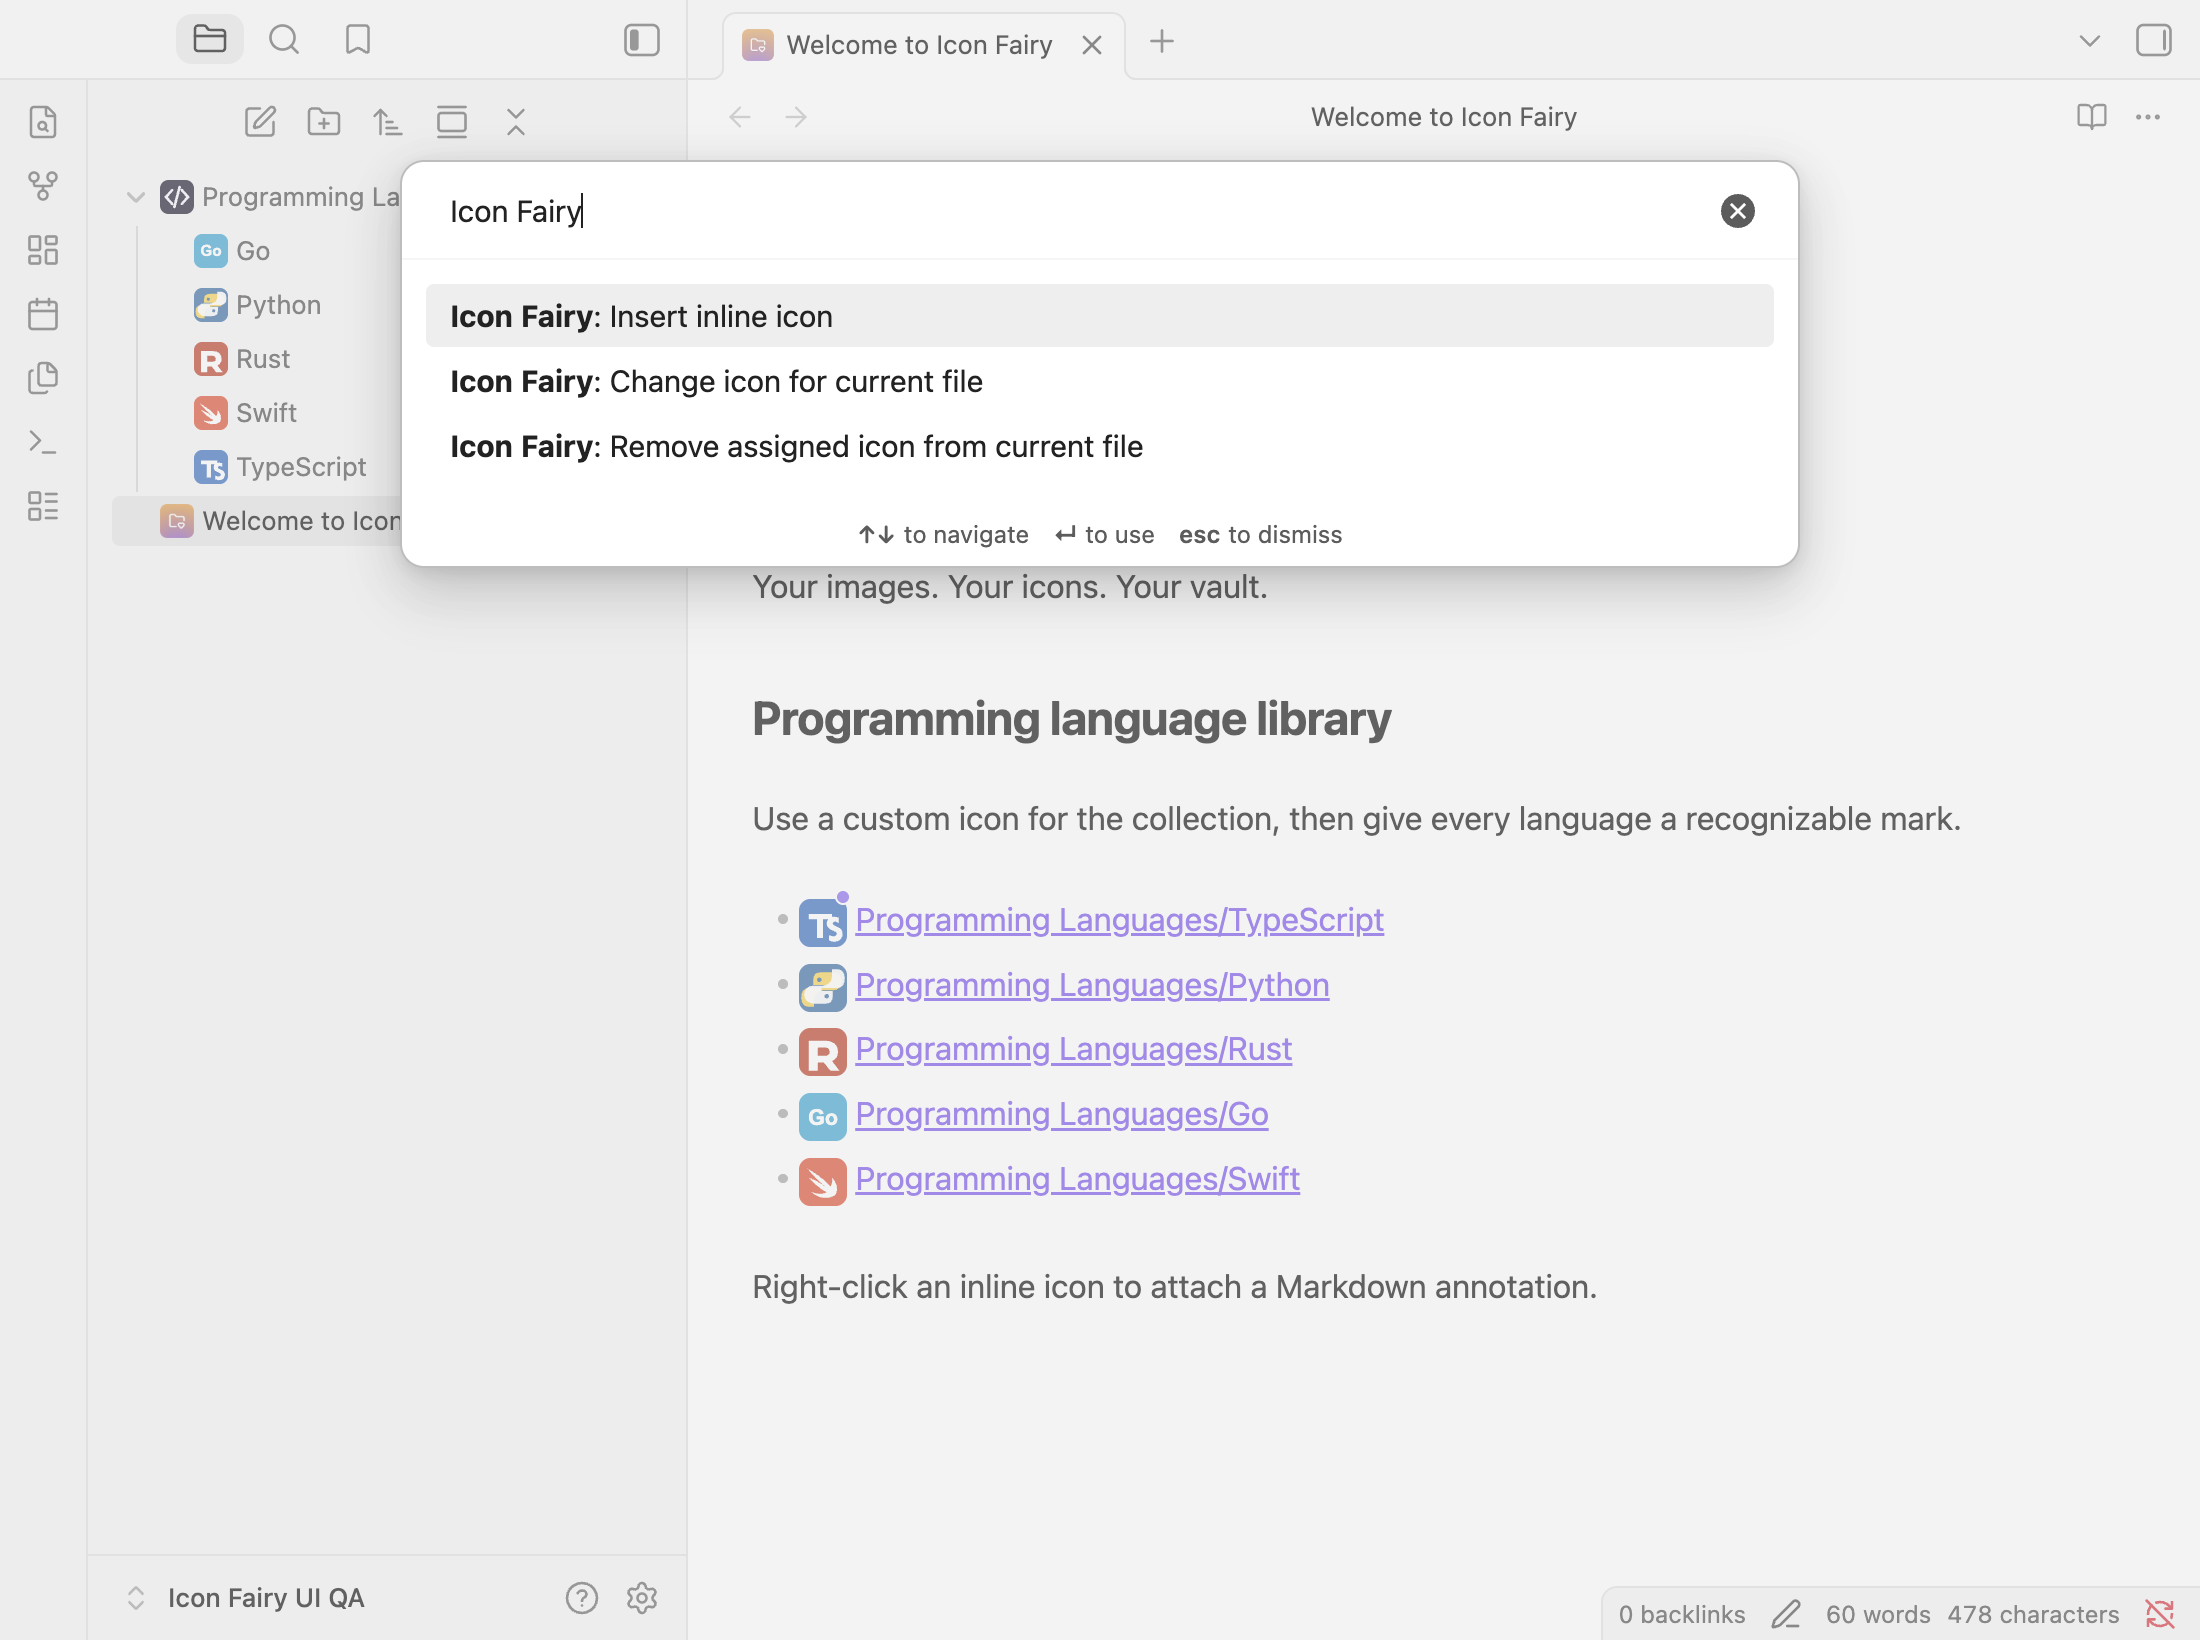
Open the command palette with Cmd/Ctrl+P and search for Icon Fairy:
- Insert inline icon
- Change icon for current file
- Remove assigned icon from current file
Settings
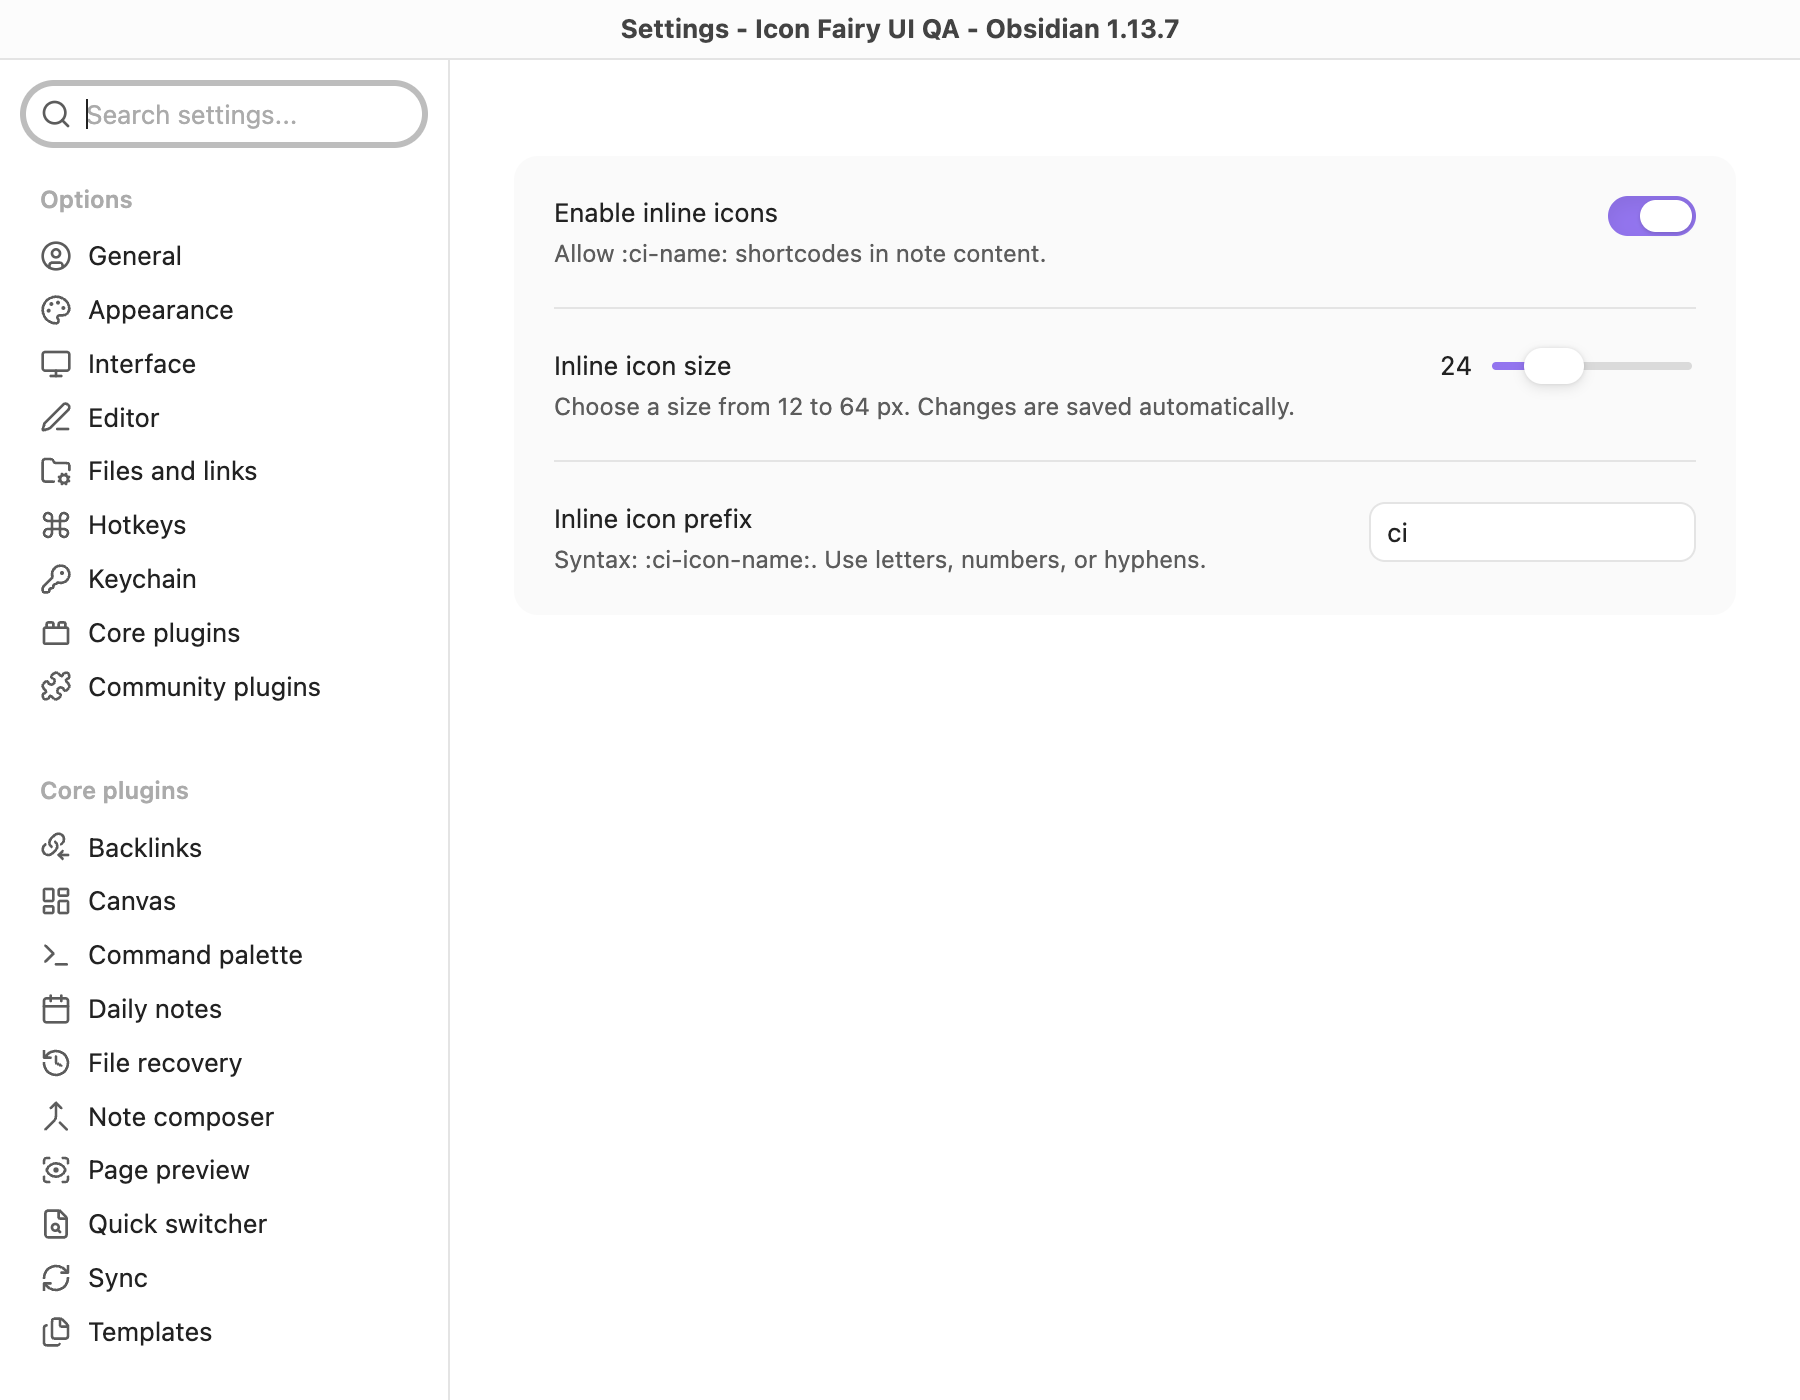
| Setting | Purpose | Default |
|---|---|---|
| Enable inline icons | Render :ci-NAME: shortcodes | Off |
| Inline icon size | Set inline icons from 12 to 64 px; saves as you move the slider | 20 px |
| Inline icon prefix | Replace ci with your own prefix; saves when the field changes | ci |
Desktop and mobile
The explorer icons, inline icons, annotations, commands, and picker adapt to Obsidian's desktop and mobile layouts. The mobile view below was captured from the sample vault in light mode with Obsidian's official desktop mobile emulation enabled.
Installation
Obsidian Community Plugins
Icon Fairy requires Obsidian 1.5.7+ and is available in Community Plugins. Its plugin ID is icon-fairy and its repository is t1seo/icon-fairy.
- Open Settings → Community plugins → Browse.
- Search for Icon Fairy.
- Select Install, then Enable.
BRAT
- Install and enable BRAT.
- Run BRAT: Add a beta plugin for testing.
- Enter
https://github.com/t1seo/icon-fairy. - Enable Icon Fairy in Settings → Community plugins.
Manual installation
- Download
main.js,manifest.json, andstyles.cssfrom the latest release. - Put them in
<vault>/.obsidian/plugins/icon-fairy/. - Reload Obsidian and enable Icon Fairy.
Version 3.0.0 is a separate installation from both Folder Fairy 2.x (icon-studio) and Custom Icon / Icon Studio 1.x (custom-icon). Icon Fairy is the same maintainer’s successor; both previous repositories and their releases remain available. Existing data, BRAT subscriptions, and hotkeys do not transfer automatically. To keep your icons, assignments, settings, and annotations, follow the migration guide using exactly one previous installation as the source. The :ci-...: note syntax stays the same.
Sample vault
The repository includes examples/programming-languages-vault, the exact structure used for the screenshots. Copy the three release files into its .obsidian/plugins/icon-fairy/ directory, then open that folder as an Obsidian vault. See the sample guide for details.
Privacy and storage
Icon Fairy makes no network requests and has no runtime dependencies. Imported icons, assignments, settings, and annotations are stored locally under your vault's .obsidian/plugins/icon-fairy/ directory.
Development and release
npm ci
npm run verify
See the contribution guide, QA evidence, UX/UI research and design decisions, release instructions, GitHub feedback and deployment diagnosis, and Community directory research.
Support
Please open an issue for bugs or feature requests.

License
For plugin developers
Search results and similarity scores are powered by semantic analysis of your plugin's README. If your plugin isn't appearing for searches you'd expect, try updating your README to clearly describe your plugin's purpose, features, and use cases.