Reading Ruler
approvedby WallWay
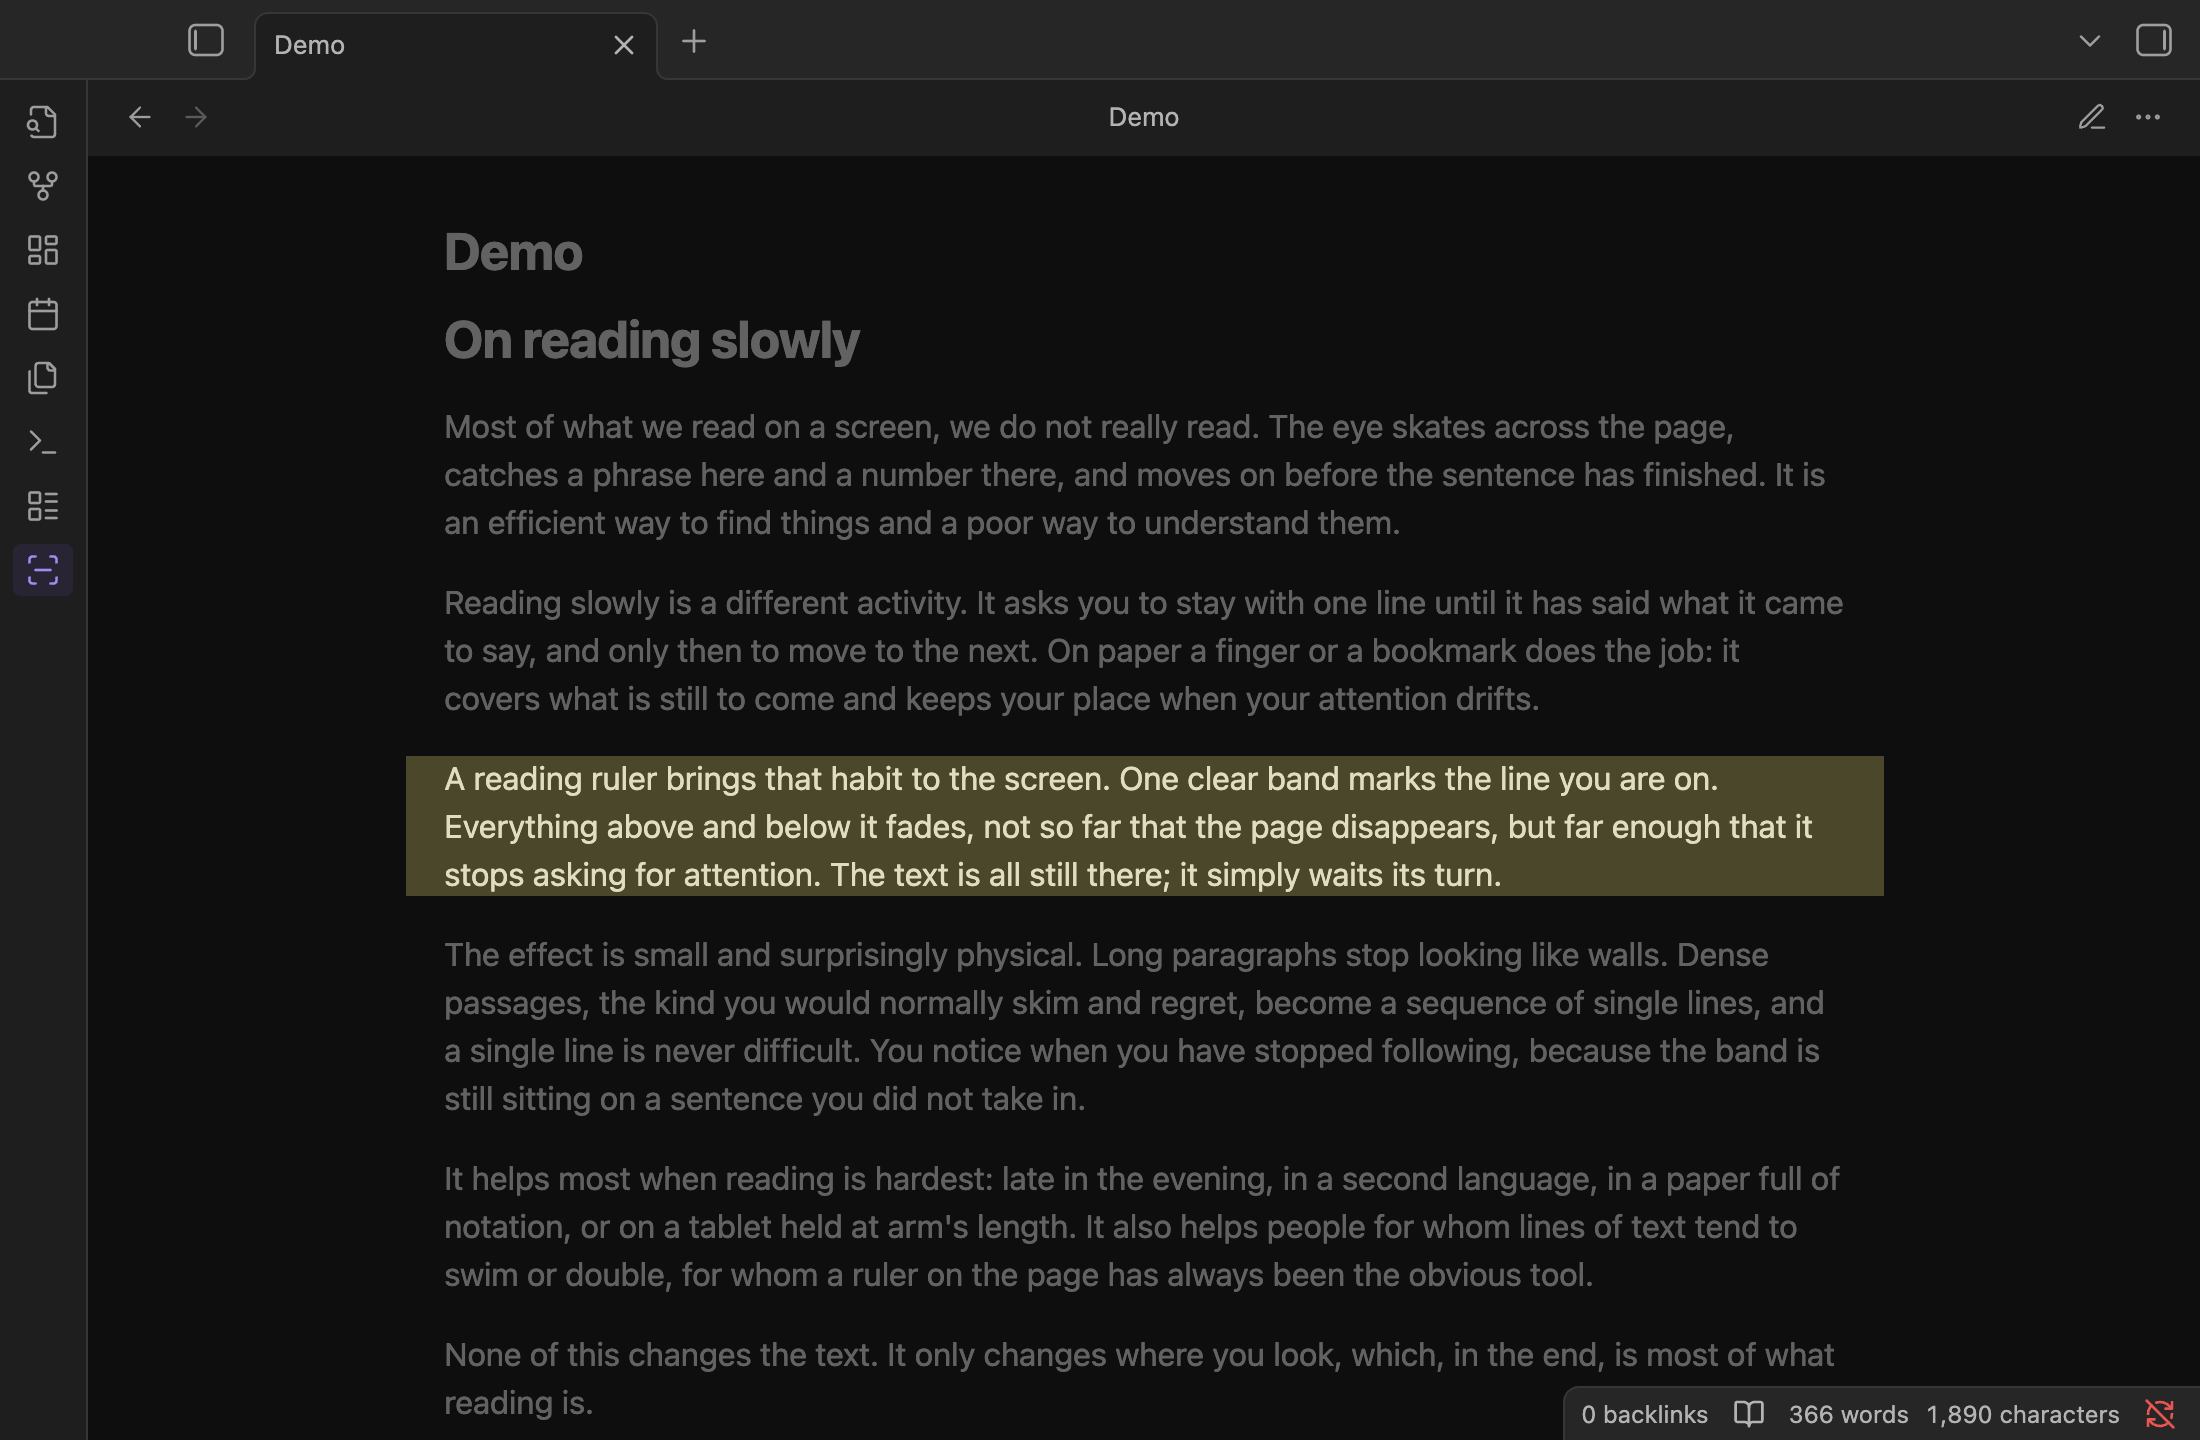
Show a Kindle-style reading ruler: a clear band at reading height while the rest of the text is dimmed. Works in Markdown notes and PDFs, on desktop and mobile. - This plugin has not been manually reviewed by Obsidian staff.
Reading Ruler
A Kindle-style reading ruler for Obsidian: a clear horizontal band at reading height while the rest of the text is dimmed. It helps you keep your place in long notes and dense PDFs.
- Works in Markdown notes (Reading view, Live Preview and Source mode) and in PDF files opened in Obsidian.
- Works on desktop and mobile (iPad, iPhone, Android).
- Never gets in the way: clicking, selecting text, scrolling, following links, typing and PDF annotations all work straight through the ruler.
- No network access, no telemetry.
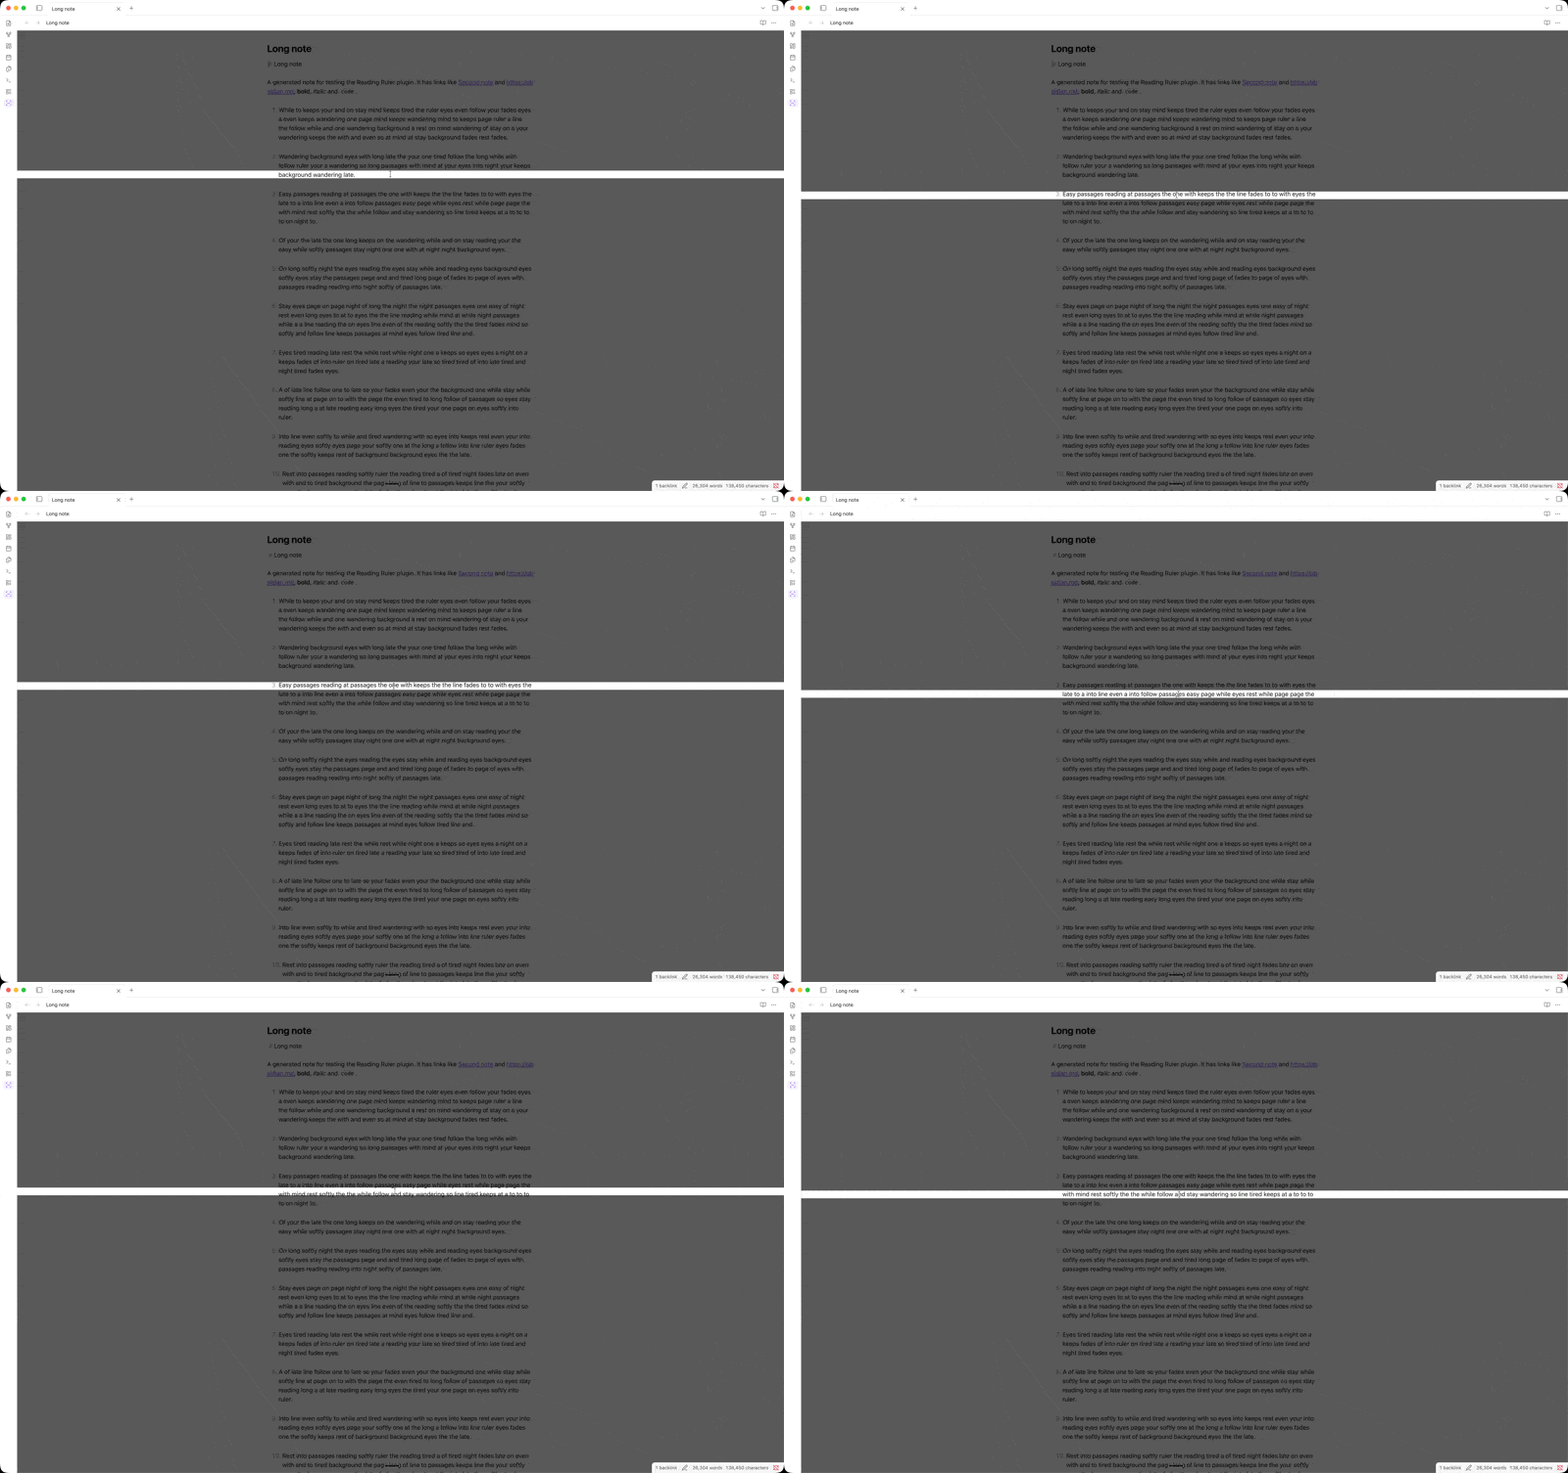
On an iPad the band follows the hovering Apple Pencil, a trackpad or mouse, or rests at a fixed height while the page scrolls underneath it.
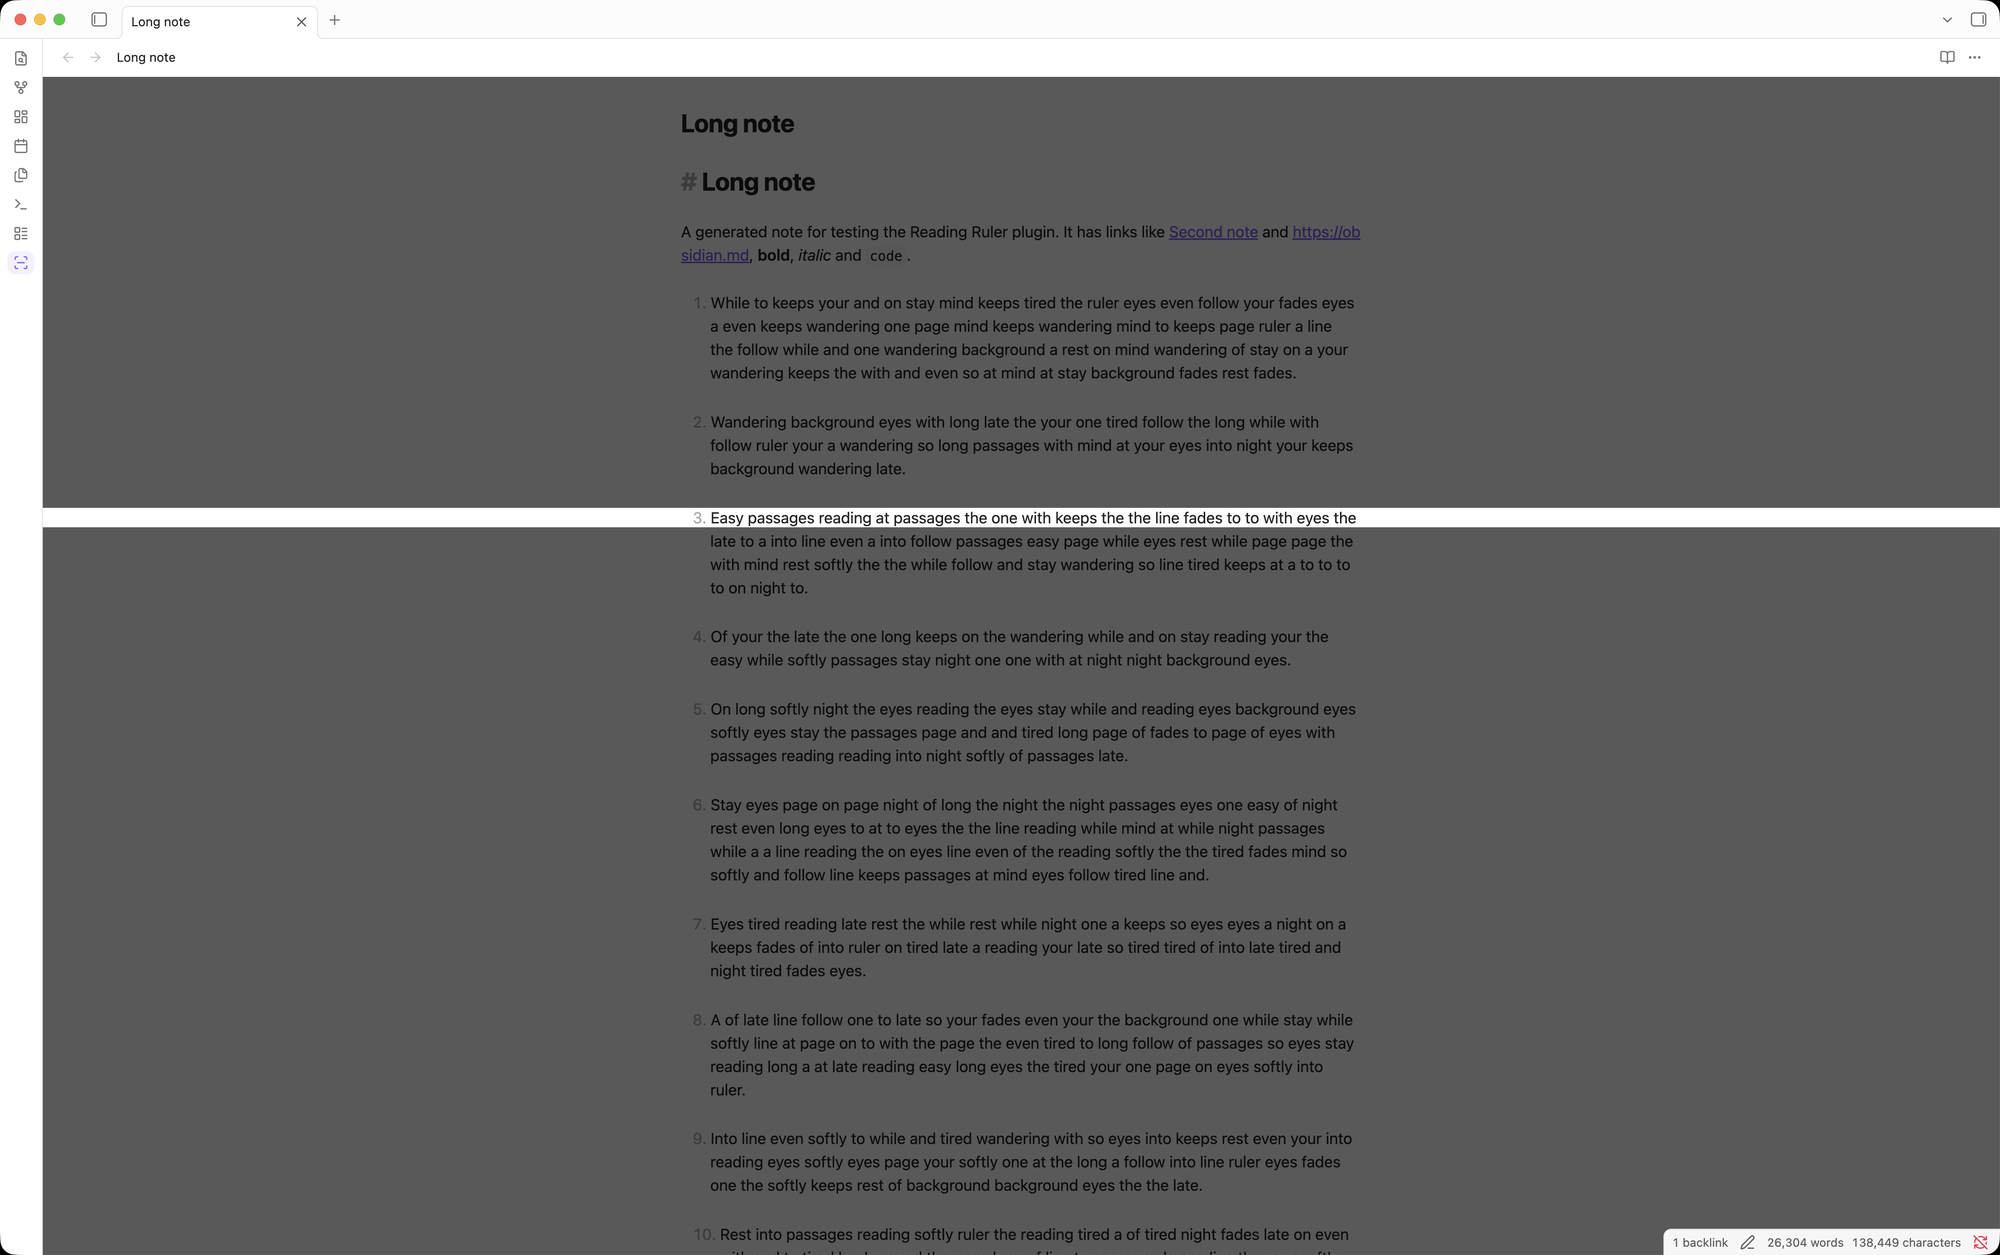
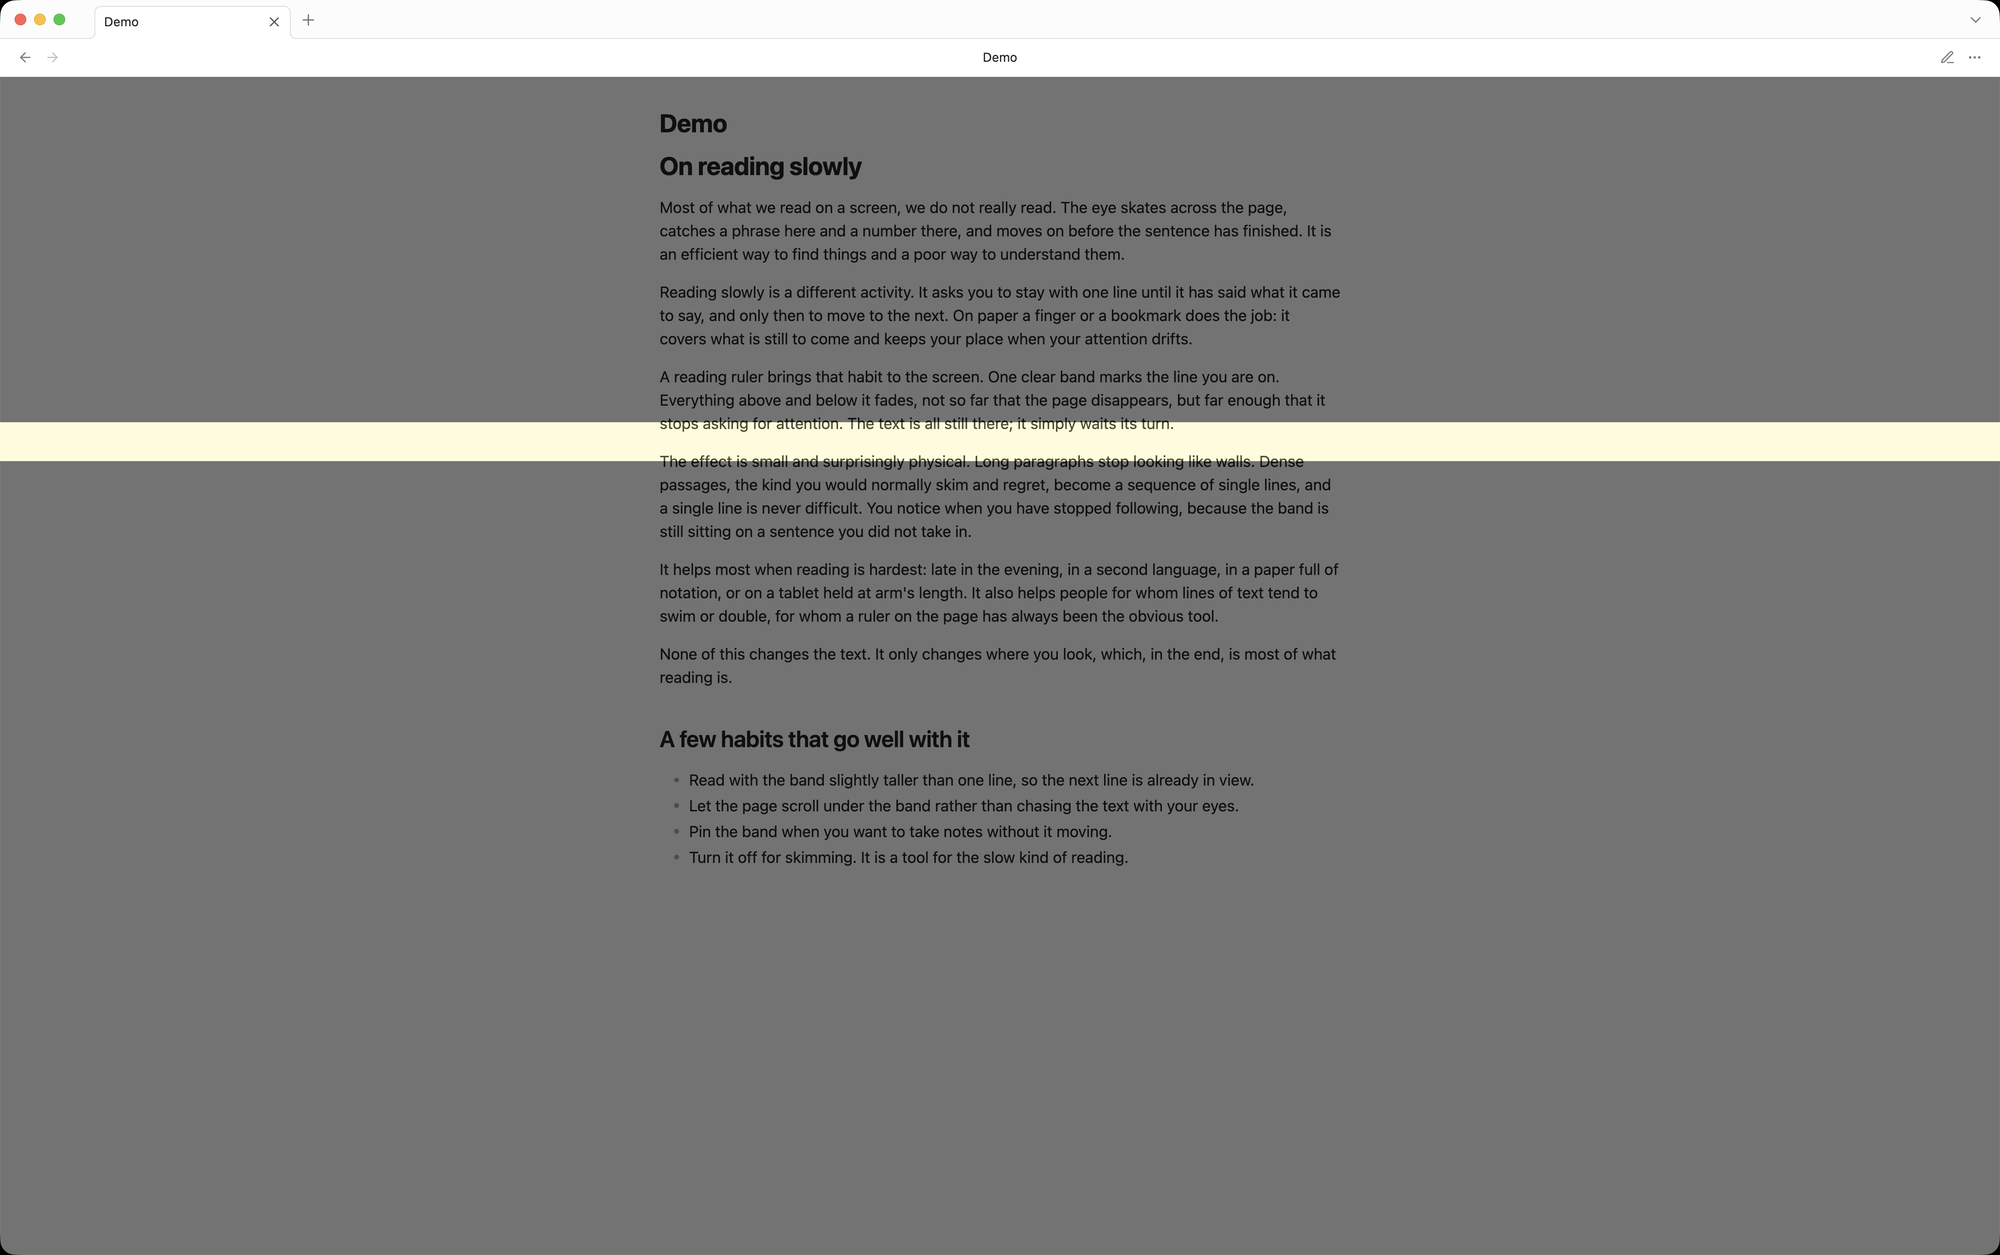
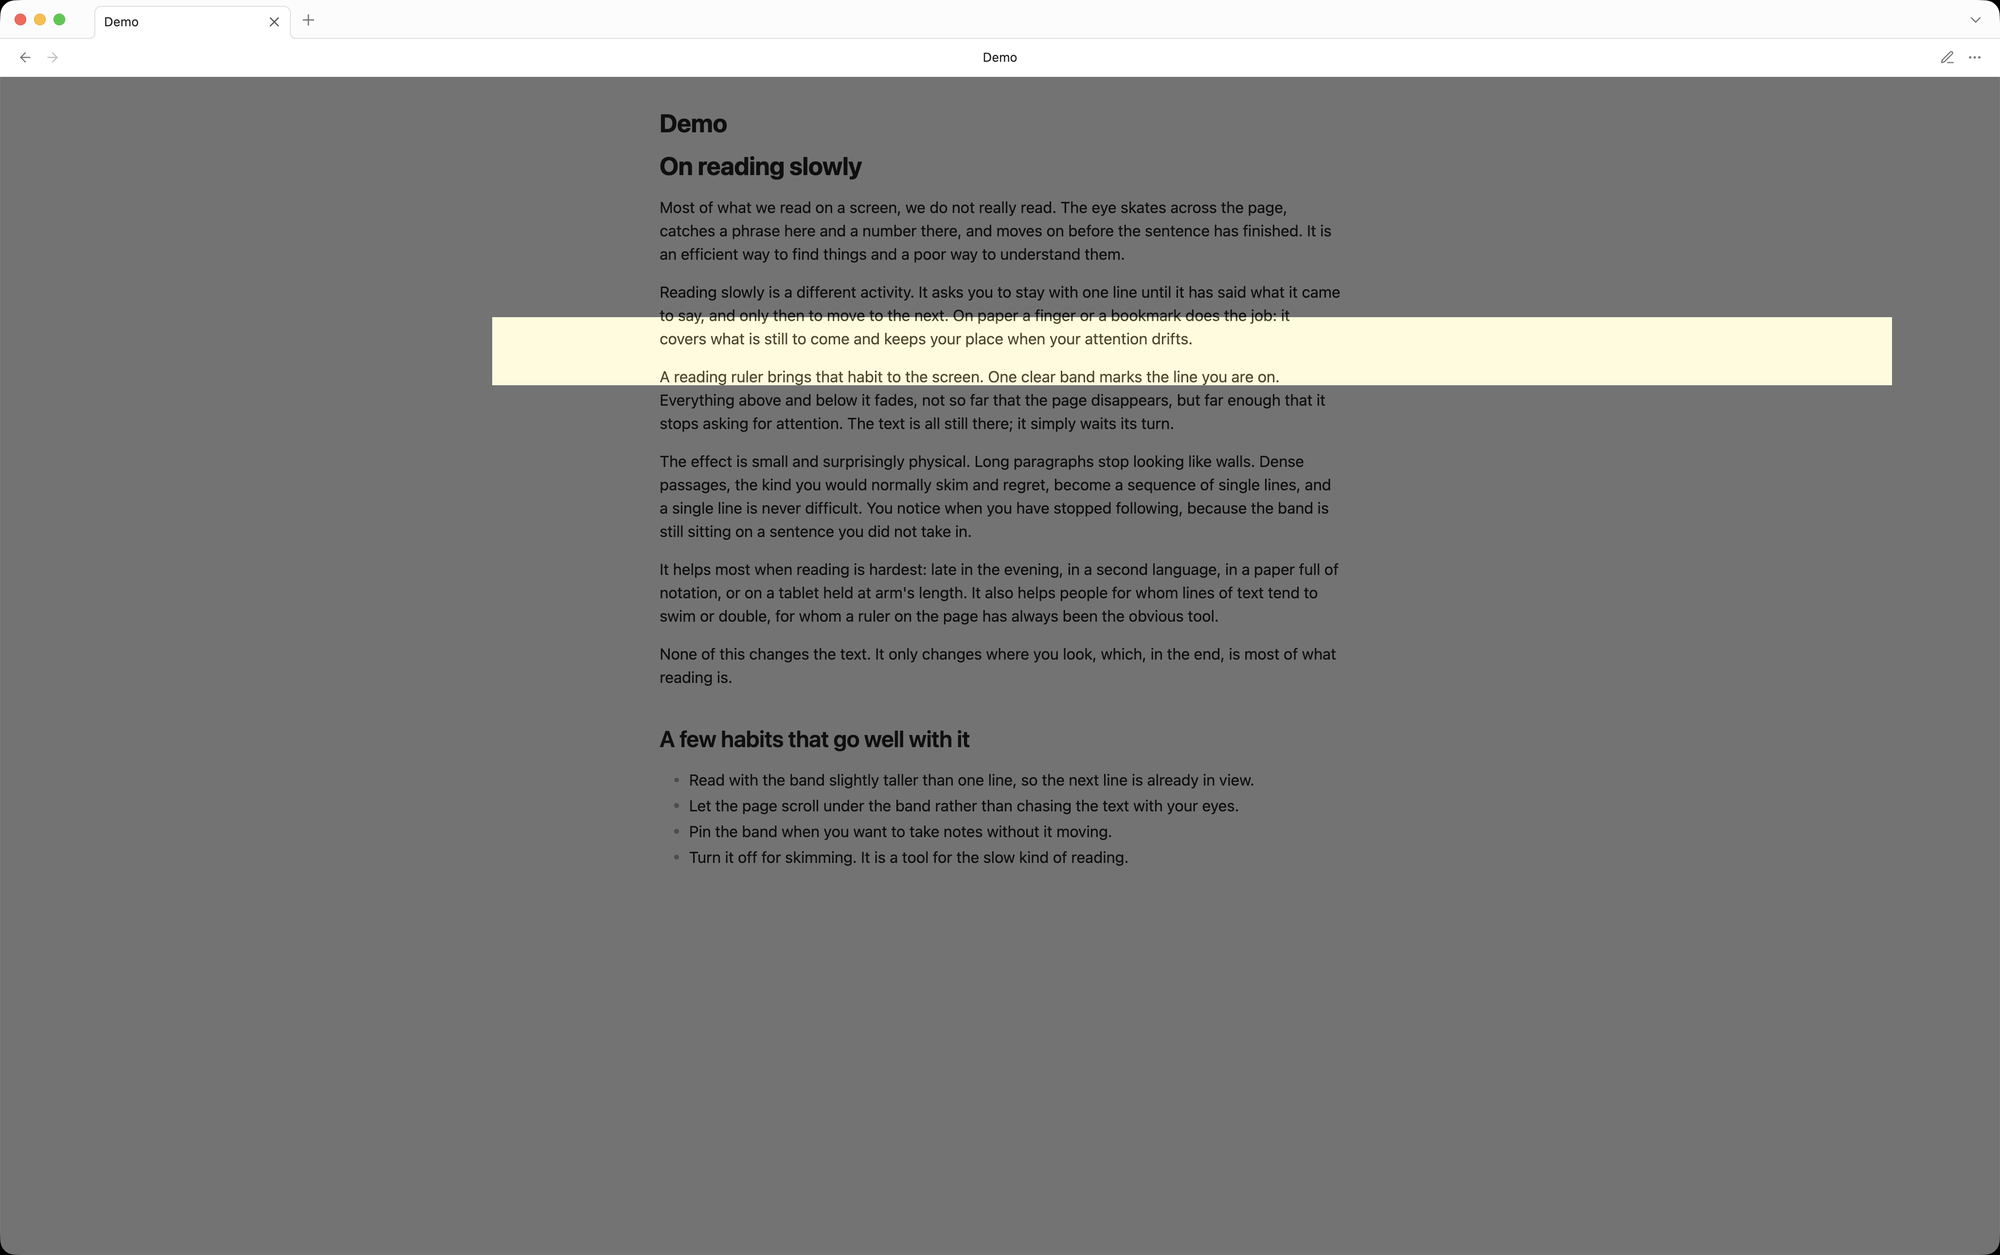
The band can be as thin as a single line or as tall as a paragraph, full width or narrower, clear or tinted like a highlighter:
 |  |
 |  |
How it behaves
| Input | What the ruler does |
|---|---|
| Mouse or trackpad (also on iPad) | The band follows the pointer vertically. |
| Apple Pencil hover | The band follows the hovering pencil. |
| Finger | The band rests at a fixed height and the text scrolls underneath it, like on a Kindle. A small handle appears at the edge of the band; drag it to move the band. The position is remembered. |
| Typing (optional) | With Follow caret while editing turned on, the band jumps to the line you are typing on. Moving the mouse takes over again. |
Every pane with a note or PDF gets its own ruler, including split panes, stacked tabs and pop-out windows. Sidebars, tab bars and toolbars are never dimmed.
Commands
All commands are available from the command palette. No hotkeys are assigned by default; add your own under Settings → Hotkeys.
| Command | What it does |
|---|---|
| Reading Ruler: Toggle ruler | Turns the ruler on or off. Turning it off also unpins it. |
| Reading Ruler: Pin or unpin ruler | Freezes the band at its current height, or releases it again. While pinned the touch handle is hidden, so the band cannot be moved by accident. |
| Reading Ruler: Increase band height | Makes the band 10 px taller (up to 300 px). |
| Reading Ruler: Decrease band height | Makes the band 10 px shorter (down to 20 px). |
Pin and resize only appear while the ruler is on. There is also a ribbon icon that toggles the ruler.
Tip for mobile: add the commands to the mobile toolbar under Settings → Toolbar. The toolbar is only visible while editing; in Reading view and PDFs use the ribbon icon or the command palette.
Settings
| Setting | Range | Default |
|---|---|---|
| Show ruler | on / off | off |
| Band height | 20–300 px | 60 px |
| Dim strength | 10–90 % | 50 % |
| Full width | on / off | on |
| Width (when not full width) | 30–100 % | 100 % |
| Tint color | yellow, blue, green, pink, gray or custom | yellow |
| Tint strength | 0–40 % (0 = fully clear band) | 0 % |
| Fixed position | 0–100 % from the top | 35 % |
| Follow caret while editing | on / off | off |
| Show in Markdown notes | on / off | on |
| Show in PDF files | on / off | on |
Changes are visible on the ruler immediately. The on/off state and all settings are remembered between sessions.
Installation
From the community plugin list
Once the plugin has been accepted: Settings → Community plugins → Browse, search for Reading Ruler, install and enable.
With BRAT (beta testing, easiest on iPad)
- Install and enable the BRAT plugin.
- Run the command BRAT: Add a beta plugin for testing.
- Enter
driekeerJ/obsidian-reading-rulerand confirm. - Enable Reading Ruler under Settings → Community plugins.
Manually
- Download
main.js,manifest.jsonandstyles.cssfrom the latest release. - Copy them into
<your vault>/.obsidian/plugins/reading-ruler/. - Restart Obsidian and enable Reading Ruler under Settings → Community plugins.
Development
npm install
npm run dev      # watch build
npm run build    # type-check and production build
npm test         # unit tests (Vitest)
npm run lint     # ESLint with the Obsidian plugin rules
All arithmetic and rules (band geometry, settings clamping, on/off and pin rules, input arbitration, colour conversion) live in src/core/. Those modules have no Obsidian or DOM dependency and are developed test-first. src/overlay.ts, src/manager.ts and src/caret.ts are a thin layer that forwards raw input to the core and writes the result as a CSS transform.
To test in a vault, symlink main.js, manifest.json and styles.css into <vault>/.obsidian/plugins/reading-ruler/.
Manual test checklist
Desktop
- Toggle the ruler from the command palette and from the ribbon icon; the ribbon icon shows the active state.
- The band follows the mouse in Reading view, Live Preview and Source mode.
- Text can be selected, links followed, checkboxes ticked and text typed through the band and through the dimmed area.
- Scrolling a long note stays smooth; the band does not move while scrolling with the wheel.
- Open a PDF: the band follows the mouse, the PDF toolbar is not dimmed, text selection and annotations work, scrolling a large PDF stays smooth.
- Split panes and stacked tabs: each pane has its own band; sidebars and tab bars are never dimmed.
- Move a pane to a new window: the ruler works there as well.
- Pin: the band stays put while the mouse moves; unpin releases it. Turning the ruler off and on again leaves it unpinned.
- Increase and decrease band height work, stop at 20 and 300 px, and do nothing while the ruler is off.
- Every setting changes the ruler immediately; settings survive a restart.
- Custom width: the band follows the pointer horizontally and keeps its width at the left and right edges.
- Follow caret while editing: the band moves to the caret line while typing and when jumping through the note; moving the mouse takes over.
- Light theme, dark theme and at least one community theme.
- With Reduce motion enabled in the OS, the ruler appears without a fade.
- Disable the plugin: no ruler, handle or dimming is left behind.
iPad (also iPhone and Android)
- Toggle the ruler from the ribbon menu and from the command palette.
- Finger: the band rests at the fixed height while the note scrolls underneath. Scrolling with momentum stays smooth.
- The handle is visible at the edge of the band. Dragging it moves the band, and the page does not scroll while dragging.
- After dragging, the new height is used in other notes and PDFs too, and survives restarting the app.
- Tapping links, ticking checkboxes, selecting text (long press) and placing the caret all work through the band and through the dimmed area.
- The on-screen keyboard opens and closes normally; tapping the handle does not close the keyboard or move the caret.
- Pin hides the handle; unpin shows it again.
- PDF: scrolling, pinch zoom, text selection and highlighting work through the ruler; the PDF toolbar is not dimmed.
- Trackpad or mouse (Magic Keyboard): the band follows the pointer; touching the screen returns it to the fixed height.
- Apple Pencil hover (supported iPads): the band follows the hovering pencil. Writing or annotating with the pencil still works.
- Rotate the device and use Split View or Stage Manager: the band keeps its relative height and spans the pane.
- Commands added to the mobile toolbar work.
- Long notes and large PDFs stay smooth with the ruler on; no noticeable battery or heat impact.
Releasing
- Update
minAppVersioninmanifest.jsonif needed. - Run
npm version patch(orminor/major). This updatesmanifest.json,package.jsonandversions.jsonand creates a tag without avprefix. If your npm is configured withignore-scripts=true, the script that updatesmanifest.jsonandversions.jsonis skipped; usenpm version patch --ignore-scripts=falseinstead. The release workflow refuses a tag that does not matchmanifest.json. - Push the commit and the tag:
git push && git push --tags. - The GitHub Actions workflow builds the plugin and creates a draft release with
main.js,manifest.jsonandstyles.css. Review it and publish.
Submitting to the community directory
Plugins are submitted through the Obsidian Community directory, not through a pull request. See Submit your plugin for the official walkthrough.
- Make sure the repository is public and has
README.md,LICENSEandmanifest.jsonin the root of the default branch. The directory reads themanifest.jsonat the HEAD of that branch. - Publish a GitHub release whose tag equals the
versioninmanifest.json(for example1.0.0, without av), withmain.js,manifest.jsonandstyles.cssattached as individual files. It has to be a normal release, not a draft. - Go to community.obsidian.md and sign in with your Obsidian account.
- On your profile, under GitHub, select Connect. This gives the directory read-only access to verify that you own the repository.
- Open Plugins in the sidebar, select New plugin and enter
https://github.com/driekeerJ/obsidian-reading-ruler. Choose yourself as the owner, agree to the developer policies and select Submit. - The plugin is reviewed automatically and the directory lists anything that has to be corrected. Fix it in the repository, publish a new release with an incremented version, and the directory picks it up.
- Once it is published, announce it if you like in the forum's Share & showcase category and in
#updateson Discord.
After the first submission, new versions only need a GitHub release; nothing has to be submitted again.
Privacy
Reading Ruler makes no network requests, collects no data and only stores its own settings in the plugin's data.json.
License
For plugin developers
Search results and similarity scores are powered by semantic analysis of your plugin's README. If your plugin isn't appearing for searches you'd expect, try updating your README to clearly describe your plugin's purpose, features, and use cases.