Miller Columns (Horizontal Tree)
approvedby Marcos Horno García
Convert nested markdown lists into interactive, horizontal column views for focused task management. - This plugin has not been manually reviewed by Obsidian staff.
Miller Columns (Horizontal Tree)
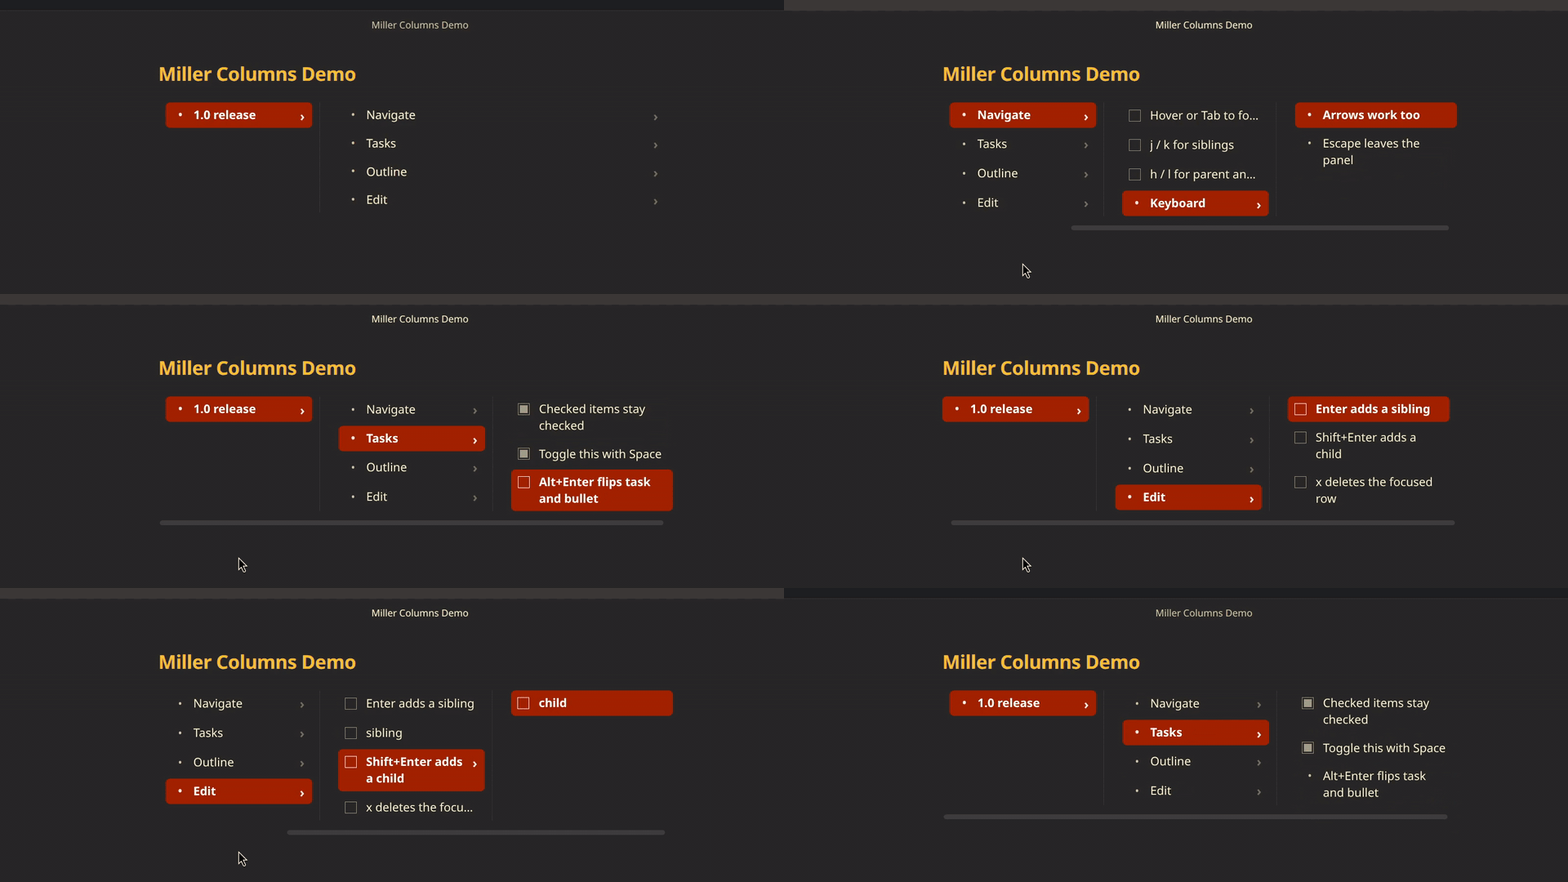
Turns a nested markdown list into Finder-style Miller columns: one column per depth, so you can walk a tree without scrolling a long outline.
Use
Add #miller-view anywhere in a - list (task items, plain bullets, or both). In reading view or live preview, that list becomes columns.
- Project #miller-view
    - Design
        - Wireframes
        - Tokens
    - Build
        - Parser
        - Renderer
Click a row to open its children in the next column. The last column grows and wraps as a reading pane; parent columns stay compact. Nodes with children show a chevron.
Checkboxes write back to the note. There is no in-place rename yet — edit the line in source.
Settings → Miller Columns (Horizontal Tree) has two options: vim hjkl (on by default; arrows always work) and show chevrons on items with children.
Keyboard
Hover the panel, click it, or Tab into it. Keys do nothing until the panel is active. Escape or a click outside releases it.
| Key | Action |
|---|---|
↑ ↓ / k j | Previous / next sibling |
← → / h l | Parent / first child |
Space | Toggle the focused checkbox |
Enter | Insert a sibling after the focused item |
Shift+Enter | Insert a child (creates a new column on a leaf) |
Alt+Enter or Ctrl+Enter | Flip task ↔ plain bullet |
x, Delete, or Ctrl/Cmd+Backspace | Delete the focused item and its subtree |
Escape | Leave the panel |
New items match the focused row’s kind (task or plain) and its indent (spaces or tabs).
Limits
- Only
-lists.*bullets and numbered lists stay as normal markdown. - Rename in the source note. Insert, delete, toggle, and kind flip work in the columns.
- In edit/source mode, insert rewrites the file as one editor change; undo after insert is coarser than after a checkbox toggle or delete.
- Works in reading view and live preview. Source view is the underlying list.
Install
Until it is in the community plugin directory, copy these three files into:
Vault/.obsidian/plugins/miller-columns/
main.jsmanifest.jsonstyles.css
Enable Miller Columns (Horizontal Tree) under Settings → Community plugins. After a manual copy or a BRAT install, reload the app if the plugin does not appear in that list (Command palette → Reload app without saving). Then reopen the note or switch to reading view so #miller-view is processed.
Develop
npm install
npm run dev      # watch build
npm run build    # type-check + production bundle
npm run test     # Vitest
npm run lint
npm run deploy:vault builds, then copies the three release files into the configured Syncthing vault plugin folder.
License
MIT — Copyright (c) 2026 marc-hg
For plugin developers
Search results and similarity scores are powered by semantic analysis of your plugin's README. If your plugin isn't appearing for searches you'd expect, try updating your README to clearly describe your plugin's purpose, features, and use cases.