Ultimate Todoist Sync: Reborn
pendingby Eric Van Johnson
Sync tasks between Todoist and your vault.
Ultimate Todoist Sync: Reborn
This is a fork of Ultimate Todoist Sync for Obsidian by HeroBlackInk.
The vast majority of the hard work creating this plugin belongs to the original author and maintainer. This fork exists because the original project appeared to no longer be actively maintained, and a breaking API change by Todoist (shutting down the legacy REST v2 / Sync v9 APIs on February 10, 2026) caused the plugin's API token to stop working entirely. Ultimate Todoist Sync: Reborn restores full functionality by migrating to the new Todoist API.
The Ultimate Todoist Sync: Reborn plugin automatically creates tasks in Todoist and synchronizes task state between Obsidian and Todoist.
Demo
Usage
Settings page
Features
| Feature | Sync from Obsidian to Todoist | Sync from Todoist to Obsidian | Description |
|---|---|---|---|
| Add task | ✅ | 🔜 | |
| Delete task | ✅ | 🔜 | |
| Modify task content | ✅ | ✅ | |
| Modify task due date | ✅ | ✅ | |
| Modify task description | 🔜 | 🔜 | |
| Modify task labels/tags | ✅ | 🔜 | |
| Mark task as completed | ✅ | ✅ | |
| Mark task as uncompleted | ✅ | ✅ | |
| Modify project | 🔜 | 🔜 | |
| Modify section | 🔜 | 🔜 | |
| Modify priority | ✅ | 🔜 | Currently, task priority only support one-way synchronization from Todoist to Obsidian. |
| Add reminder | 🔜 | 🔜 | |
| Move tasks between files | 🔜 | 🔜 | |
| Added-at date | 🔜 | 🔜 | |
| Completed-at date | 🔜 | 🔜 | |
| Task notes | 🔜 | ✅ | Currently, task notes/comments only support one-way synchronization from Todoist to Obsidian. |
Installation
From within Obsidian
From Obsidian v1.3.5+, you can activate this plugin within Obsidian by doing the following:
- Open Obsidian's
Settingswindow - Select the
Community pluginstab on the left - Make sure
Restricted modeis off - Click
Browsenext toCommunity Plugins - Search for and click on
Ultimate Todoist Sync: Reborn - Click
Install - Once installed, close the
Community Pluginswindow - Under
Installed Plugins, activate theUltimate Todoist Sync: Rebornplugin
You can update the plugin following the same procedure, clicking Update instead of Install
Manually
If you would rather install the plugin manually, you can do the following:
- Download the latest release of the plugin from the Releases page.
- Extract the downloaded zip file and copy the entire folder to your Obsidian plugins directory.
- Enable the plugin in the Obsidian settings.
Configuration
- Open Obsidian's
Settingswindow - Select the
Community pluginstab on the left - Under
Installed plugins, click the gear icon next to theUltimate Todoist Sync: Rebornplugin - Enter your Todoist API token
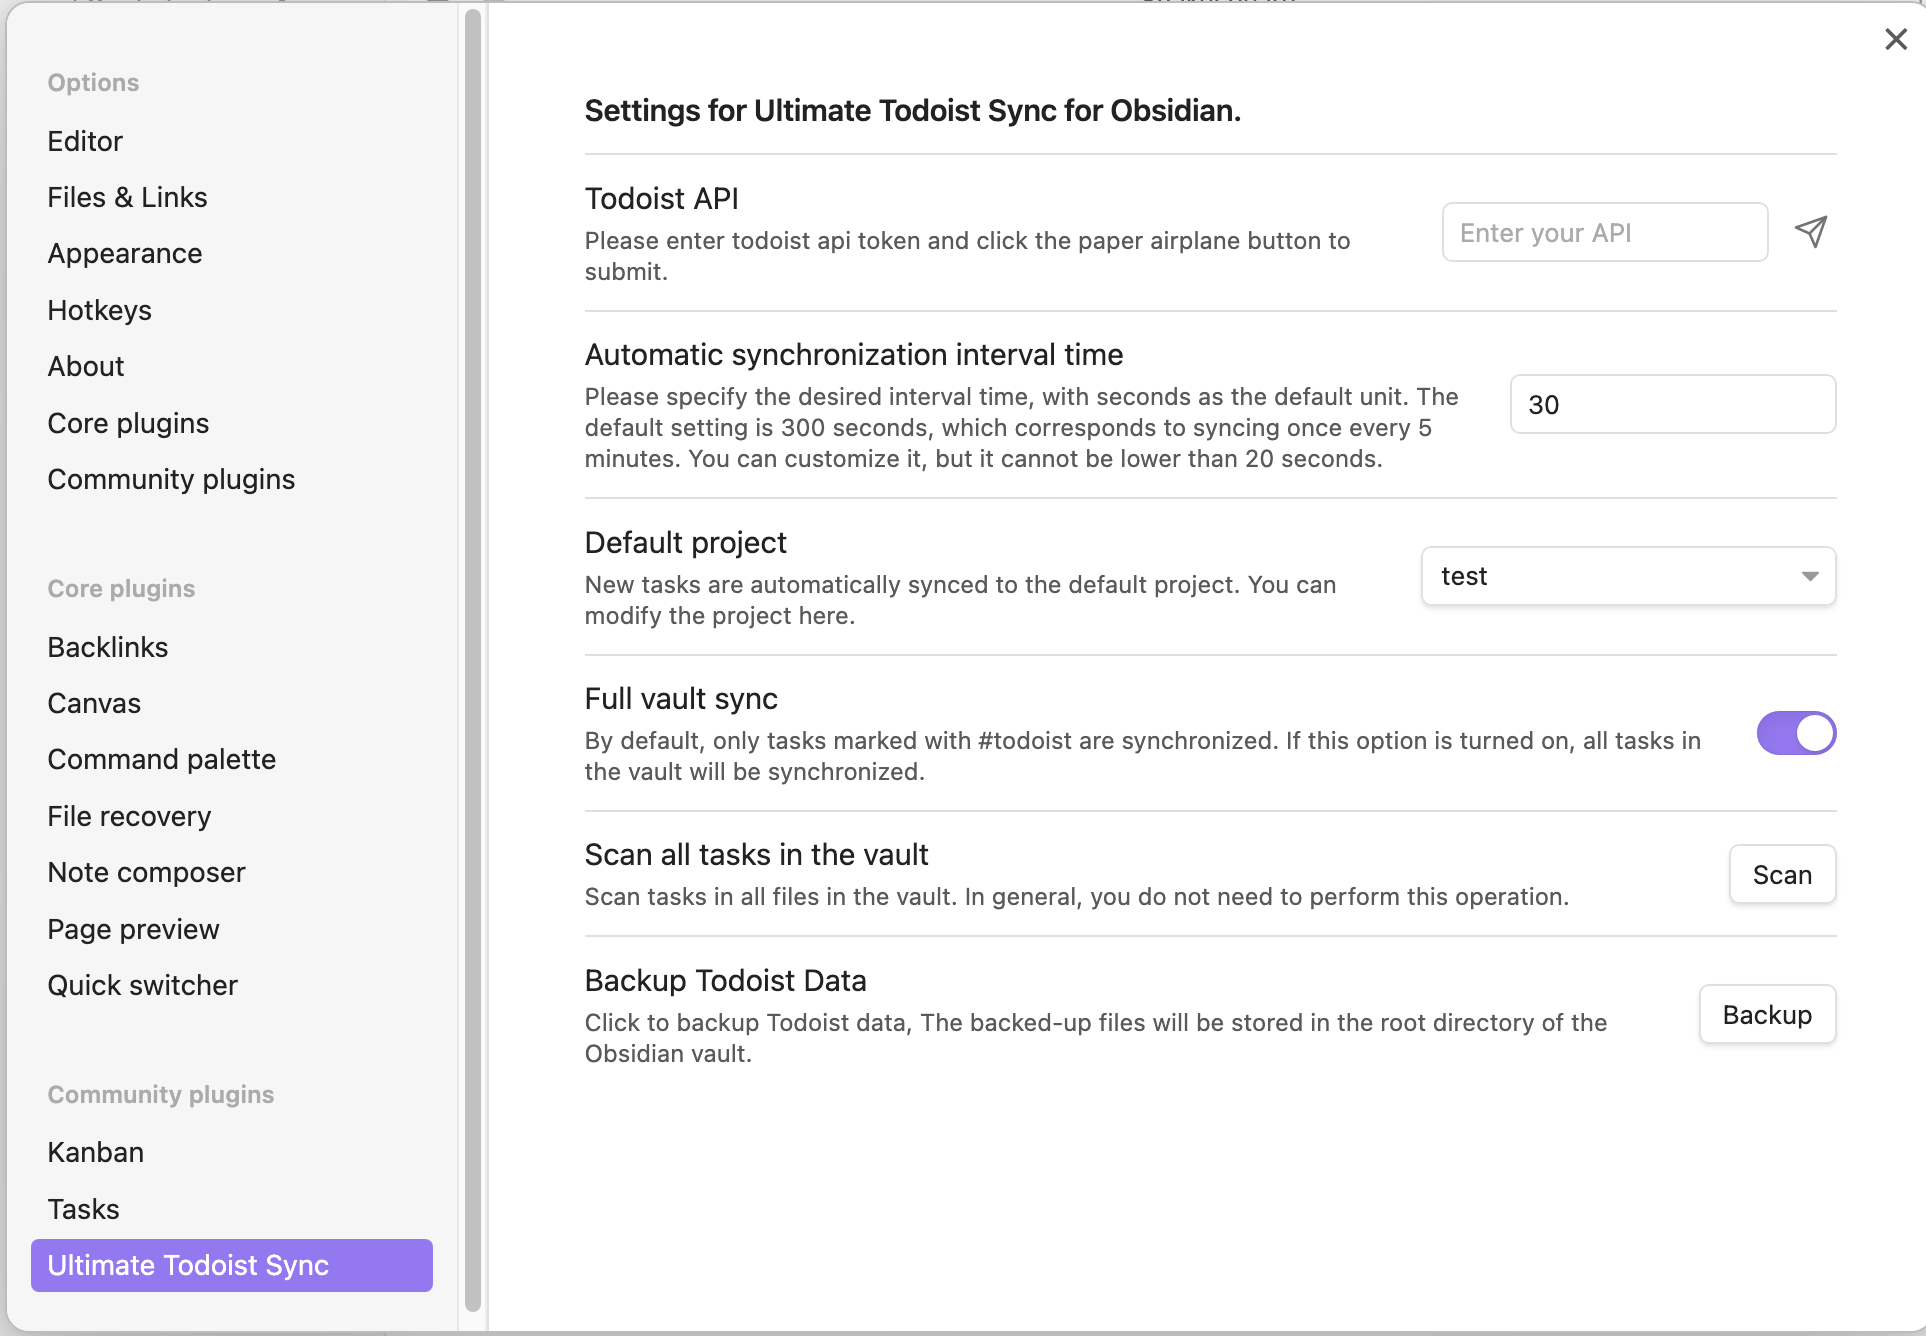
Settings
- Automatic synchronization interval time The time interval for automatic synchronization is set to 300 seconds by default, which means it runs every 5 minutes. You can modify it yourself.
- Default project New tasks will be added to the default project, and you can change the default project in the settings.
- Full vault sync
By enabling this option, the plugin will automatically add
#todoistto all tasks, which will modify all files in the vault.
Usage
Task format
| Syntax | Description | Example |
|---|---|---|
| #todoist | Tasks marked with #todoist will be added to Todoist, while tasks without the #todoist tag will not be processed.If you have enabled Full vault sync in the settings, #todoist will be added automatically. | - [ ] task #todoist |
| 📅YYYY-MM-DD | The date format is 📅YYYY-MM-DD, indicating the due date of a task. | - [ ] task content 📅2025-02-05 #todoist Supports the following calendar emojis.📅📆🗓🗓️ |
| #projectTag | New tasks will be added to the default project(For example, inbox .), and you can change the default project in the settings or use a tag with the same name to specify a particular project. | - [ ] taskA #todoist will be added to inbox.- [ ] taskB #tag #testProject #todoist will be added to testProject. |
| #tag | Note that all tags without a project of the same name are treated as normal tags | - [ ] task #tagA #tagB #tagC #todoist |
!!<number> | The priority of the task (a number between 1 and 4, 4 for very urgent and 1 for natural). Note: Keep in mind that very urgent is the priority 1 on clients. So, the priority 1 in the client corresponds to the number 4 here (Because that's how the official API of Todoist is designed.). | - [ ] task !!4 #todoist |
Set a default project for each file separately
The default project in the setting applies to all files. You can set a separate default project for each file using command.

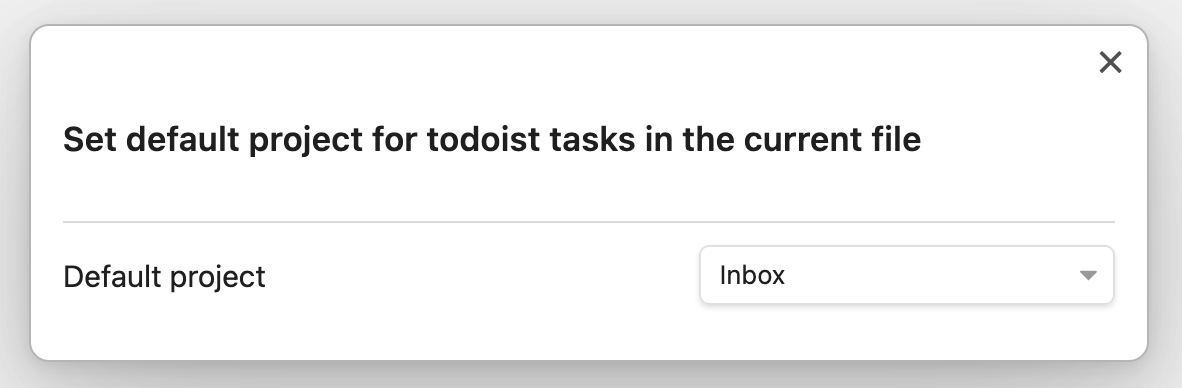
You can see the current file's default project in the status bar at the bottom right corner.

Network Usage
This plugin communicates with the Todoist API to synchronize tasks. It sends your Todoist API token (stored locally in your vault settings) with each request. No data is sent to any other service.
Disclaimer
This plugin is for learning purposes only. The author makes no representations or warranties of any kind, express or implied, about the accuracy, completeness, or usefulness of this plugin and shall not be liable for any losses or damages resulting from the use of this plugin.
The author shall not be responsible for any loss or damage, including but not limited to data loss, system crashes, computer damage, or any other form of loss arising from software problems or errors. Users assume all risks and are solely responsible for any consequences resulting from the use of this product.
By using this plugin, you agree to be bound by all the terms of this disclaimer. If you have any questions, please contact the author.
Contributing
Contributions are welcome! If you'd like to contribute to the plugin, please feel free to submit a pull request.
License
This plugin is released under the GNU GPLv3 License.
For plugin developers
Search results and similarity scores are powered by semantic analysis of your plugin's README. If your plugin isn't appearing for searches you'd expect, try updating your README to clearly describe your plugin's purpose, features, and use cases.