Video Notes
approvedby rekby
This plugin has not been manually reviewed by Obsidian staff. Annotate local videos in your vault with human-readable timestamp links, frame screenshots, and playback control.
Video Notes
An offline-only Obsidian plugin for taking notes on videos that already live inside your vault. Inspired by media-extended, minus every online feature — no YouTube, no streaming, no network calls.
Features
- Dedicated video panel that plays any video file from your vault.
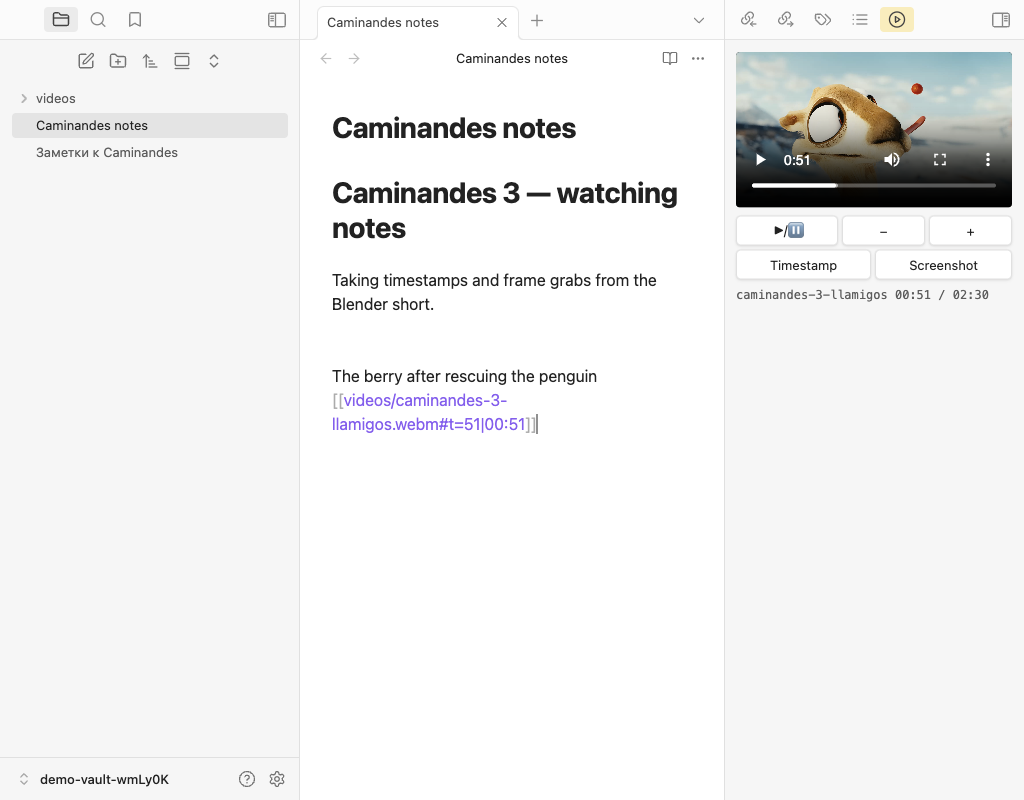
- Insert a human-readable timestamp link like
[[lecture.mp4#t=736|12:16]]at the current playback position. - Clicking such a link opens the panel and jumps the player to that exact second (and pauses, so you can inspect the frame).
- Take a screenshot of the current frame, save it as PNG to your configured attachments folder, and get the timestamp link inserted next to it.
- Configurable pre-roll offset: when you press the button, the timestamp (and screenshot) are taken a few seconds before the click, so you don't miss the moment you're reacting to.
- Playback control commands: play/pause toggle, seek backward/forward by a configurable step. Bind them to any hotkey.
Screenshots
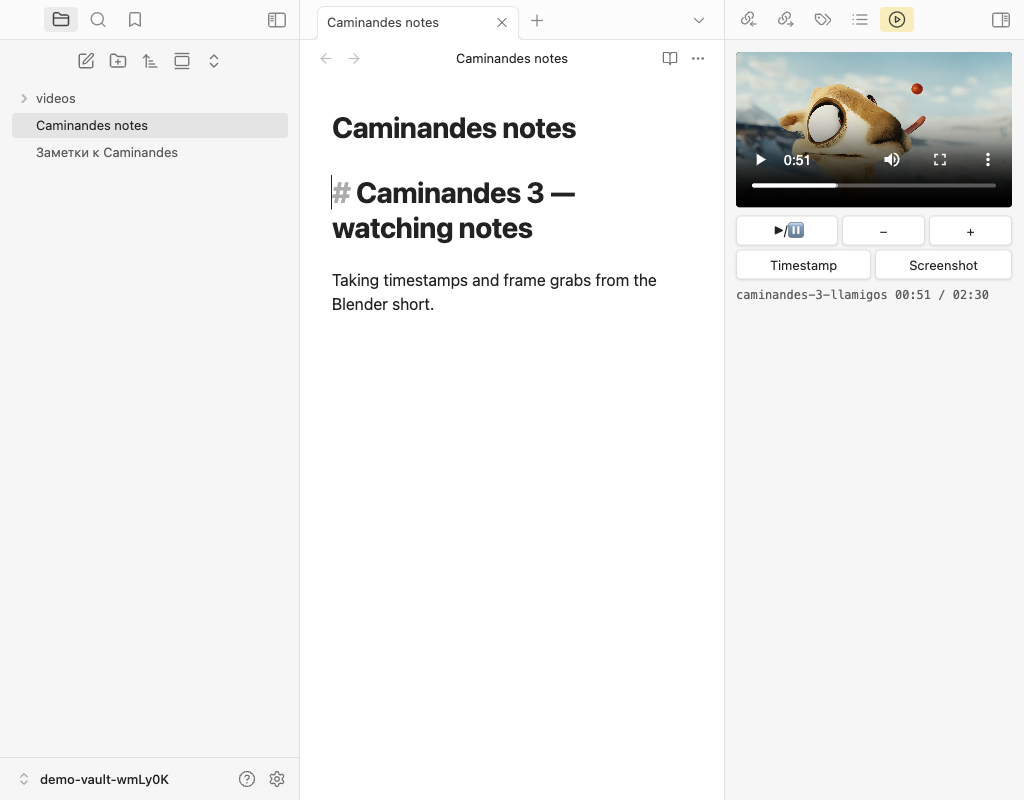

Demo footage: Caminandes 3: Llamigos © Blender Foundation — archive.org/details/CaminandesLlamigos, licensed under CC-BY 3.0.
Install
Via BRAT (recommended)
- Install the BRAT plugin from Obsidian community plugins.
- Open BRAT settings → Add Beta plugin → enter
rekby/obsidian-video-notes. - Enable Video Notes under Settings → Community plugins.
BRAT will keep the plugin updated from GitHub releases automatically.
Manual install from a release
- Download
main.js,manifest.json,styles.cssfrom the latest release. - Put them into
<your-vault>/.obsidian/plugins/video-notes/. - In Obsidian: Settings → Community plugins → enable Video Notes.
From Obsidian community plugins
Not available yet — pending acceptance of the submission PR to the official plugin list.
Usage
All features are exposed as commands. Open the command palette (⌘P / Ctrl+P) and search for "Local video".
| Command | What it does |
|---|---|
| Open local video | Fuzzy file picker across .mp4/.webm/.mkv/.mov/.m4v files in your vault. |
| Toggle play/pause | Play or pause the active player. |
| Resume playback | Start playing (no-op if already playing). |
| Pause | Pause the active player. |
| Seek backward / Seek forward | Move the playback position by seek step seconds. |
| Insert timestamp at current position | Insert [[video#t=N|MM:SS]]. Pause behaviour follows the Pause on insert setting. |
| Insert timestamp and pause | Same as above, but always pauses regardless of the setting. |
| Insert timestamp (keep playing) | Same, but always keeps the player running. |
| Take screenshot at current position | Save a PNG frame to attachments + insert image and timestamp link. Pause behaviour follows the setting. |
| Take screenshot and pause | Same, but always pauses. |
| Take screenshot (keep playing) | Same, but always keeps the player running. |
Bind any of these to a hotkey via Settings → Hotkeys. Typical workflow: bind Insert timestamp and pause to one hotkey (for "stop and write a thought") and Resume playback to another (to continue when you're done typing).
Settings
| Setting | Default | Description |
|---|---|---|
| Timestamp offset (seconds) | 3 | Subtract this many seconds from the current position when inserting a timestamp or screenshot. |
| Seek step (seconds) | 5 | Step used by Seek backward / Seek forward. |
| Pause on insert | true | Pause the player after inserting a timestamp or screenshot. |
| Seek on insert | true | Also jump the player to the inserted (offset-adjusted) moment. |
| Player location | right | Where a new player opens when you click a timestamp link and none is open yet: right sidebar or bottom split of the current tab. If the player is already open, it is reused and simply switches to the right video + time. |
Timestamps and screenshots are always inserted into the last markdown tab you had focused, not the video panel itself. You can click buttons inside the player freely without losing the target note.
Development
npm install
npm run dev        # esbuild watch
npm run build      # production build
npm test           # jest
npm run lint
Generating README screenshots (optional, local-only)
npm run demo:screenshots
This fetches the demo footage (Caminandes 3, CC-BY 3.0) into the demo vault if missing, boots a real Obsidian via wdio-obsidian-service, loads the plugin against the vault in obsidian-tests/demo-vault/, drives the player through an e2e scenario for each UI language, and writes fresh PNGs into docs/screenshots/en/ and docs/screenshots/ru/.
Releasing
- Go to GitHub → Actions → Publish Release → Run workflow.
- Choose
patchorminor. The workflow:- strips the
-pre-releasesuffix on the very first run, otherwise bumps the chosen part; - syncs
manifest.jsonandversions.jsonviaversion-bump.mjs; - builds, pushes the tag, creates a GitHub release with
main.js,manifest.json,styles.cssattached.
- strips the
License
AGPL-3.0-or-later © rekby. See LICENSE for the full text.
For plugin developers
Search results and similarity scores are powered by semantic analysis of your plugin's README. If your plugin isn't appearing for searches you'd expect, try updating your README to clearly describe your plugin's purpose, features, and use cases.