by Luca Renner
Write messages, chats and conversations inside your notes.
Chat Notes Plugin
A messenger plugin to write messages, chats and conversations inside Obsidian.
What does this plugin add?
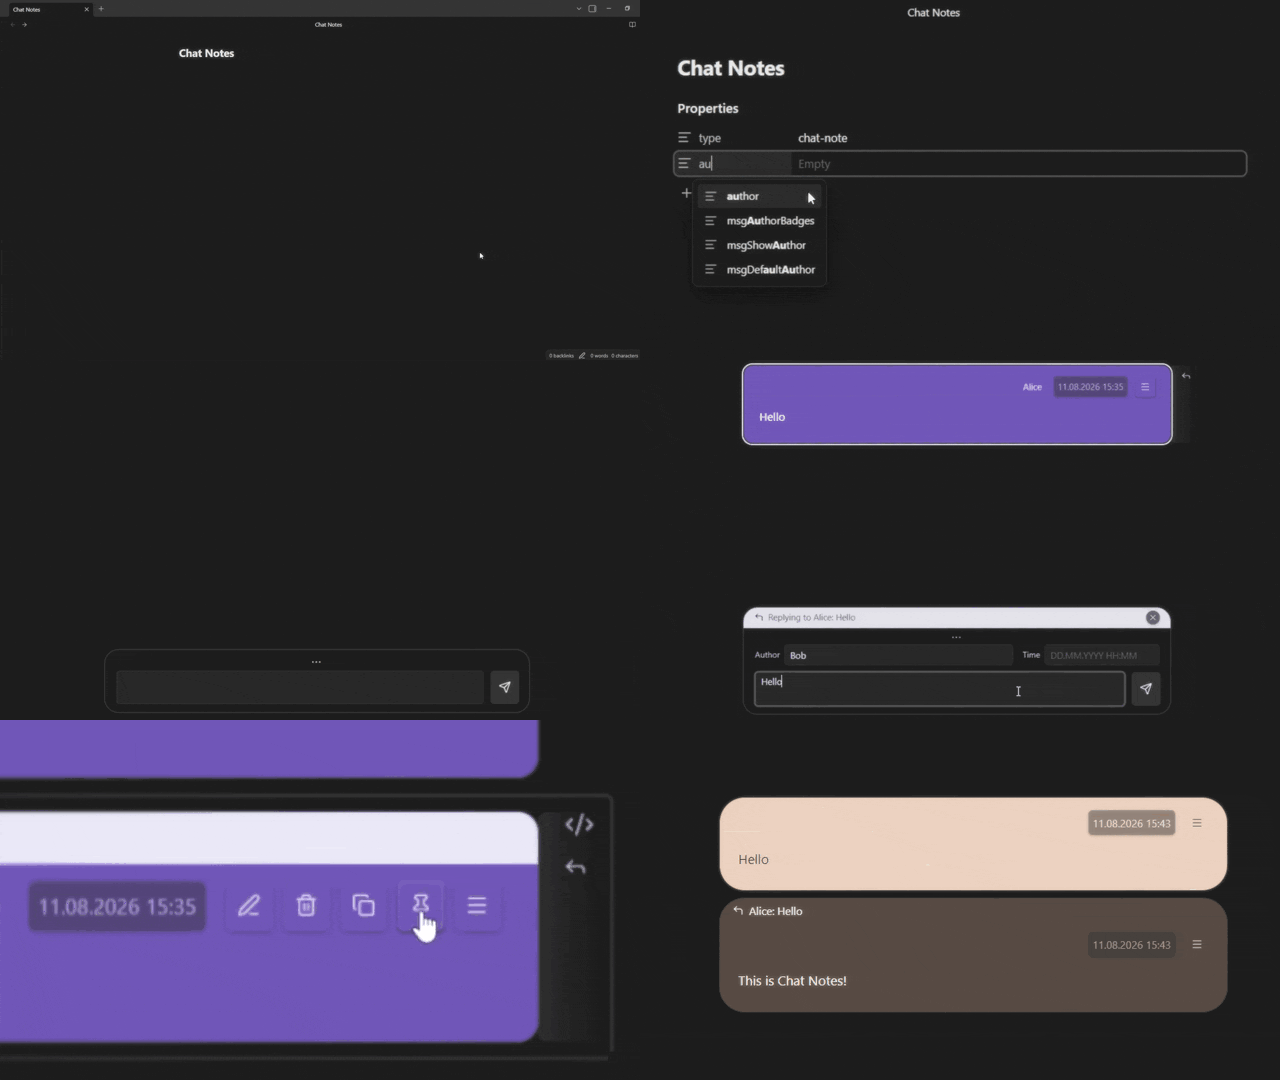
- This plugin adds chat notes that behave just like you would expect from a messenger chat: they have an input field to write new messages and a system to render and display them. You can reply, pin, copy, edit, delete and much more. All other notes will still work just like normal.
Why use this plugin?
-
This plugin was originally designed to export Discord servers into Obsidian, but it can be used independently. If you like to draft dialogues or like a message-based note system, where it's easy to separate and see the timestamps of your ideas in the same file, then this plugin might be for you.
Backup your (Discord) data before importing (the plugin allows changing ids, deleting or modifying the data)
Installation
Manually
- Download
main.js,manifest.jsonandstyles.cssfrom the latest release. - In your vault, create the folder
.obsidian/plugins/chat-notes/and put the three files in it. - Reload Obsidian and enable Chat Notes under Settings → Community plugins.
With BRAT
Add lucarenn/obsidian-chat-notes as a beta plugin. BRAT installs it and keeps it up to date.
Creating a chat note
Run the Create new chat note command, or click the ribbon icon.
To turn an existing note into a chat note, add this to its frontmatter (section at the very top of the file):
---
type: chat-note
author: Some Name
---
type: chat-note is what the plugin looks for. Without it a note renders normally, and every message block in it stays a plain code block.
You can leave the author field blank or skip it entirely. However, this results in all messages being sent with an empty author attribute by default. If you simply do not wish to display the author, it is better to specify the author anyway and disable the display separately in the settings.
Writing messages
Messages are written and render as markdown (code blocks included).
Backticks: a message is stored inside a four-backtick block, so a longer run of backticks inside a message would close it early and break the note. Runs of four or more backticks are therefore shortened to three when you send or save a message. Regular ``` code blocks work as usual.
Shortcuts
These work while the chat input has focus. Mod is Ctrl on Windows/Linux, Cmd on macOS.
| Shortcut | Where | Action |
|---|---|---|
Mod + Enter | Message input | Send the message |
Mod + ↑ | Message input | Open the author/time row |
Mod + ↑ | Author or time field | Close the row, back to the input |
Esc | Author or time field | Close the row, back to the input |
Commands
There are a handful of commands that make your life easier working with the plugin. You can use these to speed up your workflow by setting a hotkey for them:
| Command |
|---|
| Create new chat note |
| Focus chat input |
| Scroll to bottom |
| Scroll to top |
| Add override properties |
| Recalculate message ids |
Every command except Create new chat note is only available inside a chat note. No default hotkeys are set, you can assign your own under Settings → Hotkeys. Having shortcuts to move the cursor into the input field or scroll to top/bottom makes it much faster working with chat files.
You can still assign Scroll to top to
Mod+↑. Just note that when the chat input is focused, the combination will open or close the author/time row instead.
Repairing message ids
Every message has an id (which is also used by replies). An incorrect id might impair the functionality of some features. A duplicate id is especially bad: two messages claim the same number, and only one of them still responds to
pin, edit and delete.
The Recalculate message ids command repairs the open chat note. It renumbers
every message 1, 2, 3… in the order they appear and rewrites every reply to match. A reply
whose message is no longer in the file loses its link. You can reverse the command with the editor's undo in one step.
The plugin also checks for duplicates when it first reads a chat note and notifies you if it finds any.
Overriding global settings per chat note
Global settings live under Settings → Community plugins → Chat Notes. Here, many features like various colors, corner radius, visible attributes in the message header, input width and height, default author, ribbon icon visibility and more can be adjusted. By default these apply to all chat notes. If you want different settings for individual chats, you can override most of the settings per file by adding the matching key to that note's frontmatter:
# Example:
---
type: chat-note
author: Alice
msgColor: "#7f6df2"
msgCornerRadius: 20
msgAuthorBadges: true
---
Adding the keys automatically
You don't have to type any of this out. Run the Add override properties command in a chat note and every override key is added to its frontmatter with an empty value. An empty key changes nothing, so the note keeps using your global settings until you fill one in.
Keys and values the note already has are left untouched, so the command is safe to run again at any time; it only adds the missing keys.
It is recommended to run it at least once after install, which enables Obsidian to autocomplete the keys (you can delete the generated keys afterwards if you want). After that, every key is suggested to you as you type in any note's properties, so you don't need to look them up.
A few things to know:
- Overrides apply only to that note. Everything that is not listed keeps its global value.
- All changes should apply live; if not, try refreshing the view or reopening the note.
- A typo or an empty key is ignored and will still use its global setting value.
- Colors accept any CSS color:
#2b5d8a,#abc,white,rgb(43 93 138)etc.- If you paste the frontmatter directly into the file or manually write it (i.e. it's a blank file or has no properties added yet) use quotes for values starting with
#, or YAML reads them as a comment. Also make sure that the first---is at the very top of the file (no empty line above), or Obsidian will not recognize the values as properties. If done correctly, Obsidian should format the frontmatter into a properties table. There are other ways to add properties to a file as well (Obsidian offers a command). Refer to Obsidian's info page about Properties. - If you input a value starting with
#via the properties table or with the command (once Obsidian has recognized the keys) you should not use quotes, just put the value as is.
- If you paste the frontmatter directly into the file or manually write it (i.e. it's a blank file or has no properties added yet) use quotes for values starting with
Available overrides
| Key | Value | Overrides setting |
|---|---|---|
author | text | (YAML only) The chat owner |
msgColor | color | Message background color |
msgPinColor | color | Message pin color |
msgFlashColor | color | Message flash color |
msgReplyColor | color | Reply banner color |
msgBorderColor | color | Message border color |
msgCornerRadius | number, 0–50 | Message corner radius |
msgShowAuthor | true / false | Show message author |
msgShowTime | true / false | Show message time |
msgAuthorBadges | true / false | Show author badges |
msgButtonShadow | true / false | Enable button shadow |
msgScrollOnSend | true / false | Scroll to bottom on send |
msgDefaultAuthor | owner / previous | Default message author |
Out-of-range numbers are clamped: msgCornerRadius: 999 gives 50.
Global-only settings
These have no per-note override and always apply everywhere:
- Show ribbon icon
- Input field width offset
- Max input field height
Privacy
This plugin works only locally inside your vault and only imitates messenger behavior. It does not collect, share or upload any data. There is no functionality to actually send any messages to other devices, users or similar.
Development
See DEVELOPMENT.md for the architecture, the message file format, and non-obvious parts of the implementation.
If you find any bugs, please help me fix them by adding an issue on the GitHub page.
I might implement additions like virtualized rendering, markdown message editing/writing and better plugin compatibility in the future.
The plugin has not been tested on mobile.
For plugin developers
Search results and similarity scores are powered by semantic analysis of your plugin's README. If your plugin isn't appearing for searches you'd expect, try updating your README to clearly describe your plugin's purpose, features, and use cases.