Checklist Status Sets
approvedby Dan
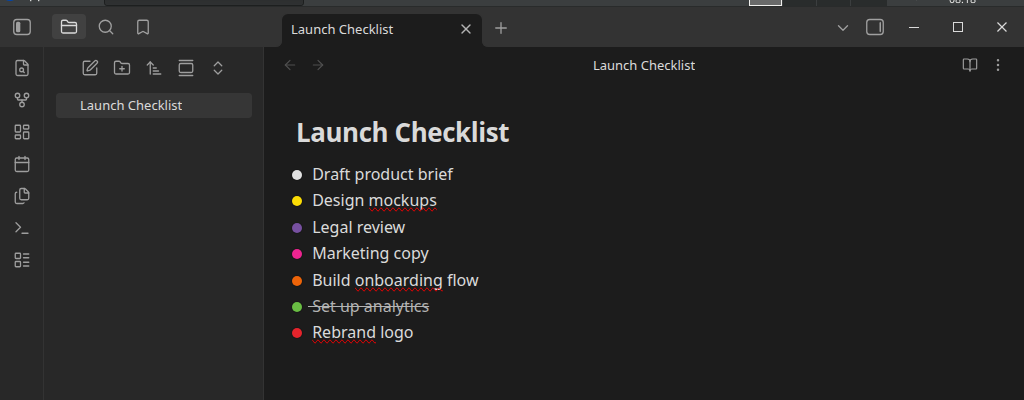
Apply Status Sets' reusable status sets to checklist items inside your notes — per file, block, or heading — with the same traffic-light icons, colors, and Glow used in the file tree. - This plugin has not been manually reviewed by Obsidian staff.
Checklist Status Sets
A companion plugin to Status Sets — applies the same reusable status sets to checklist items inside your notes, not just the file tree.
Requires Status Sets
This plugin reads status sets you define in
Status Sets
(file-folder-status-icons) — install and enable that first. Status sets
themselves are never created, edited, or duplicated here; this plugin only
reads them, live, via a small public API Status Sets exposes for this
purpose.
Features
- Three assignment scopes: an entire file, a specific block (with optional inherit-to-subtasks), or everything under a heading.
- Traffic-light status icons replace the native checkbox glyph entirely, styled identically to Status Sets' file-tree dots — Glow included, if you have that on.
- Left-click cycles a task to the next status; right-click opens the full manual picker — Status Sets' own popup, reused as-is.
- Hide completed actually removes completed-status tasks from the rendered note, not just visually.
- Works in both Live Preview and Reading view.
- Nothing is written to frontmatter. A task's status is a single
character inside its own checkbox brackets (
- [ ]→- [I], etc.), chosen after testing live that this is the only format Obsidian's own task parser actually recognizes as a task — see the docs for why, and the tradeoffs involved.
Usage
- Define a status set in Status Sets first (Settings → Status Sets → New status set), if you haven't already.
- Settings → Checklist Status Sets → Assign a file or block → type a note's path, pick a status set, Assign.
- Open the note. Left-click a task's dot to cycle status; right-click for the full picker.
- For finer control, extend the path with
^(pick a block) or#(pick a heading) instead of assigning the whole file.
Installation
From Obsidian
Settings → Community plugins → Browse → search "Checklist Status Sets" → Install → Enable.
Manually
Copy main.js, manifest.json, and styles.css from a
release
into <your-vault>/.obsidian/plugins/checklist-status-icons/, then enable
the plugin from Community plugins.
Development
npm install
npm run dev     # watch build
npm run build   # typecheck + production build
npm run lint
Support
License
MIT
For plugin developers
Search results and similarity scores are powered by semantic analysis of your plugin's README. If your plugin isn't appearing for searches you'd expect, try updating your README to clearly describe your plugin's purpose, features, and use cases.