Dense Reading
approvedby yunmin
Tighter paragraph and heading spacing for reading view, with a switchable line width per note or per view. - This plugin has not been manually reviewed by Obsidian staff.
Dense Reading
Tighter paragraph and heading spacing for reading view, with a switchable line width — no Style Settings, no hand-written
cssclassesfrontmatter.


Dense Reading does two independent things, both purely at the display layer. No file is modified, and nothing is written into your notes.
Tight spacing
Long-form notes in Obsidian's reading view are spaced for skimming, not for
reading. Turning on the dense mode compresses paragraph margins, heading gaps
and list spacing to a reading rhythm, and drops the decorative chrome on hr
and inline code so they follow your text colour instead of shouting.
Spacing only ever applies when the switch is on. With it off, the plugin is invisible.
Line width
Reading width is the bigger lever. Dense Reading sets --file-line-width at
the view layer, which is what actually takes effect — the same value set on
body is overridden by Obsidian's inline 700px.
| Preset | Width |
|---|---|
| 窄读 Narrow | 44rem |
| 均衡 Balanced | 54rem |
| 宽幅 Wide | 66rem |
| 超宽 Extra wide | 78rem |
| 自定义 Custom | 36–96rem, slider |
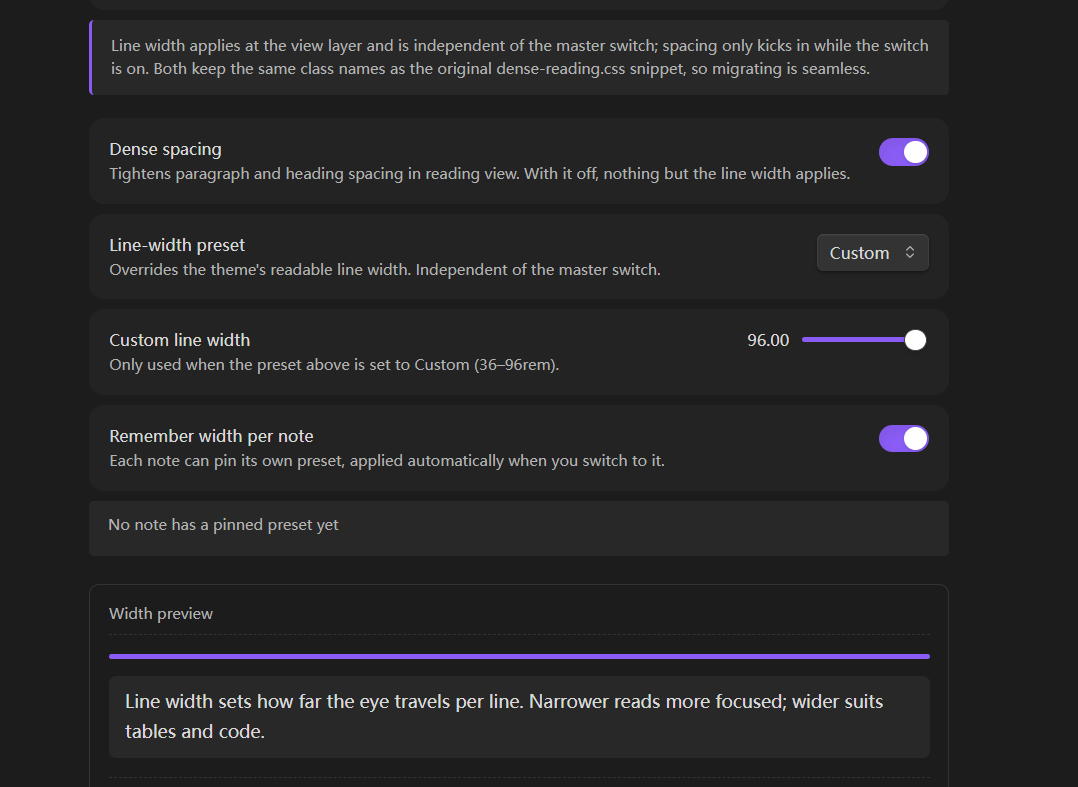
Width and spacing are independent: you can narrow the column without turning on dense spacing, which is the common case for tables and code.
Per-note width
A single global width is rarely right for every note. Readings sit well narrower than a reference table. Dense Reading can remember a width per note: pin one from the command palette, and it is applied whenever you open that note. The list of pinned notes is shown in settings and can be cleared there.
Commands
| Command | What it does |
|---|---|
| Toggle dense reading | Turns the spacing switch on or off |
| Cycle line width preset | Steps through the five presets |
| Pin line width for this note | Fixes the current preset to the active note |
| Clear line width for this note | Removes that note's pin |
No default hotkey is bound — width is a deliberate, occasional choice, and a global key for it would fight whatever else you have on that key. Bind one in Settings → Hotkeys if you want it.
Installation
Community plugins: search for "Dense Reading" in Settings → Community plugins.
Manual: download main.js, manifest.json and styles.css from the
latest release
into <vault>/.obsidian/plugins/dense-reading/, then enable it.
Beta builds: add yunmin311/dense-reading-obsidian to
BRAT.
Migrating from the CSS snippet
This plugin started life as a CSS snippet driven by Style Settings. The class
names are deliberately identical (dense-w44 … dense-w-custom,
dense-reading-mode), so:
- Install and enable the plugin; set your width and switch in its settings.
- Delete
cssclasses: dense-w54style frontmatter from your notes. The plugin no longer needs it — that was the point. - The snippet can stay enabled (the rules are the same, so they cannot
conflict) or be disabled, since
styles.cssnow carries them.
Language
The settings page, commands and every notice are available in Chinese and
English. Pick a language at the top of the settings page: Auto follows
Obsidian's own language, or pin it to 简体中文 / English explicitly.
Adding another language is a pure data change — an extra entry in
locales.js — with no build step involved. Preset ids and CSS class names stay
language-independent, so switching language never changes what is applied.
Privacy
No network access. No telemetry. No accounts. The plugin reads the path of the
active note to remember its width, and stores that map in its own data.json
inside the plugin folder — the same mechanism every Obsidian plugin uses.
License
中文说明
密排阅读:把阅读视图的段落、标题、列表间距收紧密排,并让分隔线与行内代码 跟随正文颜色;这一组只在总开关打开时生效,关闭即完全无痕。
行宽则独立于总开关,写在视图层(写在 body 上会被 Obsidian 内联的
--file-line-width: 700px 压掉,这是踩过的坑)。五档可选,也可用滑条自定义
36–96rem。
按笔记记住档位:长文和参考表格需要的宽度往往不同。可以在命令面板把当前档位 固定到某篇笔记,之后每次打开自动套用;设置页里能看到并清除这些固定。
原来的 dense-reading.css 片段 + Style Settings 那套装法已不需要:
类名与片段完全一致,装好插件、把笔记 frontmatter 里的 cssclasses: dense-w54
删掉即可——这正是做成插件的意义。
For plugin developers
Search results and similarity scores are powered by semantic analysis of your plugin's README. If your plugin isn't appearing for searches you'd expect, try updating your README to clearly describe your plugin's purpose, features, and use cases.