Autofit Tabs
approvedby bwya77
Automatically adjusts tab header widths to fit each tab's title content.
AutoFit Tabs for Obsidian

Automatically adjusts tab header widths in real-time to perfectly fit each tab's title content while maintaining a clean, seamless interface that prevents awkward text truncation and ensures optimal readability of your document titles.
Features
- Dynamic Width Adjustment: Tabs automatically resize to fit their content
- Smooth Transitions: Clean animations when tabs are resized
- Space Optimization: No more truncated titles or wasted space
- Highly Customizable: Fine-tune every aspect of tab appearance
- Resource Efficient: Uses caching to minimize performance impact
- Clean Interface: Maintains Obsidian's sleek look and feel
- Max Width: Set a maximum width for tabs to prevent excessive resizing
- Ignore Pinned Tabs: Option to keep pinned tabs with default Obsidian behavior
- Hide Tab Icons: Option to remove all icons from tabs for a cleaner look
- Close Button Customization: Adjust padding before and after the close button
- Icon Configuration: Customize icon width and left padding
- Transition Duration: Set how fast tabs animate when resizing
- Scrolling Tab Bars: Enables tabs to be scrolled left and right when they exceed the available space
- Auto Center Tabs: When clicking a tab that is off-screen, the tab will automatically scroll into view
Installation
- Open Obsidian Settings
- Navigate to Community Plugins and disable Safe Mode
- Click Browse and search for "AutoFit Tabs"
- Install the plugin
- Enable the plugin in your Community Plugins list
Manual Installation
- Download the latest release from the releases page
- Extract the files into your vault's
.obsidian/plugins/autofit-tabs/directory - Reload Obsidian
- Enable the plugin in your Community Plugins list
Usage
Once installed and enabled, AutoFit Tabs works automatically with no additional configuration needed. The plugin will immediately begin adjusting your tab widths to fit their content.
Configuration
You can customize the following settings in the plugin options:
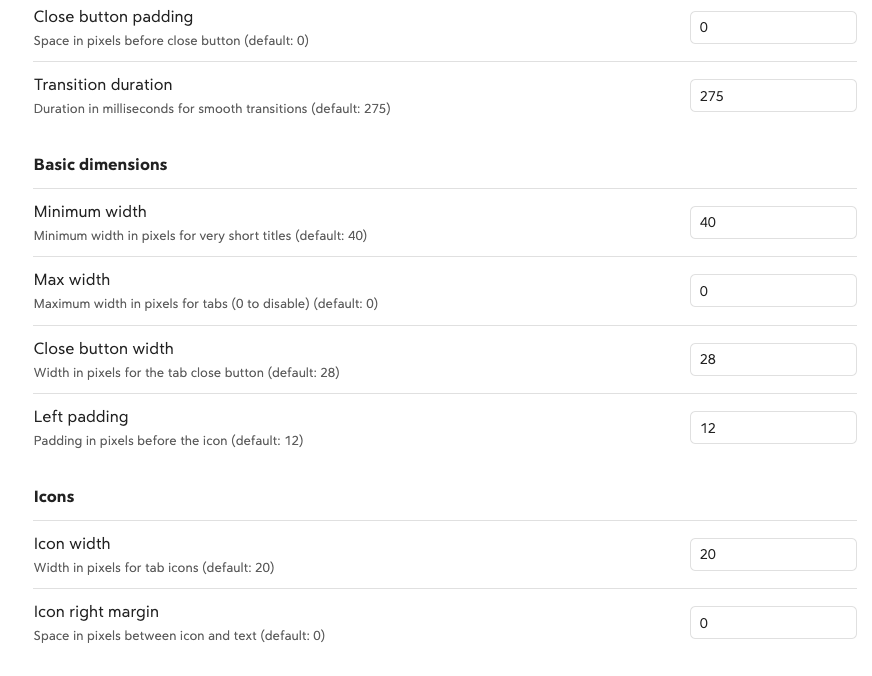
General
| Setting | Description | Default |
|---|---|---|
| Close button left padding | Space in pixels before close button | 30 |
| Close button right padding | Space in pixels after close button | 8 |
| Transition duration | Duration in milliseconds for smooth transitions | 375 |
| Ignore pinned tabs | Do not modify pinned tabs (keeps default behavior) | false |
| Hide tab icons | Hide all icons in tabs | false |
Basic dimensions
| Setting | Description | Default |
|---|---|---|
| Minimum width | Minimum width in pixels for very short titles | 40 |
| Max width | Maximum width in pixels for tabs (0 to disable) | 0 |
Icons
| Setting | Description | Default |
|---|---|---|
| Icon width | Width in pixels for tab icons | 20 |
| Left padding | Padding in pixels before the icon | 12 |
Compatibility
- Requires Obsidian v1.0.0 or higher
- Desktop only (not available for mobile)
- Compatible with most themes and plugins
Support
If you find this plugin helpful, you can:
- Star the repository on GitHub
- Report any issues on the GitHub issue tracker
- Buy me a coffee
- Become a GitHub Sponsor
Development
Want to contribute or modify the plugin? Here's how to get started with the source code:
-
Create a directory for your GitHub projects:
cd path/to/somewhere mkdir Github cd Github -
Clone the repository:
git clone https://github.com/bwya77/autofit-tabs.git -
Navigate to the plugin directory:
cd autofit-tabs -
Install dependencies:
npm install -
Start development build mode:
npm run devThis command will keep running in the terminal and automatically rebuild the plugin whenever you make changes to the source code.
-
You'll see a
main.jsfile appear in the plugin directory - this is the compiled version of your plugin.
Testing Your Changes
To test your modifications:
- Create a symbolic link or copy your plugin folder to your vault's
.obsidian/plugins/directory - Enable the plugin in Obsidian's community plugins settings
- Use the developer console (Ctrl+Shift+I) to check for errors and debug
Making Contributions
- Fork the repository
- Create a new branch for your feature
- Make your changes
- Submit a pull request with a clear description of your changes
License
MIT License. See LICENSE for full text.
For plugin developers
Search results and similarity scores are powered by semantic analysis of your plugin's README. If your plugin isn't appearing for searches you'd expect, try updating your README to clearly describe your plugin's purpose, features, and use cases.