by namikaze-40p
Mark lines you want to come back to, and jump between them across notes. Marks follow their lines as you edit.
Obsidian Line Marks
An Obsidian plugin to mark lines you want to come back to, and jump between them across notes.
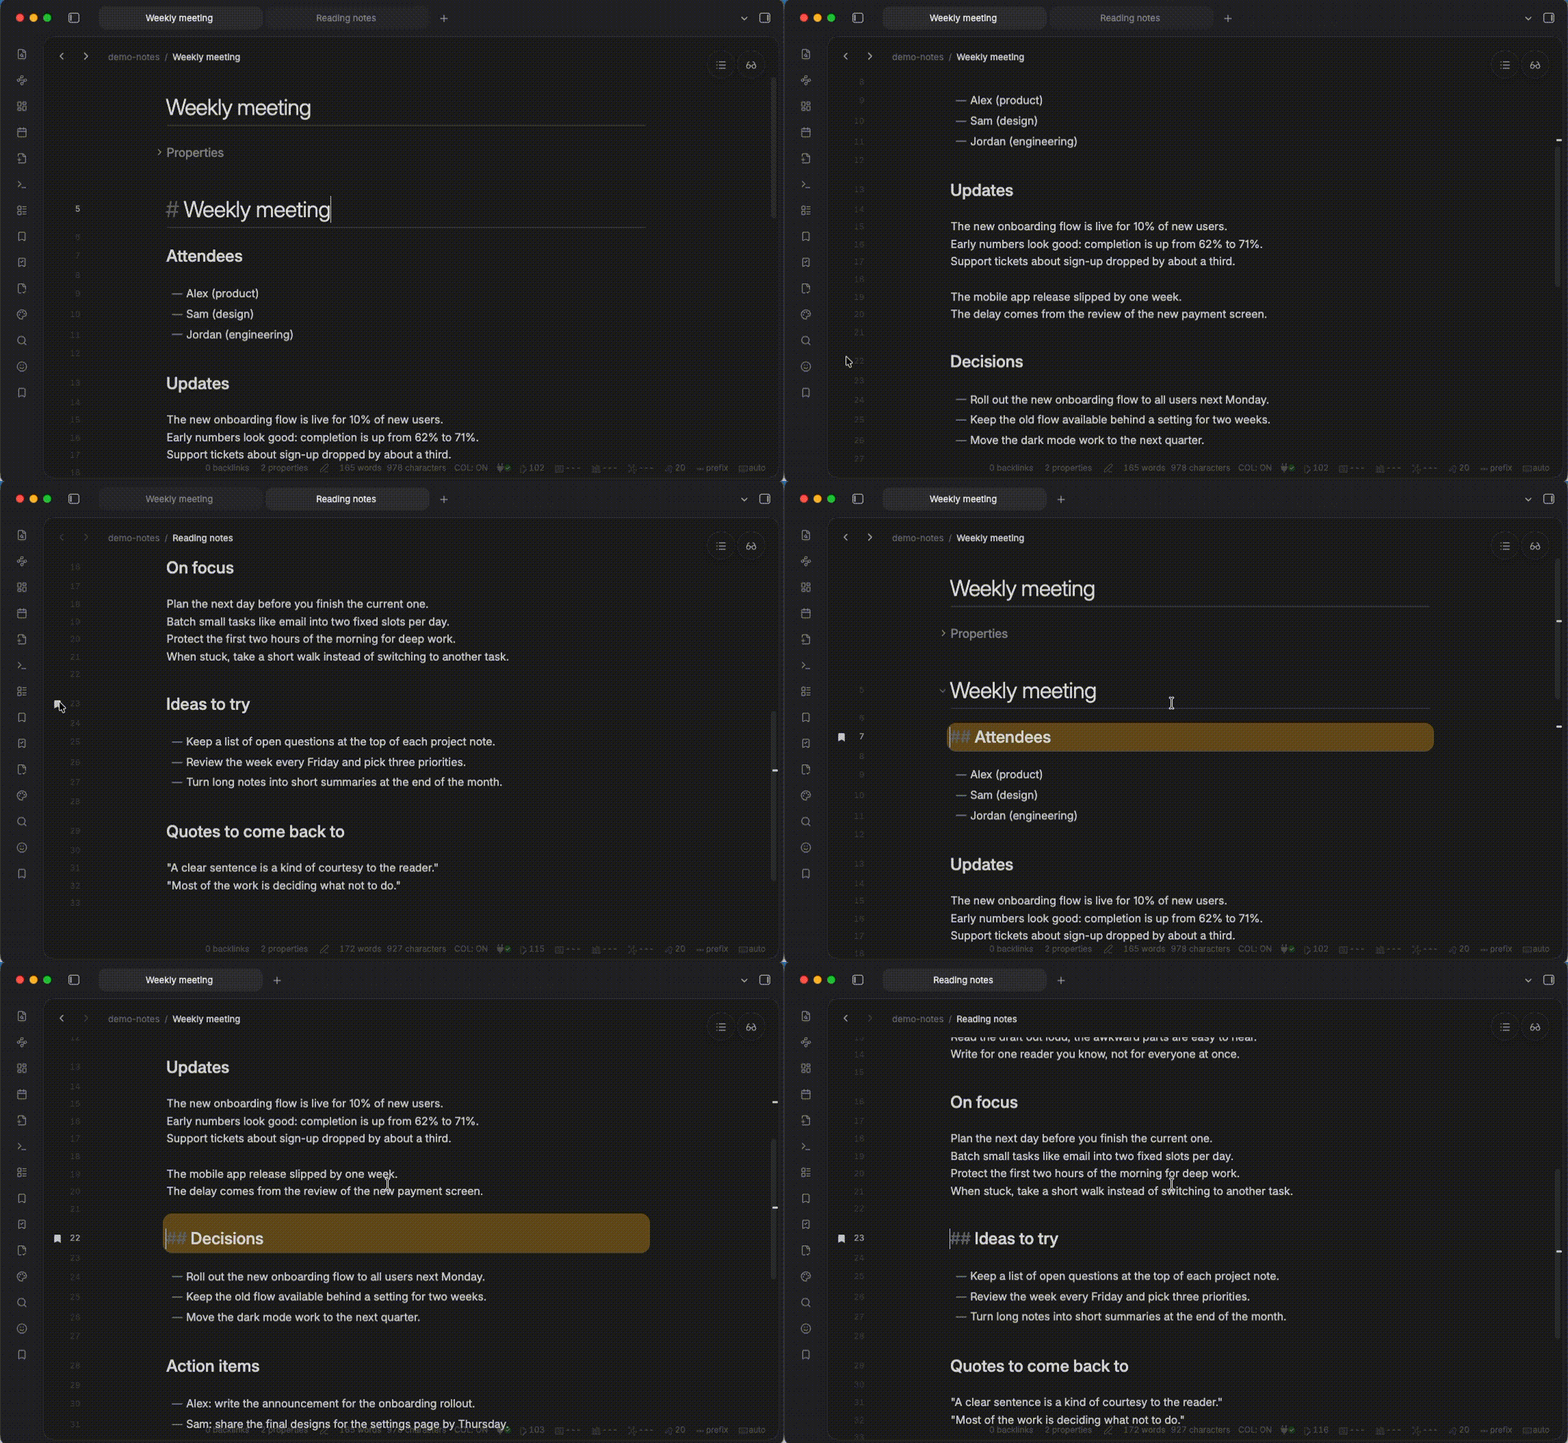
Marks follow their lines while you edit: typing, adding or deleting lines, moving lines up/down, and reordering list items.

How to use
-
Mark a line by running
Line Marks: Toggle mark statefrom the command palette, or by clicking the gutter to the left of the line. A bookmark icon appears in the gutter. Run the command (or click) again to unmark it. -
Add a label and a color to a mark with
Line Marks: Edit label and color, or by right-clicking the gutter and selectingEdit label and color. (If the line is not marked yet, it is marked when you save.)- Labels you have already used are suggested, most used first. Type to narrow them down (fuzzy match). Selecting a suggestion also sets its color, which you can still change.
- The label is shown in the mark lists, and when you hover over the bookmark icon in the gutter.
- The color is applied to the bookmark icon in the gutter and the mark lists.
-
Jump between marks with
Line Marks: Jump to next markandLine Marks: Jump to previous mark. When there are no more marks in the current file, it moves on to the next (or previous) file that has marks. When no note is open, it jumps to the first (or last) mark. -
Open the list of all marks in the right sidebar with
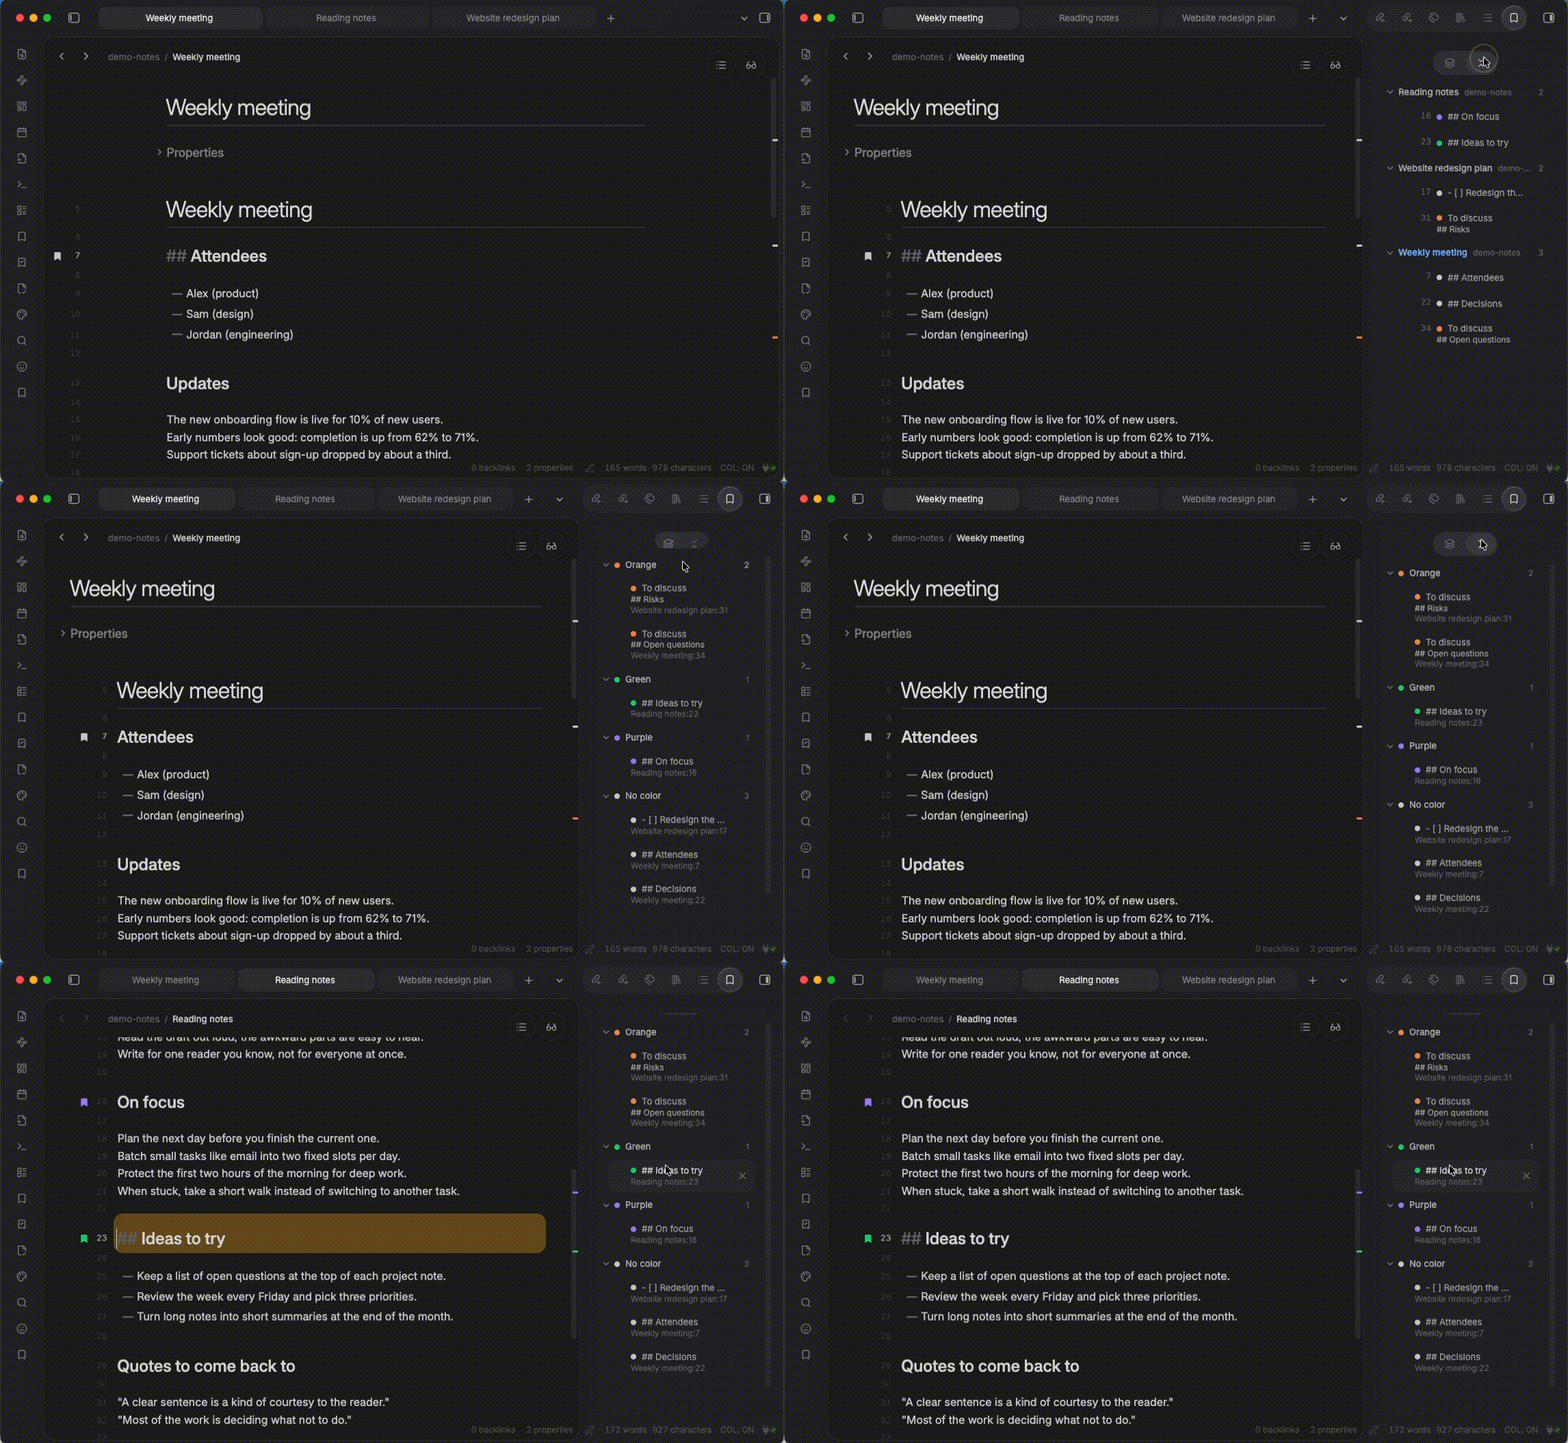
Line Marks: Open mark list in sidebar, or by clicking the bookmark icon in the ribbon.- Marks are grouped by file, and the list stays up to date while you edit. The file you are viewing is highlighted.
- To group marks by color instead, click the
Change groupingbutton at the top of the list (or changeSidebar groupingin the settings). Colors are listed in the order of the color buttons, and marks with no color come last. Within a color, marks are sorted by label (or line text), file name, and line. - Click the
Collapse all/Expand allbutton at the top of the list to collapse or expand all groups. - Click a mark to jump to it. Hover over a mark and click the
×button to unmark it. Right-click a mark to edit its label and color, or to unmark it. - Click a file name to collapse or expand its marks. Right-click a file name to unmark all marks in the file (asks for confirmation).
-
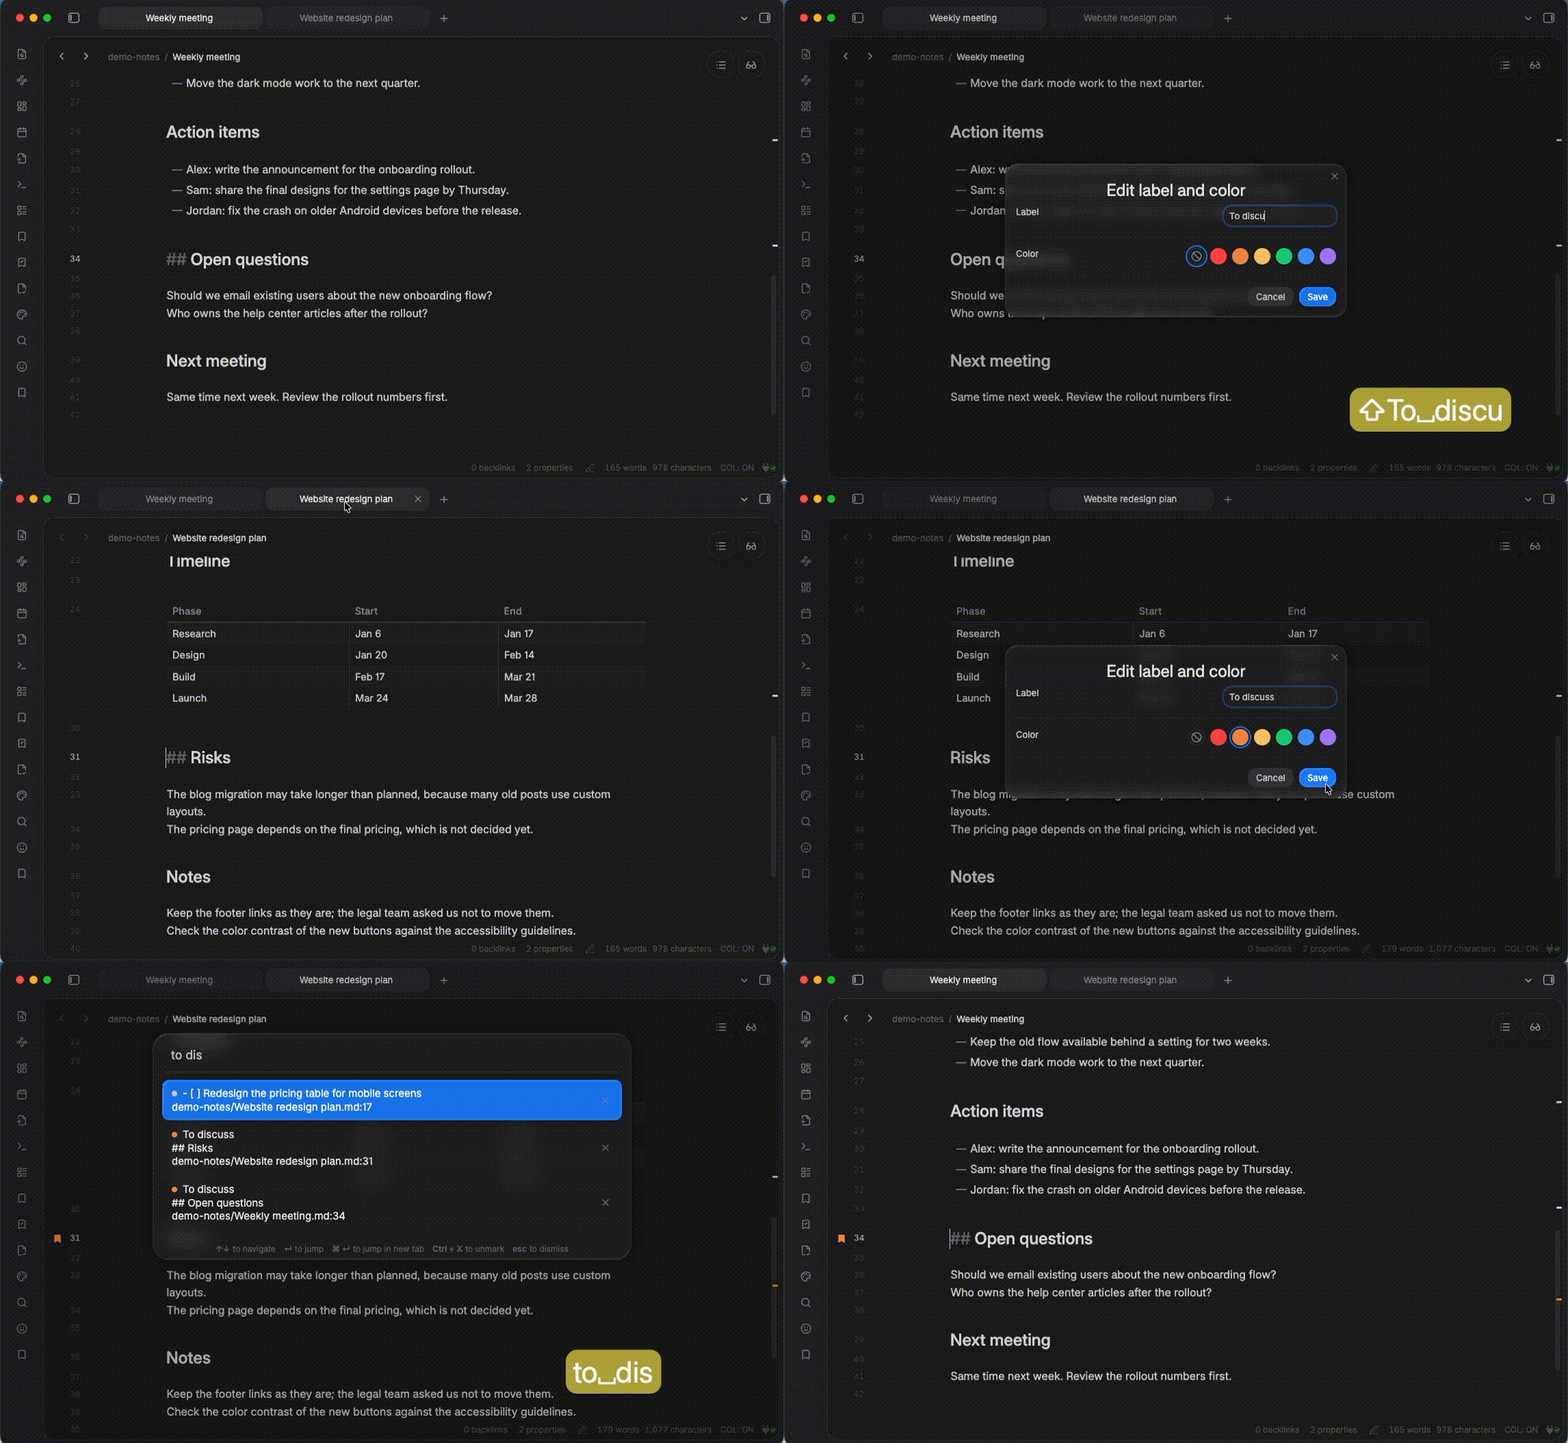
To search marks with the keyboard, open the mark list with
Line Marks: Open mark list.- Type to search marks by label, line text, and file path.
- Press
Enter(or click) to jump to the mark. - Click the
×button, or press the unmark shortcut (Ctrl+Xon macOS,Alt+Xon Windows/Linux by default), to unmark it.
-
Unmark many marks at once with
Line Marks: Unmark all in current file, orLine Marks: Unmark all in vault. Both ask for confirmation, because this cannot be undone.
On phones and tablets, some operations work differently, because you cannot right-click or hover:
- Tap the gutter to open its menu (
Mark/Unmark, andEdit label and color), instead of marking the line directly. - In the mark list in the sidebar, tap the
⋯button on a mark or a file name to open its menu. - The marks on the scrollbar are only shown, and cannot be tapped. They are too small to tap, and tapping them by accident while scrolling would make you jump.
Adding the commands to the mobile toolbar is also handy.
Assigning hotkeys to the commands is recommended. (Settings → Hotkeys → search for Line Marks)
Settings
| Setting | Description | Default |
|---|---|---|
| Allow cross file | When enabled, jumping moves on to other files with marks. When disabled, jumping wraps around within the current file. | On |
| Open in | Where to open a file when you jump to a mark in a file that is not open yet: Current tab, or New tab. If the file is already open, its tab is used. In the mark lists, Ctrl/Cmd+click (Ctrl/Cmd+Enter in the search) opens it the other way. | Current tab |
| Default color | Color of new marks. It does not change the color of existing marks. Marks with no color are shown in the text color of the theme (dark on light themes, light on dark themes). | No color |
| Show marks on scrollbar | Show where the marks are in the file along the scrollbar of the editor, in the color of each mark. Click a mark on the scrollbar to jump to it. (On phones and tablets, the marks are only shown.) | On |
| Mark list sort order | Order of marks in the mark list (search): File name and line, Date marked (newest first), or Color (by color with no color last, then by label or line text, file name, and line). The mark list in the sidebar has its own grouping, which you can switch in the sidebar. | File name and line |
| Sidebar grouping | How to group marks in the mark list in the sidebar: File, or Color. You can also switch it with the button at the top of the sidebar. | File |
| Unmark shortcut | Shortcut to unmark the selected mark in the mark list. Click the button and press the keys. A modifier key other than Shift is required. | Ctrl+X (macOS), Alt+X (Windows/Linux) |
Known limitations
- Lines in the frontmatter can be marked or unmarked only in Source mode. In Live Preview, the frontmatter is shown as properties instead of lines, so there is no gutter to click. Marks in the frontmatter are kept, and jumping to them highlights the properties.
- Swapping list items with identical text using Outliner is not tracked.
For example, when you move one of two
- aitems past the other with Outliner's "Move list and sublists up/down", the mark stays on its original line instead of following the moved item. Outliner only applies the lines that actually changed, so swapping identical items does not change the document at all, and there is nothing for the plugin to track. Swapping identical lines with Obsidian's built-in "Move line up/down" (Alt+↑/↓) is tracked correctly. - Renaming or deleting files outside Obsidian is not tracked.
Renaming, moving, and deleting files inside Obsidian (including folders) are tracked. But when files are renamed or deleted outside Obsidian (e.g. in your file manager, with git, or by a sync service while Obsidian is closed), their marks are left behind.
In the mark list, these marks are shown at the bottom with "File not found". Unmark them one by one, or run
Line Marks: Remove marks of missing filesto remove them all at once. Marks are never removed automatically, because a file may only be temporarily missing (e.g. while a sync service is still downloading it). - Marks are restored only on matching lines when a file seems to have been recreated. If a file at the same path was recreated (e.g. deleted and created again, or recreated by a sync service or git), the plugin cannot tell whether it is the same file. In that case, marks are restored only on lines whose text is unchanged, and the other marks are dropped.
Installation
You can find and install this plugin through Obsidian's Community Plugins browser. Requires Obsidian 1.13.0 or later. For detailed steps or alternative installation methods, click here.
For plugin developers
Search results and similarity scores are powered by semantic analysis of your plugin's README. If your plugin isn't appearing for searches you'd expect, try updating your README to clearly describe your plugin's purpose, features, and use cases.