Vault name in status bar
unlistedby 3C0D
Vault name in status bar and vaults menu
Vault Name in Status Bar
Key Features
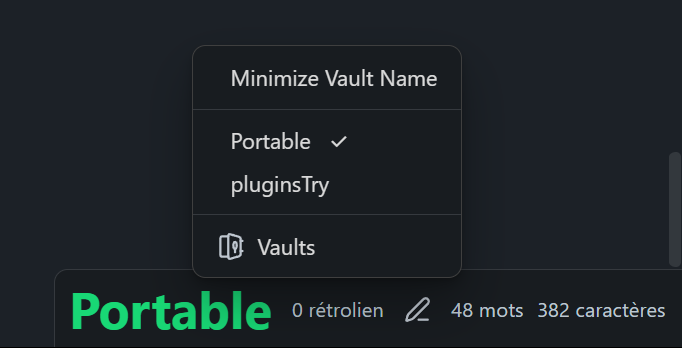
- Vault Name in Status Bar: See your vault name at a glance, with one-click access to the vaults menu.
- Per-Tab Line Width Control: Each Markdown tab has its own width control icon. Adjust globally or lock any file to its own width.
Vault Name
The vault name appears in the status bar. Click it to open the vaults menu for quick switching. You can customize its color, font size, and maximum display length — or hide it entirely.
Line Width Control
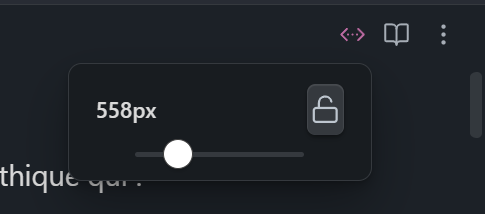
Each Markdown tab has a <-> icon in its top-right header. Click it to open a width slider (300px–1600px). Visual guides appear on both sides of the editor while adjusting.
The slider works across all windows — including split panes and secondary windows.
Global mode (lock open): the slider adjusts the width for all unlocked files.
Local mode (lock closed): the slider adjusts the width for this file only. A small lock badge appears on the icon as a reminder.
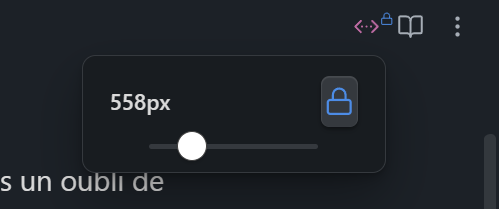
Clicking the lock again removes the local override and reverts to the global width.
Disabling the feature
Disabling "Enable Line Width Control" in settings hides all icons and restores the default Obsidian line width. Re-enabling it restores your previous settings.
Settings
Vault Name
- Enable vault name: Show/hide the vault name
- Vault Name Color: Color of the vault name
- Font Size: Font size of the vault name (in em)
- Enable Maximum Length: Truncate the vault name if too long
- Maximum Length: Max characters to display
Editor Line Width
- Enable Line Width Control: Show/hide the width control icons
- Line Width Color: Color of the
<->icon - Restore cursor on popup close: When enabled, closing the popup restores the cursor position and selection to where it was when the popup was opened
Installation
- Copy files from the release
- Install them in
your-vault/.obsidian/plugins/status_vault_baror use BRAT
Support
Issues and suggestions: GitHub repository.
License
MIT License.
Development
This plugin uses a template that automates the development and publication processes on GitHub, including releases. You can develop either inside or outside your Obsidian vault.
Environment Setup
main.tsandstyles.cssmust be in thesrcfolder.- After building,
styles.csswill appear in the root folder (this is normal for the release process).
Development Options:
-
Inside the vault's plugins folder:
- Delete the
.envfile. - Run npm commands as usual.
- Delete the
-
Outside the vault:
- Set the paths in the
.envfile:TestVaultfor developmentRealVaultfor production simulation
- Necessary files will be automatically copied to the targeted vault.
- Set the paths in the
Available Commands
npm run start: Opens VS Code, runsnpm install, thennpm run devnpm run dev: For developmentnpm run build: Builds the projectnpm run real: Simulates a traditional plugin installation in your REAL vaultnpm run bacp: Builds, adds, commits, and pushes (prompts for commit message)npm run acp: Adds, commits, and pushes (without building)npm run version: Updates version, modifies relevant files, then adds, commits, and pushesnpm run release: Creates a GitHub release (prompts for release title, can be multiline using\n)
Recommended Workflow
npm run startnpm run bacpnpm run versionnpm run release
Additional Features
- obsidian-typings: This template automatically includes obsidian-typings, providing access to additional types not present in the official API.
For plugin developers
Search results and similarity scores are powered by semantic analysis of your plugin's README. If your plugin isn't appearing for searches you'd expect, try updating your README to clearly describe your plugin's purpose, features, and use cases.