Simple Timeline
pendingby Jareika
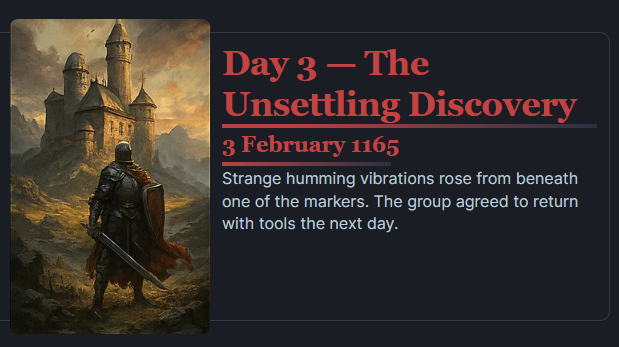
Timeline-Renderer für Calendarium-Frontmatter (fc-date/fc-end). 200×315 Bild, Callout-Stil, native Popover, mobilfreundlich.
Simple Timeline (Obsidian Plugin)
Simple Timeline renders timelines from note frontmatter. It can be used in:
- Markdown code blocks (
timeline-cal,timeline-h) - Bases views (optional integration)
It is designed to be theme-friendly and configurable.
Examples
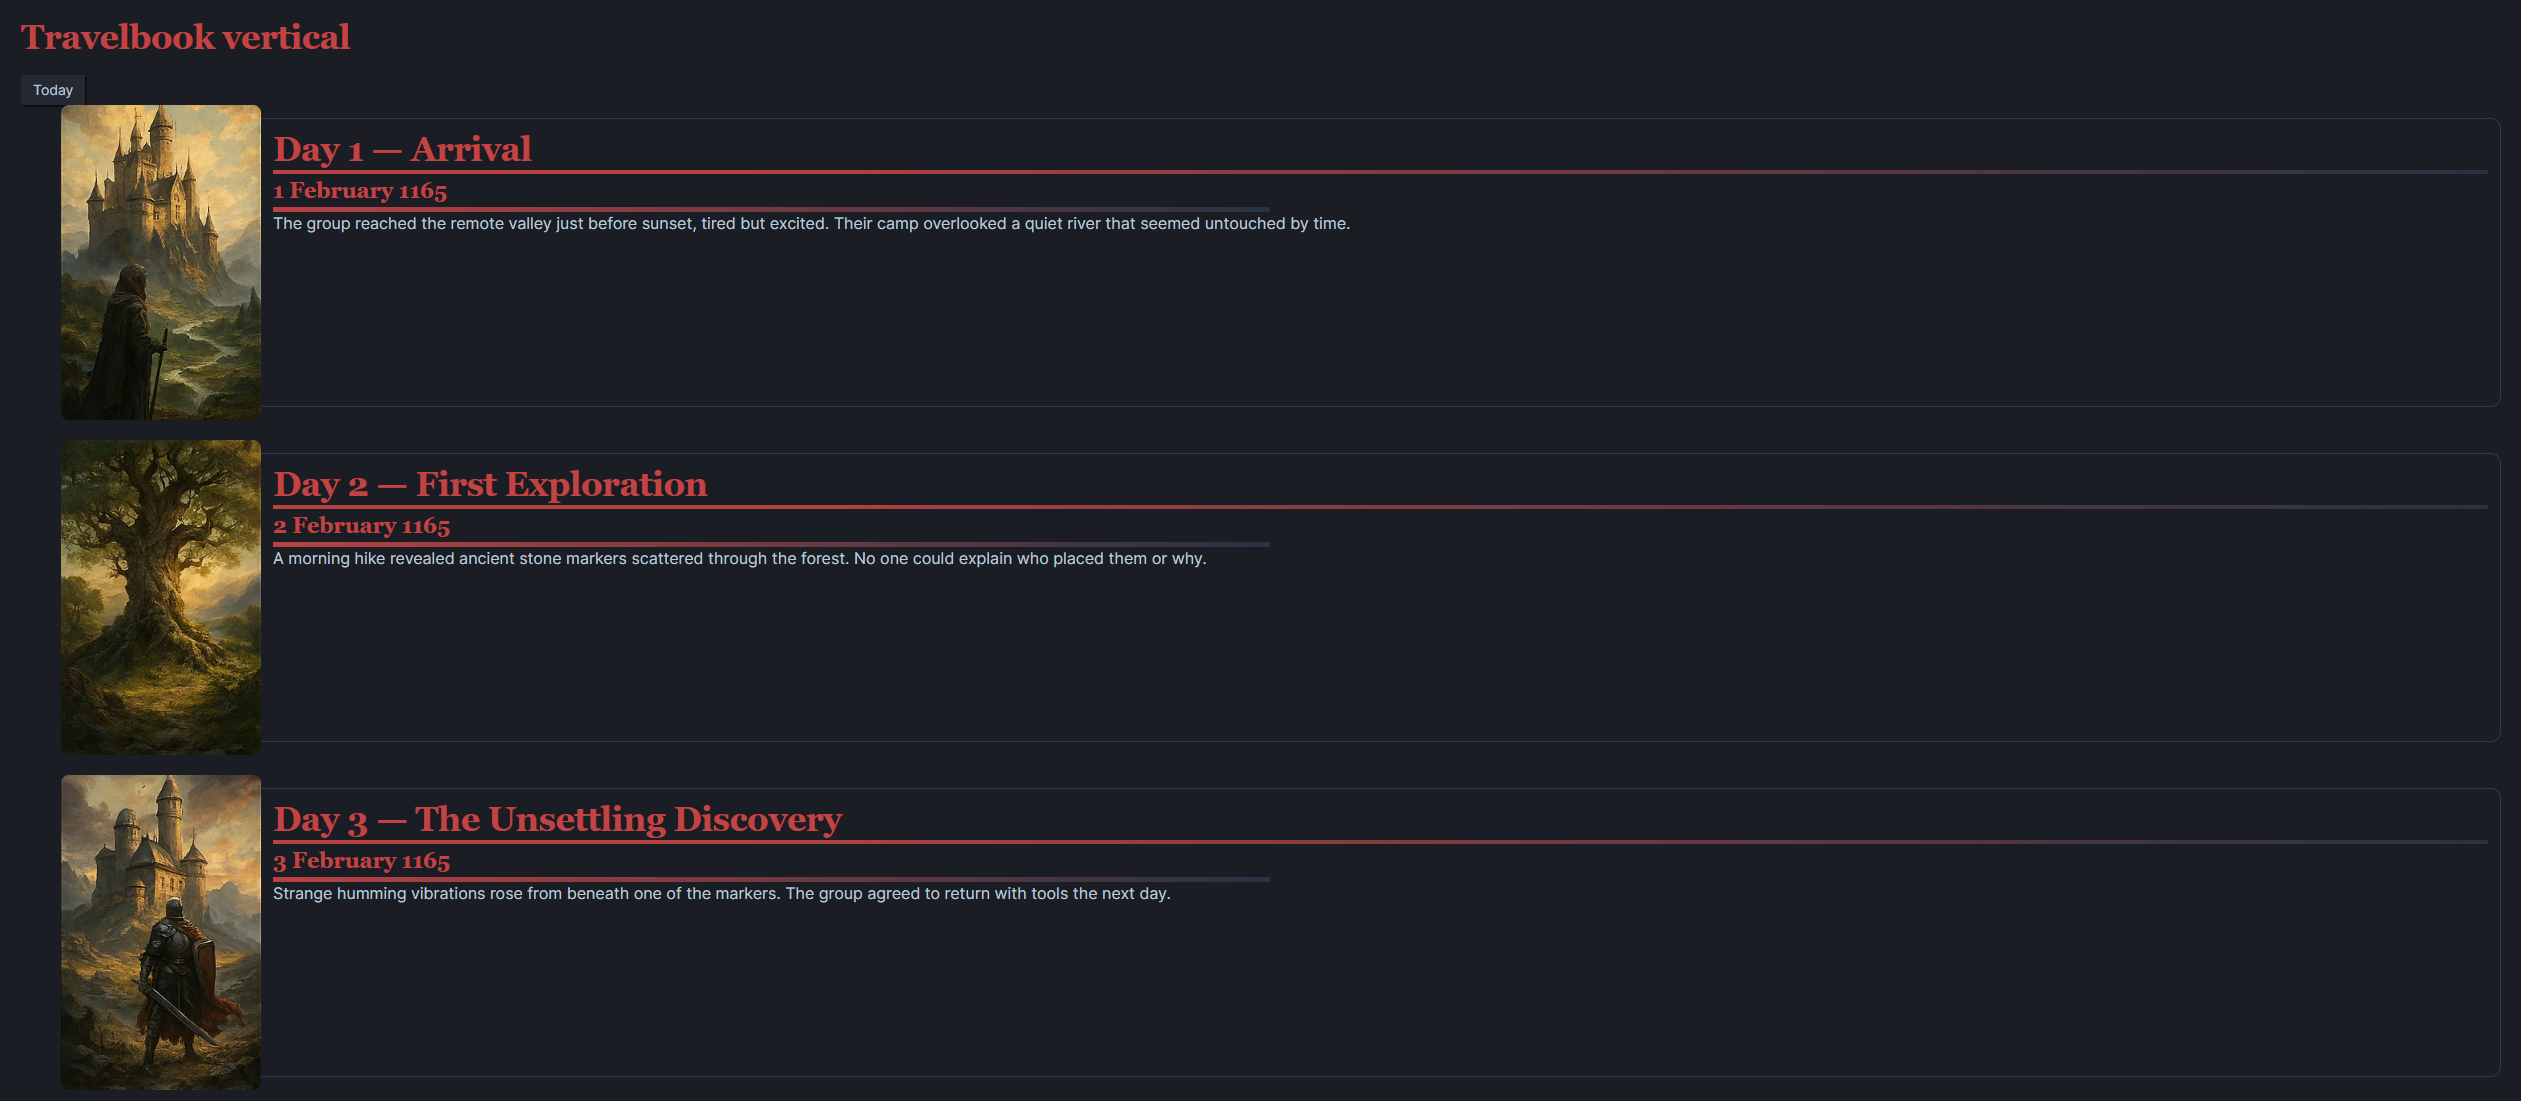
Vertical View
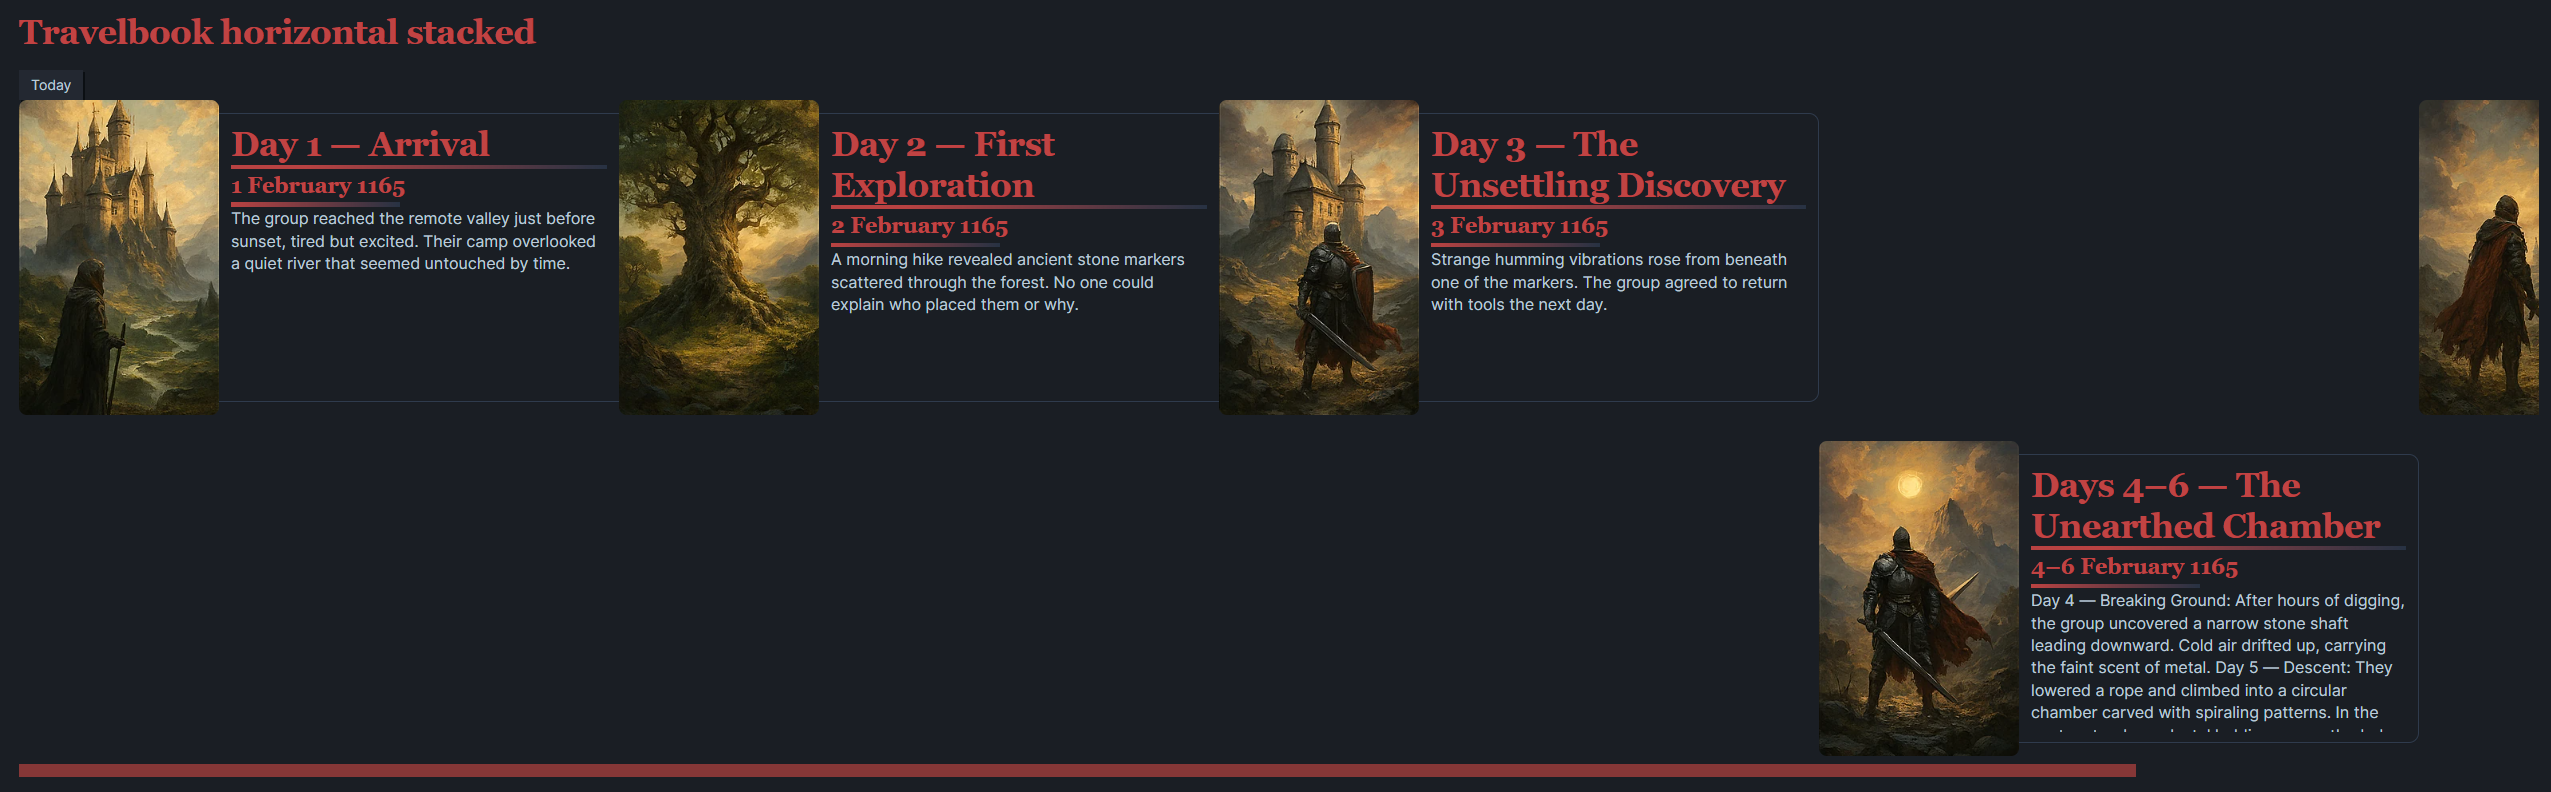
Horizontal View
Install / Enable
- Install the plugin (manual or via BRAT / community store if available).
- Currently available via BRAT.
- Install the BRAT plugin from the community store.
- Click the little smiley face icon that is now in the left hand icon pane.
- Select: Add a beta plugin for testing (with or without a version).
- Copy the Github URL for the plugin into the Repository Address (
https://github.com/Jareika/Simple-Timeline) - Select
Latest Versionand clickAdd Plugin.
- Enable it in Settings → Community plugins.
- Enable Page Preview (recommended) to use hover popovers.
Plugin Settings
Settings > Community Plugins > TTRPG Tools: Timeline > Options
- Bases Integration - Enable this is you wish to use the Timeline views within Obsidian Bases.
- Global Defaults - Various settings that control the plugin.
- Image Width - number of pixels wide that each image will be.
- Image Height - number of pixels high that each image will be.
- Box Height - set's the height of the text box within each timeline entry.
- Inner Left Padding - set's the left padding.
- Inner Right Padding - set's the right padding.
- Max. Summary Lines - define the maximum number of summary lines displayed.
- There is also a selection of colors that can be changed here.
- Timeline Configurations - see Create a Timeline below.
Create A Timeline
This step is optional however it gives you more control and customisation over your timeline.
- If you choose not to do this, you can simply use the same
timelinesname in your events and the Timeline view and it will still work.
Settings > Community Plugins > TTRPG Tools: Timeline > Options > Timeline Configurations > New Timeline
-
Name - Define the name of your timeline here.
-
Other Settings - You can customise the settings of each unique
timelinesthat is defined here. -
Month names (optional) - Define the names of your months here. Separate them with commas.
Example months:
Hammer,Alturiak,Ches,Tarsakh,Mirtul,KythornFlamerule,Eleasis,Eleint,Marpenoth,Uktar,Nightal
Creating Timeline Events
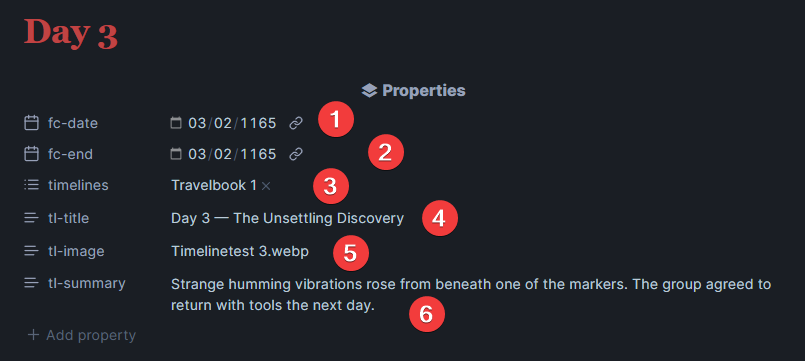
A note becomes a timeline event when the following Properties exist.
- timelines: set the timeline name here. Use the same name for each event and view to display it within that timeline.
- fc-date: this is the start date of the event.
- fc-end: this is the end date of the event.
- tl-title: this is the title of the event.
- tl-image: define an image to be displayed in the format <my-image.png> or <assets/my-image.png>
- tl-summary: this is a brief summary of the event.
Copy this template into a note.
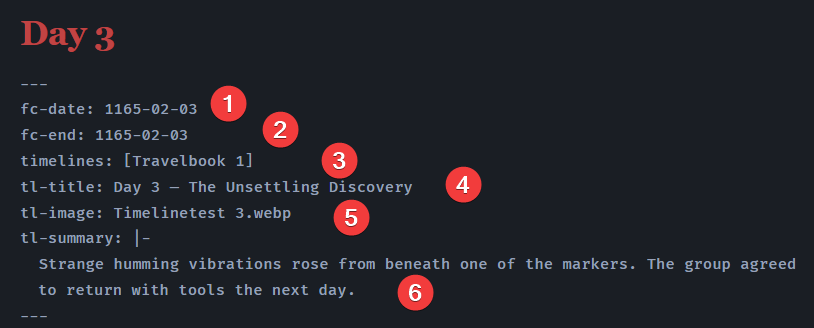
---
fc-date: yyyy-mm-dd
fc-end: yyyy-mm-dd
timelines: [timeline_name]
tl-title: Enter title here
tl-image: image-name.webp
tl-summary: |-
  Enter description here
---
Live Preview Mode
Take note of the icons on the left of each property. This reflects the type of property that is being used.
Source Mode
Reading Mode
When adding an image; there is an image selection priority. The plugin tries to find an image in the following order:
- Priority 1 - tl-image (frontmatter)
- Priority 2 - first internal embed image.
- Priority 3 - first markdown image link.
- Priority 4 - first image file in the note folder
This means you can choose which way you define the image, just note that having more than 1x method in your note, the above priority is used to determine which image is displayed.
Display The Timeline In A Note
There are two ways you can add a timeline to a note.
- Code Blocks
- Bases - utilises the core Bases functionality within Obsidian.
Markdown Code Blocks
A) Vertical “Cross” layout (default renderer)
```timeline-cal
names: Travelbook 1, Travelbook 2
jumpToToday: true
```
Shows one entry per row (image + callout box).
B) Horizontal timeline
```timeline-h
names: Travelbook 1, Travelbook 2
mode: stacked      # stacked | mixed
jumpToToday: false
```
Modes:
- mixed: all entries from all timelines in one horizontal row (chronological)
- stacked: one horizontal row per timeline; aligned by the union of existing dates (gaps appear only when a timeline has no entry for a date that another timeline has)
Bases Integration
Enable it in plugin settings:
Settings > Community Plugins > TTRPG Tools: Timeline > Options > Bases Integration > ENABLE
[!important] Important: After enabling, restart Obsidian or reload the plugin (required for view registration).
Add a Base to your notes per https://help.obsidian.md/bases
Example template to add a Bases Timeline view to your note:
```base
views:
  - type: simple-timeline-horizontal # simple-timeline-cross
    name: Timeline (mixed)
    timelineConfig: ""
    startProperty: note.fc-date
    endProperty: note.fc-end
    titleProperty: note.tl-title
    summaryProperty: note.tl-summary
    imageProperty: note.tl-image
    orderMode: start-asc
	mode: stacked | mixed #only for horizontal timeline
```
You can now configure the Bases view using the UI.
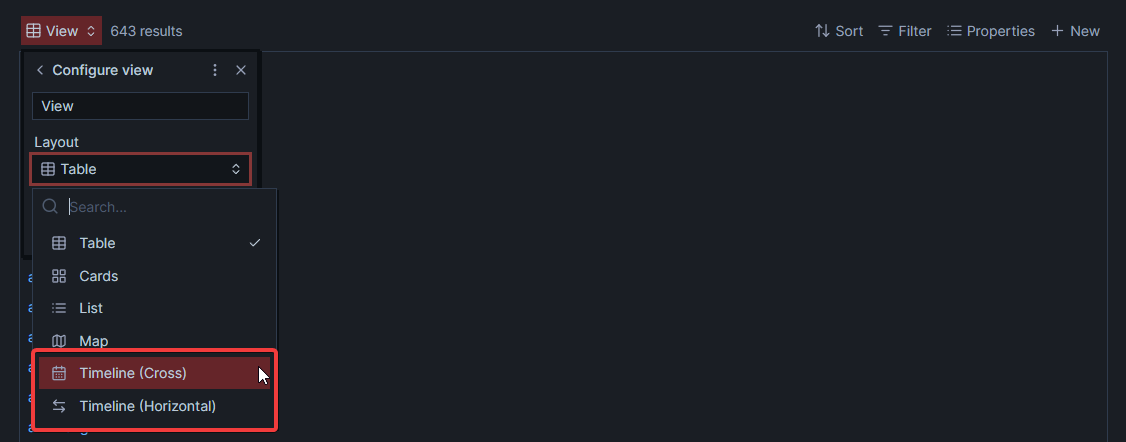
- Timeline (Cross) - A vertical view.
- Timeline (Horizontal) - A horizontal view.
- Timeline (Grid) - In-Development
Majority of the settings will be pre-configured and do not need to be changed.
- Set the timeline name if you have defined it in the plugin settings to allow the custom months to work.
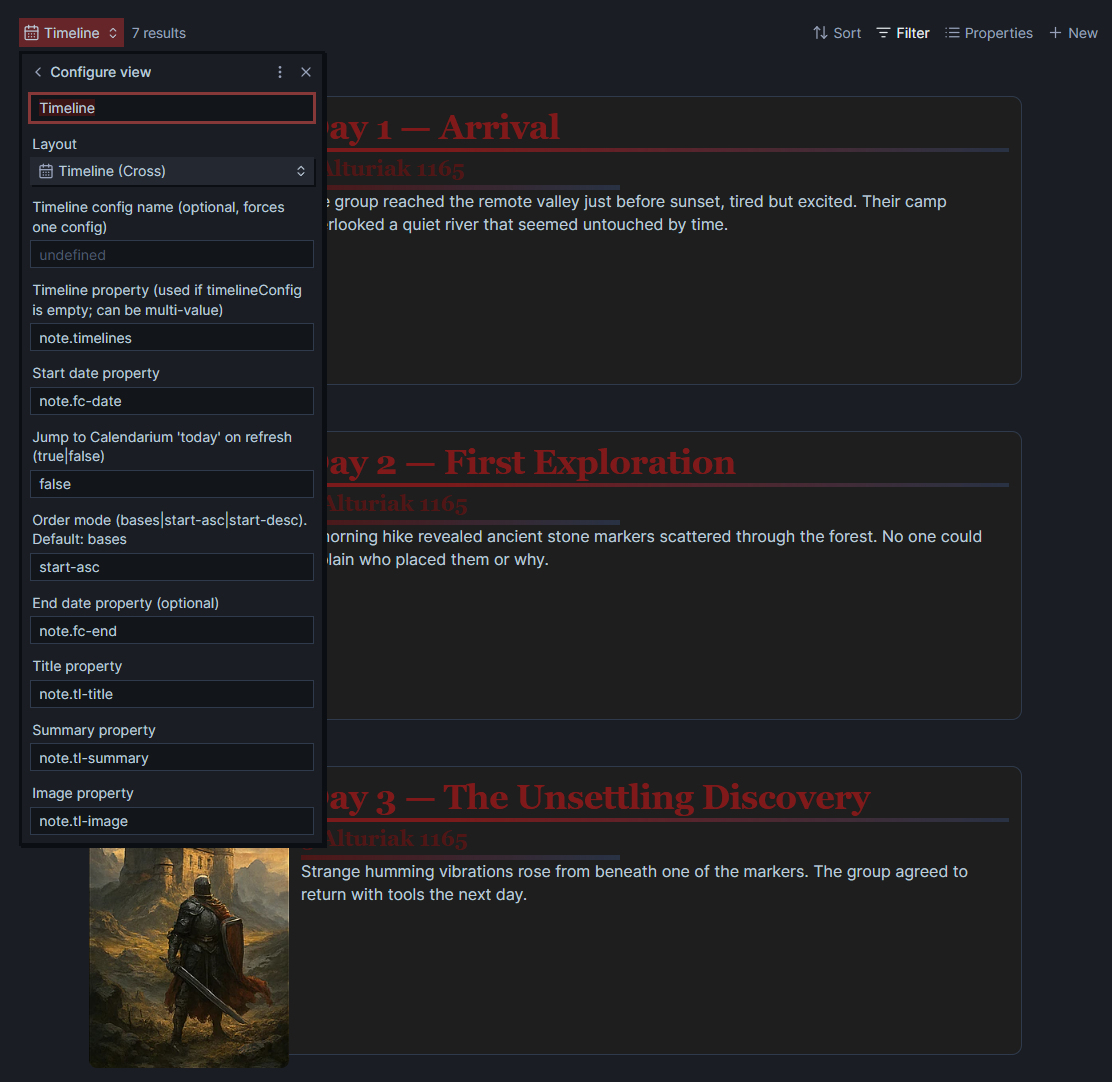
[!NOTE]- Bases - Timeline (Cross) Config Options
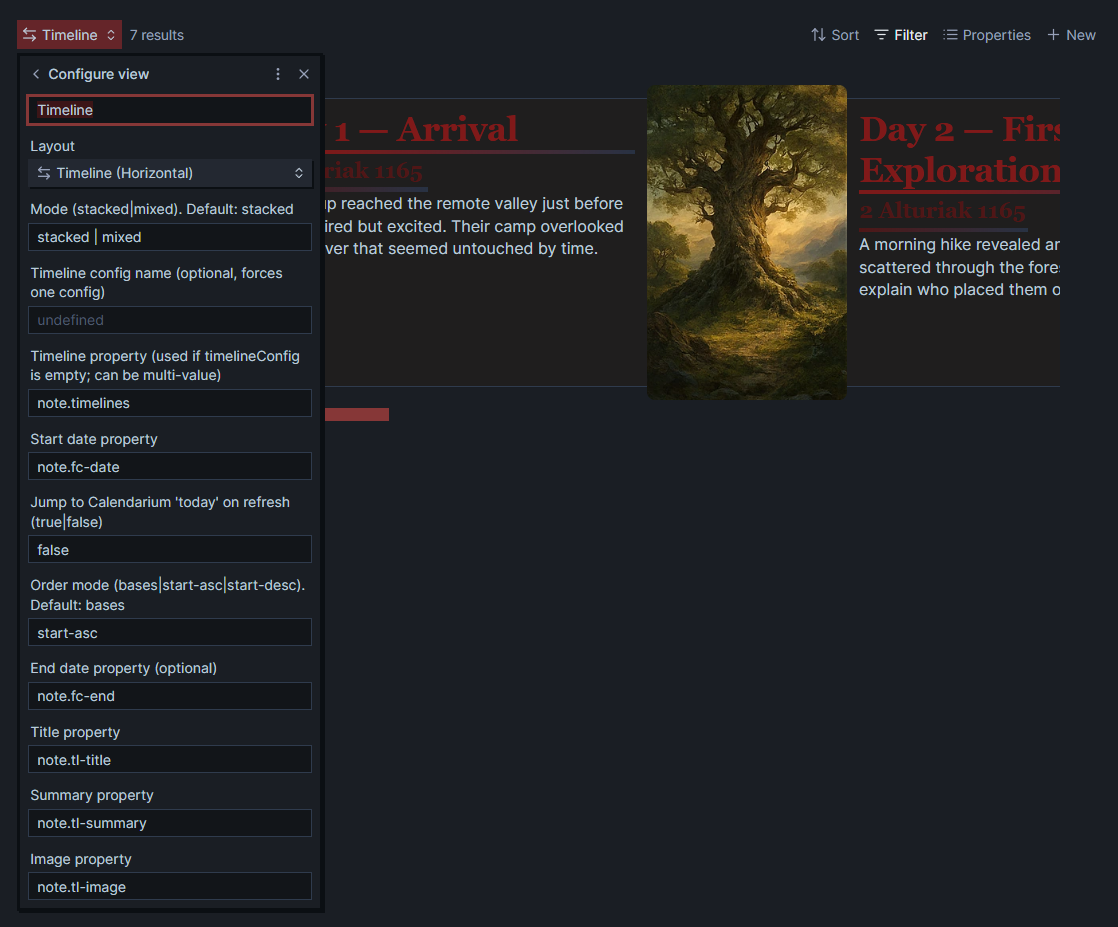
[!NOTE]- Bases - Timeline (Horizontal) Config Options
Calendarium “Today” (optional)
If the Calendarium plugin is installed, the Timeline UI can jump to “today”:
In Markdown blocks: jumpToToday: true In Bases views: option jumpToToday: "true" If Calendarium is not installed, the button will show a notice.
Plugin Support
This plugin is created by Jareika. Development and discussion happens in the Obsidian TTRPG Community Discord. You can join us using the link from the top of https://obsidianttrpgtutorials.com/
Once you have joined the Discord, jump into the TTRPG Tools: Timeline thread to request support or offer feedback.
For plugin developers
Search results and similarity scores are powered by semantic analysis of your plugin's README. If your plugin isn't appearing for searches you'd expect, try updating your README to clearly describe your plugin's purpose, features, and use cases.